

Some ideas come about almost by accident.
One morning, while I was folding laundry (yes, that moment when all the socks end up in one big jumble), a really simple thought crossed my mind: they all look the same. I'm a huge fan of plain white socks. But... they're all the same shape. Same color. Same boredom. And yet, we wear them every single day.
That's when the idea hit me. Not to make something complicated. Not a big project. Just... to transform a basic item. A pair of socks. A little word. A name. A detail. Something that changes everything. The kind of personalization that makes you smile when you pull them on. Or that really makes an impression when you give them as a gift. And above all, something that's simple to make, even if you're a beginner.
Because believe it or not, personalizing your socks doesn't take complicated equipment or advanced skills.
With some heat transfer vinyl and a few steps done right (which I'll walk you through here, of course), you can get a clean, durable, and genuinely high-quality result.
In this article, I'll show you how to personalize your socks easily, step by step, without overcomplicating things, and with a result that doesn't look "rushed and homemade."
Alright, let's gooooo!
1. Why Personalize Your Socks?
It's not something we ever really think about. We buy socks in multipacks, usually without a second thought. They're practical, low-key... and above all, completely interchangeable.
Until one of them goes missing, everything gets mixed up in the drawer, or you end up with several identical pairs and no idea whose they are. In short, nothing new there.
And yet, that ordinary quality is exactly what makes them an I-DE-AL item to personalize!
Personalizing your socks isn't just about adding a design. It's about turning an everyday item into something recognizable, personal, and even meaningful. A name, a date, a special word... and the sock becomes one of a kind. It's simple, but it changes everything (and it prevents those early-morning fights between kids accusing each other of stealing their socks. And yes, I'm speaking from experience here!).
It's also a gift idea that's both affordable and original. Unlike gifts people have seen a hundred times, personalized socks are useful, easy to tailor to the person, and quick to make. They're great for a new baby, a birthday, a couple's gift, or just to make someone happy with a personal touch.
If you create or sell personalized products, socks are also a great item to take advantage of. The base cost is low, they're quick to make, and the perceived value is good. It's exactly the kind of product you can test easily without complicating your product line.
Finally, what makes this kind of personalization so accessible is heat transfer vinyl. You don't need to be an expert or have a fully equipped workshop. With the right supplies (and the heat transfer vinyl from Transfer Paper is certified good quality!) and a few steps done right, you can absolutely get a clean, durable result, even on your very first projects.
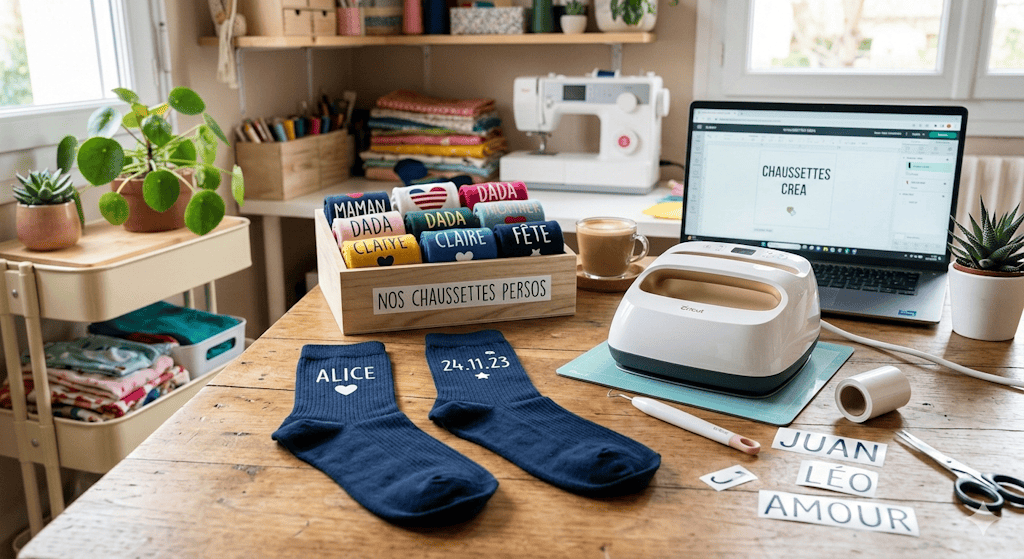
2. The Supplies You Need to Personalize Your Socks
Before you get started, there's one simple thing to understand: the quality of your results depends as much on your technique as on the supplies you use. The good news is that you don't need complicated equipment. That said, you do need to make the right choices from the start to avoid the classic mistakes.
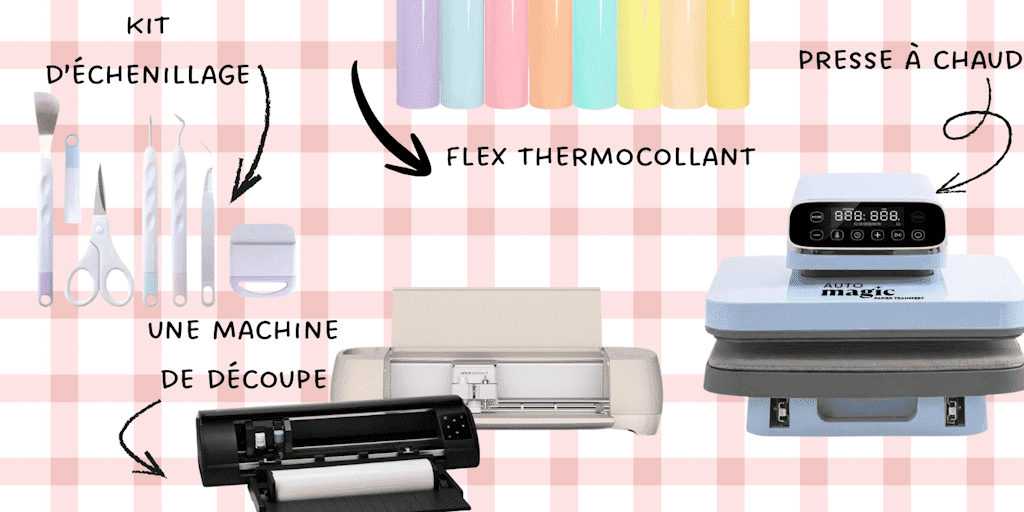
It all starts with the socks. Not all socks are created equal. For a clean result, go for a mostly cotton fabric with a fairly smooth surface and a decent thickness. On the other hand, fabrics that are too stretchy, too ribbed, or too synthetic make application harder and less durable. This detail may seem basic, but it has a direct impact on how well the heat transfer vinyl holds up.
Which brings us to heat transfer vinyl, the key element. It's what brings your design to life. It's very easy to cut, then bonds to the fabric with heat for a clean, crisp result. But be careful: not all HTV is created equal. A low-quality product may not stick well, can peel off quickly, or may crack after a few washes. And then all the time you put into the project goes down the drain... So it's better to invest in reliable heat transfer vinyl from the start to avoid this kind of problem.
When it comes to cutting, you have two options. You can use a cutting machine like a Cricut Maker 4 or a Silhouette Cameo 5, which lets you work quickly and precisely, especially if you plan to make things regularly (or sell your products). Otherwise, cutting by hand is still an option for simple designs. The choice mainly depends on how you'll use it and how demanding you are about the results.
Next comes heat application. To apply the vinyl, you'll need a heat press or, if you don't have one, a regular iron. A heat press gives more even results, but an iron is enough to get started if you're careful. Either way, three things are essential when heating heat transfer vinyl: temperature, pressure, and press time. The wrong setting can ruin the result, even with good equipment and the best intentions in the world.
Finally, there's one detail people often forget, but it's essential: something to put inside the sock. It may seem silly or unnecessary, but... slipping in a piece of cardboard gives you a nice flat surface, keeps the heat transfer vinyl from sticking to the back (and fusing both sides of the sock together in the process), and improves overall adhesion.
With these supplies, you have a solid foundation to work with. The next part gets even more hands-on: we're moving on to the steps for personalizing your socks easily, without making mistakes! And for that, there's nothing better than a TUTORIAL by Alyah, haha!
3. Easy Steps to Personalize Your Socks
Once your supplies are ready, it all comes down to execution. The process is simple, but to get a clean, durable result, every step counts. So hold on tight, and let's take notes on every step!
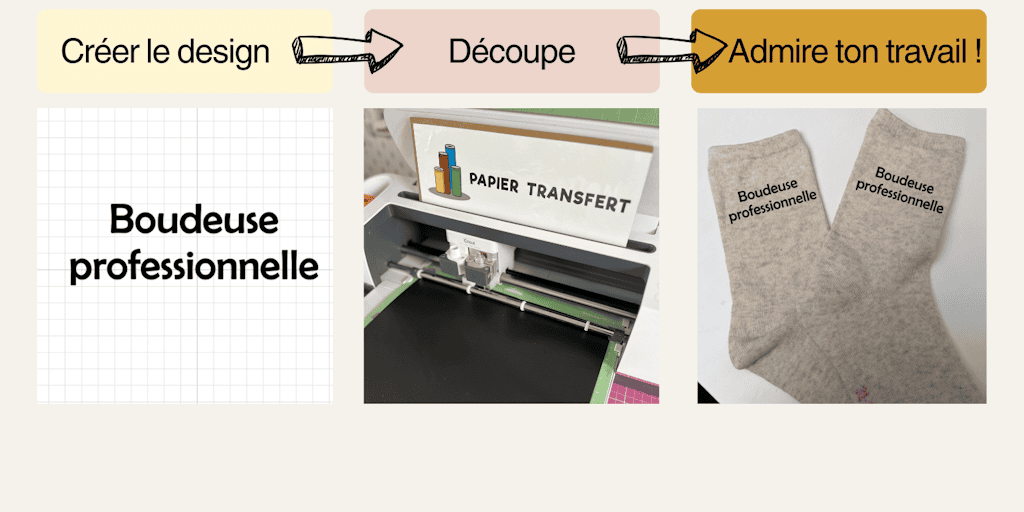
It all starts with the design. Whether you choose a name, initials, or a short word, the key is to keep it readable. A sock has a small, slightly stretchy surface, so a design that's too thin or too detailed may not show up well.
Next, it's time to cut the heat transfer vinyl. Place it correctly (shiny side down, against the backing) and cut your design in mirror mode. Watch out: it's super important to turn on mirror mode, or your design will come out backward when you press it! If you're cutting by hand, stick to something simple to keep the result clean. It's a quick step, but an important one: a sloppy cut will definitely show in the end.
Then comes weeding, which means removing the excess vinyl so only your design is left. Take your time here. Above all, you'll need some really handy tools, like the weeding kit. That's often what makes the difference between a clean result and a messy one. Every detail counts!
Once your design is ready, prep the sock. Slip something inside to create a nice flat surface (personally, I use a piece cut from a cardboard box), smooth out the fabric, and position your design where you want it. Take a quick look at the alignment, because a crooked design is noticeable right away. To avoid that, you can use an alignment ruler (it's seriously handy!).
Now you can move on to heat application. Whether you're using a heat press or an iron, follow the recommended settings carefully: temperature, pressure, and press time. If you're using an iron, don't move it around, and apply steady pressure. The goal is for the vinyl to bond properly to the fabric. But whatever you do, don't use steam! NEVER! Otherwise, you'll just have to start all over again (and if we can avoid that, even better).
Once you're done, let it cool for a few seconds, then carefully peel off the carrier sheet. Make sure everything is firmly attached and no part is lifting. If needed, give it another quick burst of heat (with a Teflon sheet between your design and the heat source, or the vinyl will stick straight to your heat press).
Finally, to make sure it lasts, let the sock rest for at least 24 hours before washing it. After that, stick to a gentle wash cycle and skip the dryer. These are simple details, but they make all the difference in the long run.
With these steps, you can personalize your socks easily, even if you're a beginner. Next, we'll look at how to take it further with some really great personalization ideas, whether you want to give them as gifts or sell them.
4. Personalization Ideas That Add Real Value
Once you've mastered the technique, the real question is no longer "how do I do it?" but "what should I make?" Because in the end, it's not the sock that makes the difference; it's the message you're sending. That's what turns a simple personalization into something memorable... or something that sells.
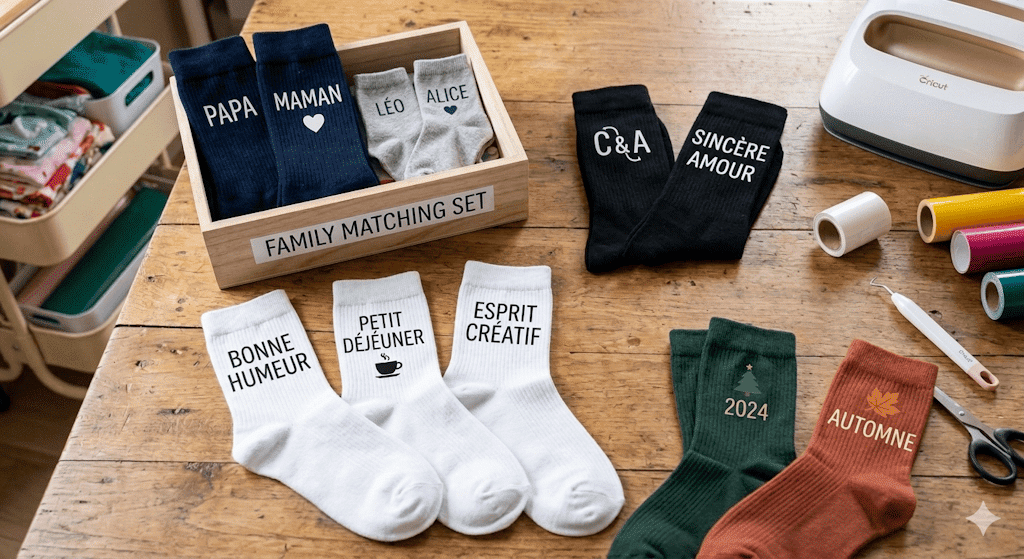
Names and initials are still a solid starting point. They're simple, but they always work. They make it easy to tell pairs apart, avoid mix-ups, and above all create something personal without going overboard. They're especially great for kids, baby gifts, or even matching sets for the whole family.
You can also play with short messages. Sometimes, a few well-chosen words are more than enough. A word that captures a mood, a short phrase, or a playful nod can give your creation some personality. The goal isn't to overdo it, but to hit the mark with something readable and eye-catching.
Another fun idea is to create coordinated sets. Offering socks in sets of two or as a series lets you go beyond a single item. Whether it's for a couple, a parent and child, or siblings, you create a cohesive look, almost like a little story. And if you sell your creations, it's also a great way to offer bundles instead of a single product.
You can also build themed collections. Adapting your designs to specific times of year, events, or seasons lets you keep your product line fresh while staying consistent. It's a simple way to keep your creations moving with the calendar and always offer something timely.
Finally, the most important point is often the most overlooked: think about how the socks will be used before you think about the design. Before you even start creating, ask yourself what this pair of socks is for. Is it a gift? An everyday product? A symbolic item? The more closely your personalization matches its purpose, the more relevant and impactful it will be.
Personalizing your socks isn't about throwing ideas together at random. It's about making simple, consistent choices with a clear purpose in mind. Next, we'll go over the mistakes to avoid so you get a clean, durable result.
5. Mistakes to Avoid for a Clean, Long-Lasting Result
Personalizing your socks is easy to get into, but certain mistakes can quickly ruin the result.
And it's often the same ones that keep coming up, especially when you're just starting out.
Knowing about them is the first step to avoiding them.
Choosing the Wrong Fabric
Not all socks react the same way to heat and heat transfer vinyl.
Fabric that's too stretchy, too thick, or mostly synthetic can keep the vinyl from sticking properly, distort the design once the socks are worn, and inevitably shorten how long it lasts...
Choosing the right material from the start helps you avoid this kind of problem (and pulling your hair out in the process, haha).
Ignoring Temperature and Pressure Settings
Applying heat transfer vinyl isn't just about heat.
You need to get three things right:
-
the temperature
-
the press time
-
the pressure
If the temperature is too low, the heat transfer vinyl won't stick properly.
On the other hand, if it's too high, it can damage the fabric (and scorch the heat transfer vinyl...).
Likewise, not enough pressure will give you a fragile result that could peel off quickly. And you can say "bye-bye" to your personalization after the very first wash.
Forgetting to Put Something Inside the Sock
It's a simple detail, but an essential one.
Without something inside:
-
the surface isn't flat
-
the pressure isn't evenly distributed
-
the vinyl can leave a mark or stick to the back
Slipping a piece of cardboard inside makes a real difference in the final result.
Choosing a Design That's Too Complex
A sock doesn't give you the same amount of space as a T-shirt or a tote bag.
A design that's too thin, too busy, or too detailed can:
-
make cutting harder
-
make weeding difficult
-
hurt readability
It's better to go for simple, clear designs that suit the item.
Rushing After Application
Once the vinyl is applied, it's important to let the fabric "rest."
Washing too soon can:
-
weaken the adhesion
-
shorten the life of the design
It's best to wait at least 24 hours before the first wash, then go for:
-
a low-temperature wash
-
socks turned inside out
-
no dryer
Using Low-Quality Vinyl
It's a common mistake, often made when trying to save money.
Low-quality vinyl can:
-
stick poorly
-
crack
-
stop holding up after just a few washes
On this kind of project, the quality of your materials plays a key role in the final result.
At Transfer Paper, our heat transfer vinyl is guaranteed quality. Try it once, and you'll love it!
Avoiding these mistakes already goes a long way toward a clean, durable, consistent result.
With solid technical basics, the right supplies, and well-thought-out design choices, personalizing socks becomes simple, effective, and accessible.
Personalizing socks might seem trivial at first glance.
And yet, it's exactly the kind of project that shows you can create something truly different with very little.
Starting with a simple everyday item, you can create something useful, personal, and visually striking.
The key isn't complexity, but execution:
a good fabric, quality vinyl, the right design... and above all, careful application.
It's also a great way in if you want to get started with custom apparel or test a new product without complicating your production.
Whether it's for gifting, creating, or selling, personalized socks have a clear advantage:
they're accessible, quick to make, and easy to adapt.
All that's left is to give it a try.
FAQ: Personalizing Your Socks
Does Heat Transfer Vinyl Hold Up Well on Socks?
Yes, as long as you follow the right steps.
With proper application (temperature, pressure, time), it holds up well, even after several washes.
Can You Use an Iron Instead of a Heat Press?
Yes, absolutely.
An iron is enough to get started, as long as you apply firm, steady pressure without moving it around.
That said, a heat press gives more even results and, above all, makes applying heat transfer vinyl much easier.
What Type of Socks Should You Choose?
It's best to use socks that are:
-
mostly cotton
-
fairly smooth on the surface
-
neither too thin nor too thick
These features help the heat transfer vinyl stick better and last longer.
Do You Need to Wait Before Washing Personalized Socks?
Yes. It's best to wait at least 24 hours after application before the first wash.
After that, to protect the design, wash them at a low temperature, turn the socks inside out, and skip the dryer.
Can You Personalize Socks Without a Cutting Machine?
Yes, you still can. For simple designs, cutting by hand works fine.
However, a cutting machine saves time and gives you better precision, especially for more detailed projects.
Is Heat Transfer Vinyl Good for Beginners?
Absolutely. In fact, it's one of the most beginner-friendly techniques.
With a little practice and by following the steps carefully, you can get a clean result from your very first projects.
If you're just starting out, keep it simple, test, adjust... and gradually improve your creations.
That's how you'll get cleaner and more professional-looking results over time.
And don't hesitate to show us what you make by sharing your creations and tagging us @papiertransfert!



Comments
No comments yet. Be the first to share your experience.
Leave a comment