
You've probably just bought a Silhouette cutting machine and want to cut out your first design or logo. Don't worry, you're in the right place 😉
Today, we're going to walk you through the basic settings in the Silhouette Studio software so you can cut your first project with your machine!✨
The Ingredients
For this tutorial, you'll need to:
- Download the Silhouette Studio software
- Have your Silhouette Cameo cutting machine on hand
- Download the logo you want to cut in PNG format
Step 1: Import Your Logo into Silhouette Studio
Once you've installed the Silhouette Studio software and connected your computer to your cutting machine, it's time to get down to business!
First, you need to bring the logo you want to cut into the software. There are two ways to do this:
Method 1
If your design or logo is made up of text only, you can recreate it directly in the software:
To add text, click the button with the letter "A" on the left side of the screen, choose the font you want at the top of the page, then click on the Silhouette grid. Now you can type any phrase you like 😊.
If your logo is more complex, you'll need to import it into the software as a PNG file:
Method 2
Click "File" at the top right of the screen, then click "Open". This lets you find the logo you designed on your computer.
After this step, the logo will be in the software, but you can't use it yet because it isn't vectorized!
What is vectorization? A PNG image is made of pixels, so if you try to cut a PNG image with your machine, the cut won't be smooth because it will follow the path of the image's pixels.
Once it's vectorized, the design no longer has any pixels, so the cut will be perfectly smooth.
Note that you don't need to vectorize text created with Method 1, because the software does it for you!
IMPORTANT⚠️: If your design's image resolution is too low, it can't be outlined correctly during vectorization. So always make sure your image has a good resolution.
To vectorize your logo, click the butterfly-shaped button on the right side of your screen.
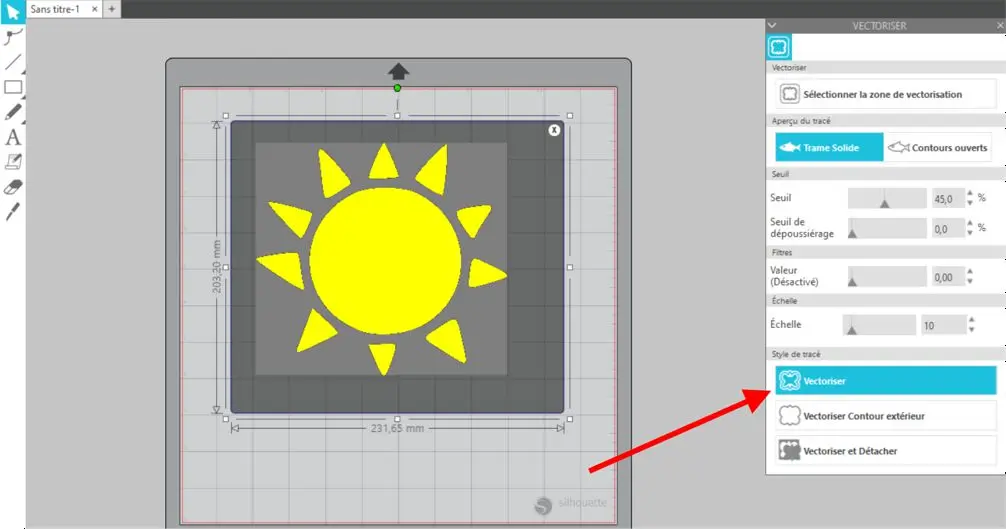
Hold down the left mouse button and drag to fit your entire logo inside the vectorization grid, then click the "Vectorize" button, and you're all set!
This process is very simple, but vectorization isn't always perfect, and Silhouette Studio can sometimes miss certain details in the design. For more advanced vectorization, check out this guide on vectorizing with Inkscape.
Step 2: Design Settings
Once your logo is vectorized, you can make various adjustments in the Silhouette Studio software. First, resize the logo and place it in the right spot on the page (usually at the top left, where the cut will be made).
If you're working with heat transfer vinyl, you must mirror your logo, because the machine cuts designs "backwards". They need to be flipped so they read the right way once they're applied.
To do this, right-click your logo, then click "horizontal mirror", and your logo will do a little flip!
You can now click the "SEND" button at the top right of the screen to move on to the next step ➡️
Silhouette Studio is a full-featured program with tons of different tools for designing your logo. We've covered the most important ones, but feel free to try them all!
Now let's get to the heart of the matter: the cut settings!
Step 3: Cut Settings
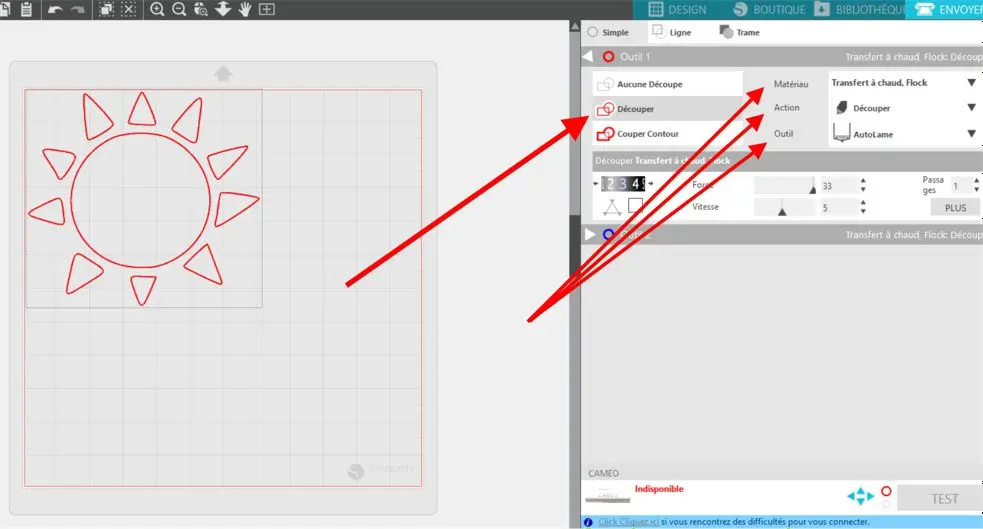
Material, Action, and Tool Buttons
- In the first white box, click "Cut".
- In the "Material" tab, choose "Heat Transfer, Flock"
- In the "Action" tab, click "Cut"
- In the "Tool" tab, click "AutoBlade" (the most common) if you have an automatic blade; otherwise, click "Silhouette Blade".
Blade Depth, Force, and Speed
Heat transfer vinyls on the market all have slightly different blade settings.
That's why, in this tutorial, we'll use the cut settings for standard heat transfer vinyl from Transfer Paper as an example.
The black dial is the blade depth. We always recommend keeping the blade depth at 1 (2 at most) when cutting vinyl, because a blade depth that's too high could damage your cutting mat and, even worse, your machine...
Force is the pressure applied to the material to cut it more effectively. Simply put, if you can't manage to cut through your vinyl, it's smarter to increase the blade force than the blade depth.
As mentioned above, the force setting varies depending on the type of vinyl. For the standard vinyl in our range, we recommend a force between 21 and 25.
If you're cutting vinyl from another brand (that's okay, nobody's perfect 🙄), we recommend starting with a force of 25. If the blade cuts through the vinyl's plastic carrier sheet, lower the force ⬇️, and if the blade doesn't cut deep enough, increase the force ⬆️.
As for cut speed, we recommend keeping the default speed (5).
Finally, if your settings are right, there's no need to make multiple cut passes over your logo, so we recommend keeping the number of passes at 1.
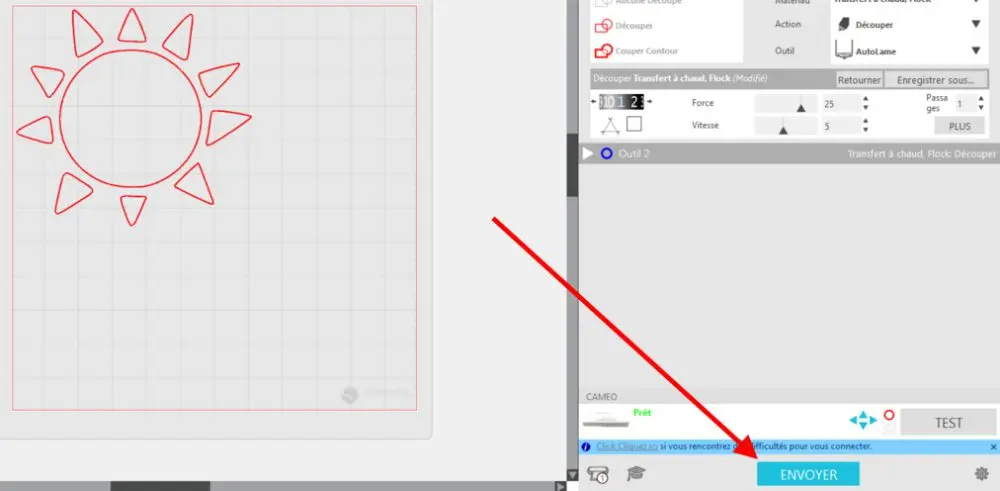
Your settings are finally done 🤩. You can now cut out your design by clicking "SEND"!
We hope this tutorial was helpful and that cutting designs with Silhouette Studio will soon be a piece of cake for you!
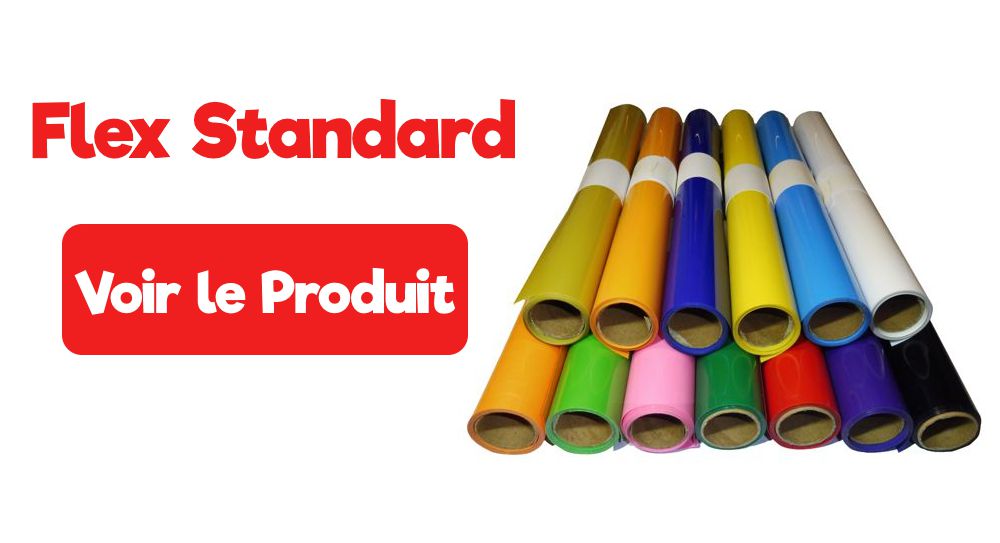
Want to try our Standard Vinyl? Don't wait any longer, click the link below!😉
I want the Standard Vinyl!
Product benefits:
✔️ Easy to weed and cut
✔️ Compatible with all Silhouette cutting machines
✔️ Quick application (15 seconds)
✔️ Best value for money



Comments
No comments yet. Be the first to share your experience.
Leave a comment