
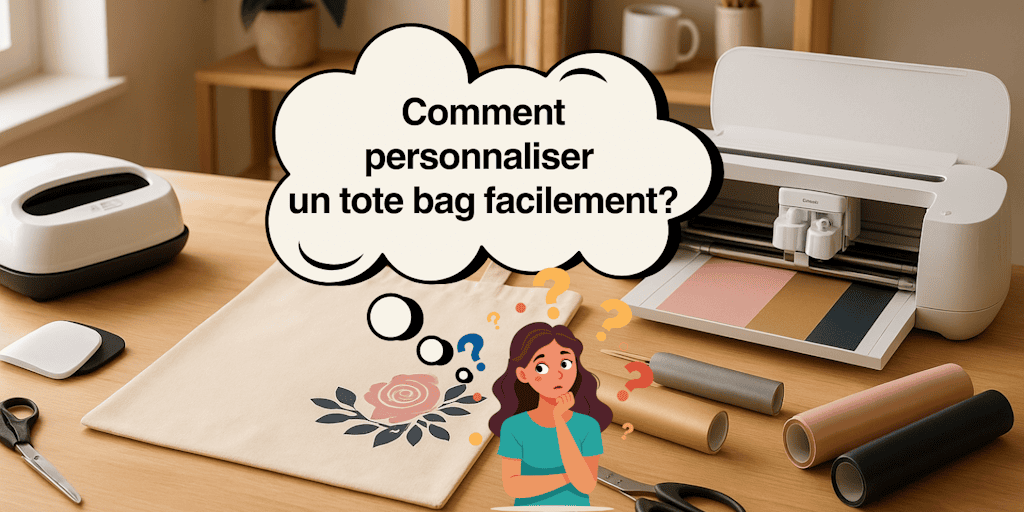
You know that moment when you're looking for a practical bag for your everyday stuff… and all you can find are those plain white tote bags with zero personality that everyone already owns?
That happened to me. And honestly, I wanted something that felt like me: a bag that's both practical and stylish. Not some boring tote bag you forget about at the back of the closet, but a one-of-a-kind accessory that tells a story.
That's how I started personalizing my tote bags. And trust me, the first time I went out with one, the looks and compliments came right away. People asked me: "Where did you get it?" And I couldn't help smiling a little proudly as I answered: "I made it myself."
And you could get exactly the same reaction (we're going to do this together, and I promise you'll want to make more afterward)!
So don't go just yet. Grab your best heat transfer vinyl, your Silhouette Cameo 5, and your heat press (or iron), and let's find out how to personalize a tote bag easily!
Step 1: Prepare Your Tote Bag
Before you even think about the design or the heat transfer vinyl you're going to use, there's one step we all tend to skip: prepping the bag. And trust me, it's THE detail that makes the difference between a tote bag that turns out great and one that ends up at the back of the closet because the design peeled off or warped after the first wash.
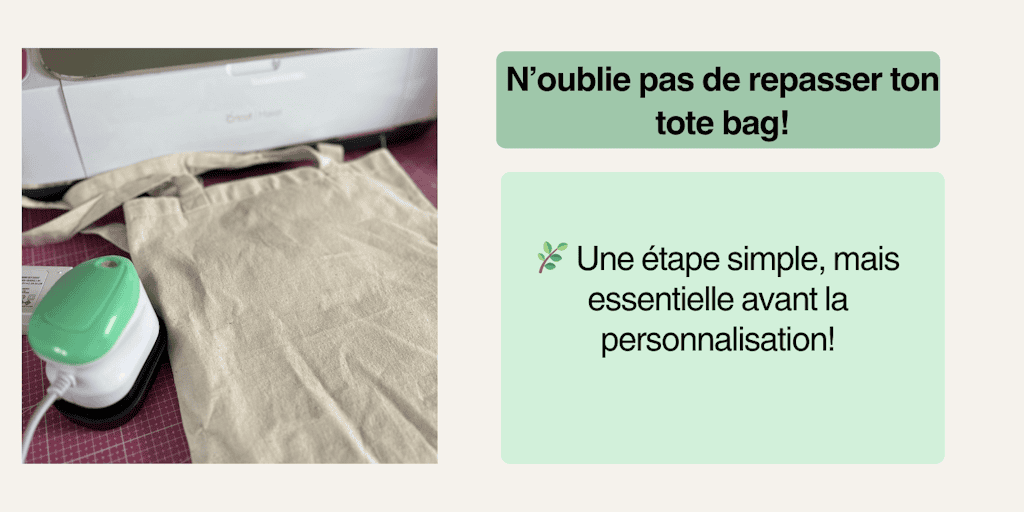
First, take your cotton tote bag. It often comes out of the package a little wrinkled, sometimes with small irregularities in the fabric. Iron it carefully. It may seem like a small thing, but it's essential: smooth fabric helps your design stick properly and prevents unsightly creases. Imagine putting a label on a crumpled surface… it'll never look neat. It's the same with your tote bag: the smoother the fabric, the more beautifully your design will stand out.
Next, let's talk about a magic tool you probably already have at home: the lint roller (yes, the same one you use to get cat hair off your clothes). Roll it over the entire surface of your bag before applying your design. Why? Because even if your tote bag looks clean, there may be dust, microfibers, or tiny bits of dirt you can't see with the naked eye. And once those little intruders get trapped under the heat transfer vinyl, they'll cause bubbles and uneven spots, and can even weaken the design's adhesion.
Tip: if your tote bag is brand new and stiff, feel free to give it a quick wash before ironing it. This will soften the cotton fibers and help the vinyl stick more easily.
As simple as it is, this prep step is the absolute foundation if you want your project to be neat, durable, and pretty. Without it, even the most beautiful design can end up ruined.
👉
As you've probably guessed, this is the first key to learning how to personalize a tote bag successfully.
✂️
Step 2: Choose and Cut Your Design
This is where your tote bag starts to come to life. It's the most creative step, the one where you give your bag its own identity. You're probably wondering: how do I personalize a tote bag so it really feels like me? It all starts with choosing your design.
🔹
Choose Your Design
Your tote bag is like a blank canvas. You can go for an inspiring phrase that motivates you every morning, a name if it's a gift, a minimalist design for a chic look, or a fun, colorful drawing to show off your personality. Anything goes. The more meaning your design has for you (or for the person you're giving it to), the more unique your tote bag will be.
Tip: if you can't decide, start with simple shapes (hearts, stars, initials, short quotes). They're quick to make and still look STUN-NING!
🔹
Cut Your Design from Vinyl
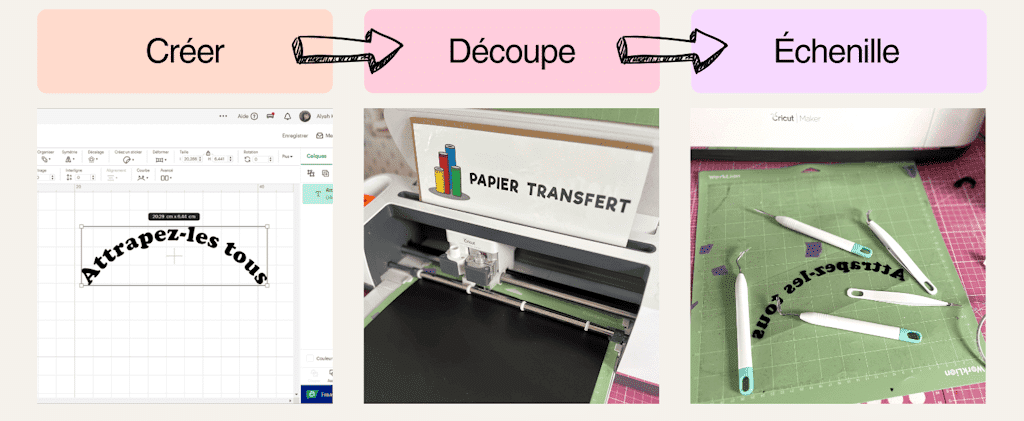
Once you've picked your design, it's time for the technical part. For this, you'll use heat transfer vinyl, which is applied to fabric with heat. Load it into your cutting machine (a Cricut or a Silhouette Cameo 5), and be sure to mirror your design (flip it before cutting). If you skip this step, your text or design will come out backward… and trust me, it happens more easily than you'd think.
🔹
Weeding: A Key Step
Once your design is cut, it's time for the tricky part: weeding. This means removing all the vinyl you don't need, like the little pieces between letters, the inside of an "O" or an "A", and any extra outlines. For this, grab a weeding kit or, if you don't have one, tweezers and a scrap collector. It's a detailed step that can take a while, but it's incredibly satisfying: you watch your design appear little by little, ready to shine on your tote bag.
Pro tip: work on a well-lit surface. Some people even use a light pad to see the areas to remove more easily. It makes all the difference!
When your design is finally ready, you can start picturing the final result. You hold it in your hands, lay it on your tote bag to see how it looks… and realize this bag will never be a boring tote bag again. You've just completed the second essential step of how to personalize a tote bag: turning an idea into a real, one-of-a-kind design that's ready to apply.
Step 3: Apply Your Design to the Tote Bag
This is the most exciting part: watching your design come to life right on your tote bag. Once your design is cut and weeded, you need to transfer it properly onto the fabric.
Position Your Design
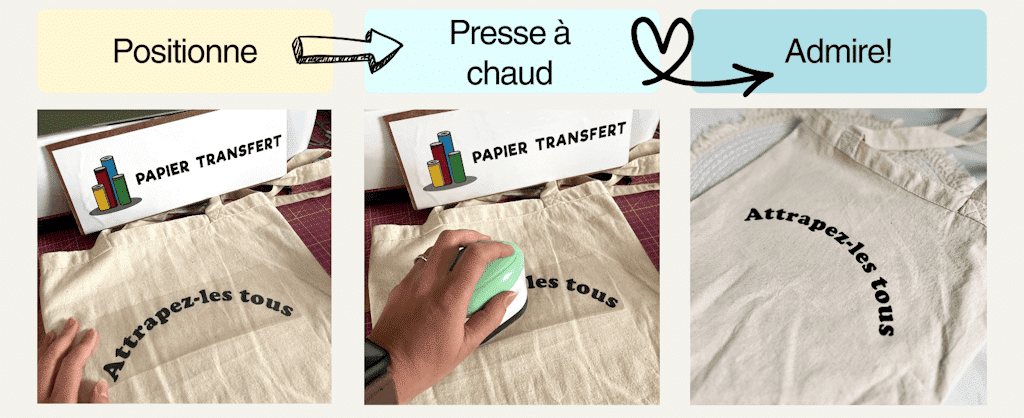
Place your design exactly where you want it to appear. Take your time: a personalized tote bag is one of a kind, so you might as well make sure your design is nicely centered and straight. You can even measure with a ruler or use masking tape to mark the area.
Apply the Design with Heat
Adjust the temperature and pressing time to the type of heat transfer vinyl you're using. Ideally, use a heat press rather than an iron.
-
-
With an iron: use the cotton setting (no steam) and apply firm pressure for 15 to 30 seconds on each area of the design.
-
With a heat press: set the temperature (usually between 150 and 170°C for heat transfer vinyl) and press for 15 seconds.
-
Let It Cool and Peel Off the Carrier Sheet
Wait a few seconds (depending on your heat transfer vinyl's instructions: hot peel or cold peel) before removing the carrier sheet. This is the magic moment: your tote bag is now decorated with your very own design!
👉
This step is crucial, because poor pressing or the wrong heat can ruin all your previous work. But once you get the hang of it, personalizing a tote bag is almost child's play.
✨
Step 4: Mistakes to Avoid When Making a Personalized Tote Bag
Even though personalizing a tote bag seems simple, a few small mistakes can quickly ruin the final result. Don't panic: avoiding them just takes a little attention and preparation. Here are the most common mistakes to steer clear of!
1️⃣
Skipping the Prep Work
First things first: your tote bag needs to be clean, dry, and ironed. Creases, dust, or even pet hair (especially if you have a cat
🐱
) can keep your design from sticking properly.
👉
Tip: go over the entire surface with a lint roller (like the one you use to remove hair from clothes) before applying your heat transfer vinyl. You'll see, it works like magic.
2️⃣
Not Centering the Design
It's the most common mistake… and definitely the most frustrating (I've rushed and ended up putting my vinyl on crooked before, and that's anything but fun)! A design that's a little too far to the left or a little too high, and your bag loses all its visual balance.
👉
To avoid this, fold your tote bag in half to mark the center, and do the same with your design. Line up the two creases, and you're all set! You can also use masking tape to hold everything in place before pressing, or even a centering ruler.
3️⃣
Getting the Temperature or Time Wrong
Each type of heat transfer vinyl has its own requirements: some are applied at 150°C for 15 seconds, others at 160°C for 20 seconds. If the temperature is too low, your design won't stick; too high, and it'll warp or peel off in the wash (or worse, it could even melt!).
👉
Always read your heat transfer vinyl's instructions before you start, and do a test on a small scrap of fabric if you're not sure the first time you use it.
4️⃣
Moving the Heat Press or Iron
It's a natural reflex… but one to avoid here! When you're pressing a vinyl design, you should not glide back and forth like you would on a shirt. Press down firmly, without moving, for the recommended time. Otherwise, your design could slip, wrinkle, or not stick properly!
5️⃣
Removing the Carrier Sheet at the Wrong Time
Some heat transfer vinyls are peeled hot, others cold. If you peel too early (or too late), the design can lift, come off, or even warp.
👉
Once again, the instructions are your best friend: they tell you whether to wait a few seconds or remove the sheet right after pressing. At Transfer Paper, all the instructions are listed on every heat transfer vinyl page (which, between us, makes life a lot easier).
6️⃣
Touching the Design Right Away
Let your tote bag cool completely before handling it. Until the adhesive has set, the design is still FRAGILE. A single fold at the wrong moment can be enough to partly peel it off.
7️⃣
Forgetting About Care
Even once your tote bag is finished, a few mistakes can damage it over time. Avoid washing it too hot, putting it in the dryer, and ironing directly on the design.
👉
Wash it inside out at 30°C max and let it air-dry. Your design will stay vibrant much longer.
💡
In short: personalizing a tote bag successfully mostly comes down to preparation, precision, and patience. Follow these tips, and your tote bag will have a professional finish, with no stress, no bubbles, and above all… a one-of-a-kind look!
A Little Inspiration for You
You've got your tote bag ready, you know how to personalize it… but you still can't decide on a design? Don't panic, I'm going to inspire you with ideas I've tried myself that are a hit every time.
🌸
Floral designs
Flowers are a timeless classic. You can choose small, delicate flowers in pastel shades for a romantic touch, or bright tropical flowers for a fun, vibrant look. A floral tote bag is the perfect companion for a stroll around town, a trip to the market, or even the beach. And trust me, people will definitely ask where you bought it.
💬
Short, inspiring quotes
A single word or phrase can change the energy of your whole day. "Positive vibes only", "Believe in yourself", or even a joke that makes you smile. Imagine grabbing your tote bag every morning and seeing a motivating message: it's like a little dose of good vibes you carry with you everywhere. And if you give it as a gift, it means even more: you're giving someone a message chosen especially for them.
🐾
Super cute animals
Cat, panda, llama, fox… or why not your favorite animal? Animals have a way of catching people's eye and making them smile. I remember a tote bag I personalized with a minimalist cat: I lost count of how many times people stopped me on the street to tell me how adorable it was. If you want a tote bag that wins people over, it's the perfect choice.
✨
Minimalist design
Sometimes, less is more. A name, an elegant initial, or even a simple symbol is all it takes to add style. The tote bag becomes an understated but chic accessory that goes with everything. It's the kind of gift that always works, because it feels personal without being too busy.
🎁
Personalized tote bags as gifts
This is probably my favorite way to use them. For a birthday, a bachelorette party, Mother's Day, or even as an end-of-year gift for a teacher, each tote bag becomes a treasured keepsake. The person you give it to doesn't just see a bag; they see the thought behind it. And every time, there's that special smile, the one that says: "You really thought of me." And trust me, that's priceless.
Psst: if you're still unsure, take a look around Pinterest. You'll find plenty of ideas to get you started!
And if you'd like to give a personalized tote bag without making it yourself, you can also check out the artisan creations from Mlle K. Boutique, handmade in France with lots of care.
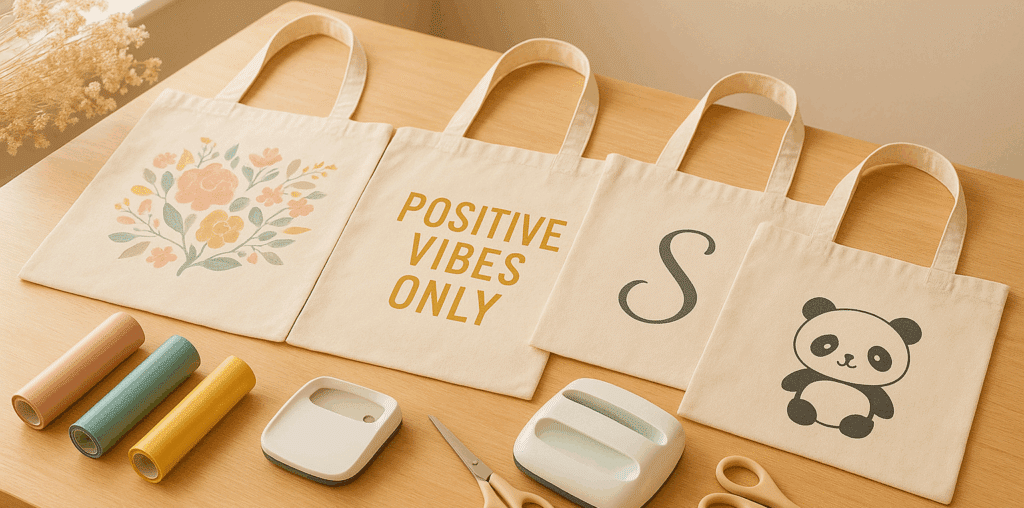
Personalizing a tote bag is about more than decorating a bag.
It's about giving it a story and a personality, and turning it into a one-of-a-kind accessory that truly reflects who you are. In just a few simple steps, with a little heat transfer vinyl and a healthy dose of creativity, you can create a piece that turns heads and gets compliments.
And the best part? You don't need to be an expert. What matters isn't technical perfection, but the intention: the desire to create something that carries your personal touch.
So whether you're making it for yourself, as a gift for someone you love, or to celebrate a special occasion, remember: every tote bag you personalize tells a story. And that story is yours.
❓
FAQ: Everything You Need to Know to Personalize Your Tote Bag
1. Can I Personalize Any Tote Bag?
Yes! What matters is that it's made of cotton (or a fabric that works with vinyl). Bags that are too textured or too thick can make applying heat transfer vinyl more difficult.
2. Do I Need a Special Machine to Cut Heat Transfer Vinyl?
A cutting machine like the Cricut or the Silhouette Cameo 5 makes the job so much easier. But you can also cut simple shapes by hand with scissors or a precision craft knife.
3. Does Heat Transfer Vinyl Hold Up Well Over Time?
Yes, as long as you apply it correctly with the right heat and pressure. To make it last longer, wash your tote bag inside out and skip the dryer.
4. Can I Use an Iron Instead of a Heat Press?
Absolutely! An iron works really well, as long as you turn off the steam and press down firmly for several seconds on each part of the design.
5. How Long Does It Take to Personalize a Tote Bag?
On average, less than 30 minutes. Prep (washing, ironing, and cleaning with the lint roller) takes a few minutes, and after that, weeding and applying the heat transfer vinyl go quickly.
6. Can You Mix Several Colors of Heat Transfer Vinyl?
Definitely! And that's what makes your tote bag even more unique! You can layer different colors or place them side by side, just be sure to follow the pressing times for each layer. So go ahead and use glitter HTV, metallic HTV, velvet HTV, or even fluorescent HTV!
7. Can I Give a Personalized Tote Bag as a Gift?
Of course! It's actually a great idea: a tote bag with a name, a quote, or a design chosen especially for someone always makes them happy and becomes a one-of-a-kind keepsake.
The tutorial is over, but the adventure continues
👇
Share your personalized tote bag on social media with the hashtag #PapierTransfertDIY and tag @papiertransfert (or share it in our Facebook group)!
We always love seeing what you create with our products
💕



Comments
No comments yet. Be the first to share your experience.
Leave a comment