
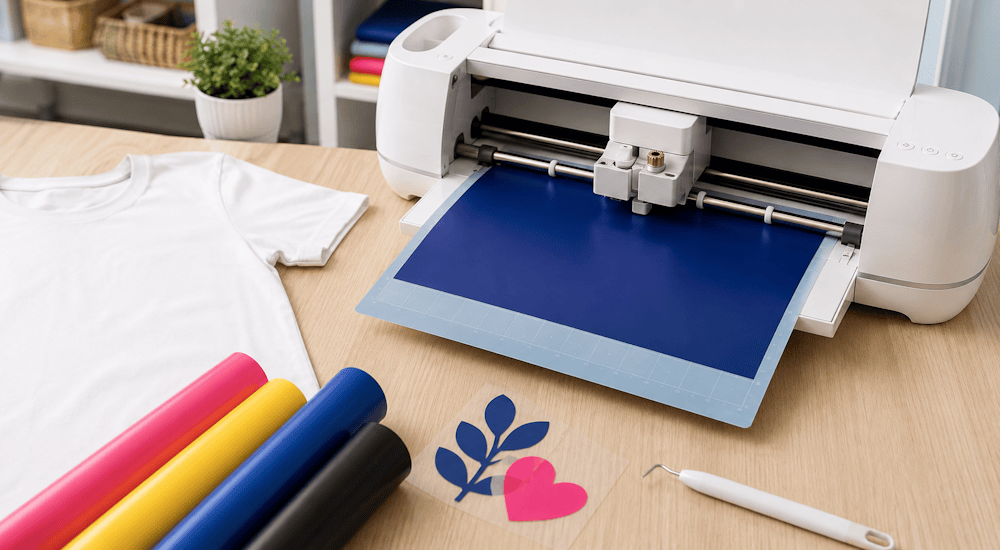
Today, we're going to show you how to cut heat transfer vinyl with Cricut machines. One of the great things about heat transfer vinyl is that you can apply it to all kinds of fabric items, like shirts, pillows, T-shirts, and bags.
Whether you have a Cricut Maker, Cricut Explore Air, or Cricut Joy, here's how to cut your first HTV design with a Cricut:
Select Your Design
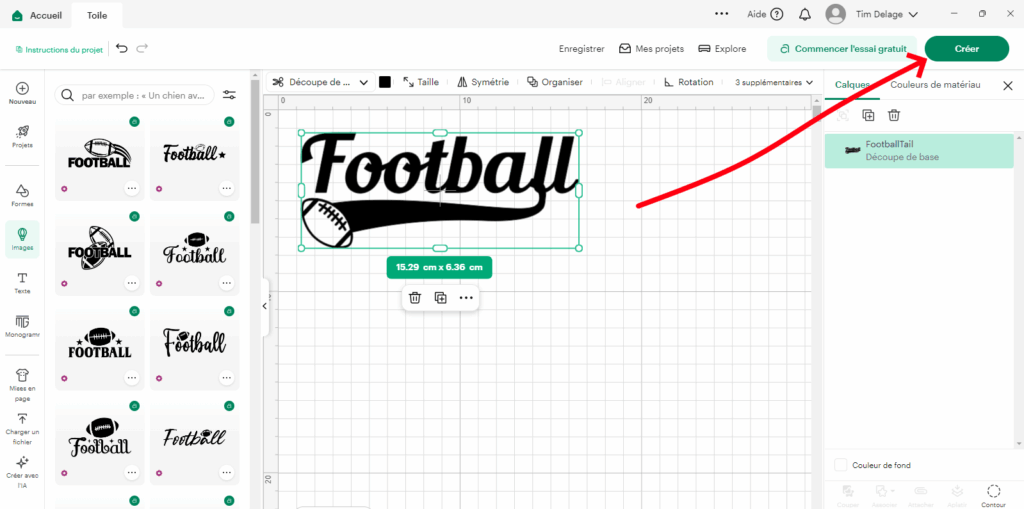
When you're ready to cut a design out of heat transfer vinyl, open the Cricut Design Space software and get your design ready. For this example, we used a design from our pack of 50 free designs for Cricut, which you can download too! 🎨
Place the design on your Cricut virtual mat by clicking "Upload," then "Upload Image," and choosing the design you want from your files.
Resize your design to the size you need.
Once your design is ready, click "Make It." Your screen should look like this. ⬇️
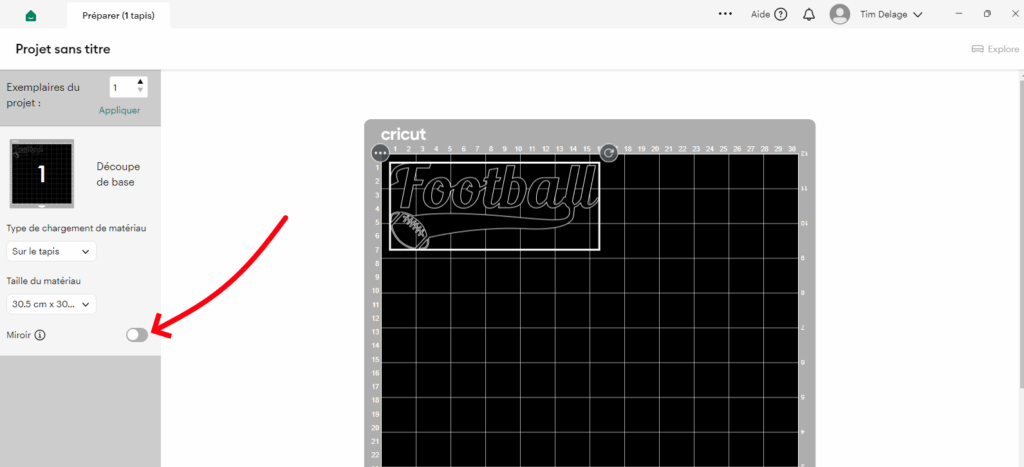
Since you're working with heat transfer vinyl, you need to make sure your image is mirrored. Heat transfer vinyl always has to be cut in reverse so the design reads the right way when you apply it to the fabric.
To mirror your design, click the "Mirror" button on the left side, below the mat preview.
When you click the toggle, the button on the left turns on, and the mat shows your design flipped. 🔄
Click "Continue," and you'll be asked to choose your machine. For this article, we're using the Cricut Maker, but the Cricut Explore Air 2, for example, also does a great job cutting heat transfer vinyl.
If you select the Cricut Maker to cut your heat transfer vinyl, you'll be prompted to choose your material.
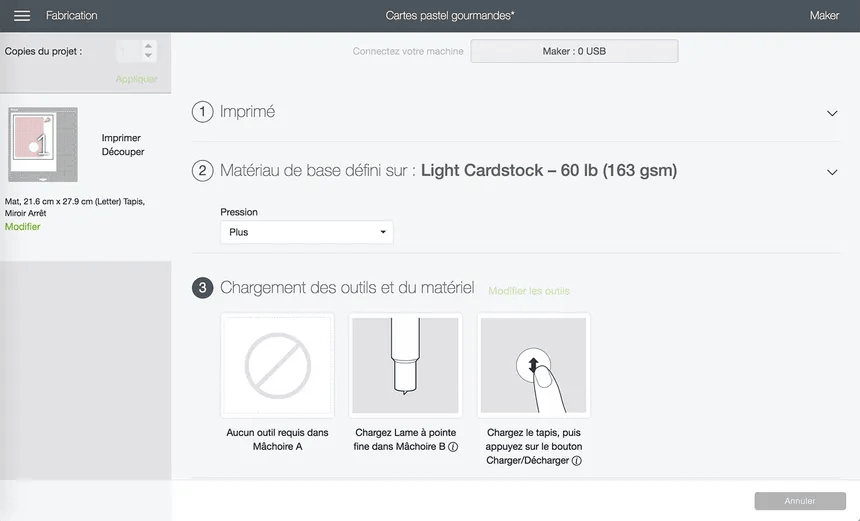
We chose "Everyday Iron-On," which works for standard HTV, but there are also settings for glitter heat transfer vinyl, velvet HTV, and all the other types of HTV available in our heat transfer vinyl shop. (You'll find all the settings for our HTV in each product description.)
Once you've selected your material, the machine will ask you to load the mat, and cutting will begin.
Just wait a few minutes for the cut to finish, and then you can remove the mat.
Placing the Vinyl on the Cricut Mat
Now that we've shown you how to cut HTV with a Cricut machine, here are a few tips for placing the vinyl on the cutting mat correctly:
1️⃣ The shiny side of the vinyl should always face down. Keep in mind that some vinyls are a different color on the front and back, while others are the same color on both sides. To make sure your cut works properly, it's essential to go only by which side is shiny and which isn't, not by the color of the vinyl, which can be misleading.
2️⃣ Once the vinyl is on the mat, load it into the machine by pressing the flashing arrow button on your Cricut. Then press the Cricut button to start cutting.
3️⃣ When your design has finished cutting, peel the vinyl off your Cricut mat. The vinyl may curl up a bit as you peel it off, but that won't affect the cuts.
4️⃣ The more you use your Cricut mat, the more likely it is to lose its stickiness. When your vinyl won't stick to the mat anymore, you don't need to buy a new one: you can use masking tape to hold the vinyl in place on the mat.
5️⃣ Here's a little tip: don't be afraid to do a test cut first. Choose a small design and run it through the cutting process with your heat transfer vinyl. This helps you avoid cutting mistakes and wasted vinyl if you're not quite sure which settings to use.
6️⃣ Cut your vinyl to fit the size of your design. When you're preparing your mats, most of your designs won't need a full sheet of vinyl. You can pre-cut your heat transfer vinyl to roughly the size of the design. Use the grid lines on the mat to figure out how much you need, and give yourself a small 2cm margin.
Removing Excess Heat Transfer Vinyl
Once you've removed the vinyl from your cutting mat, the next step is called "weeding." It simply means removing the excess vinyl around your design that you don't want transferred onto your finished project.
How Can You Avoid Wasting Vinyl When Weeding?
If the design you cut is much smaller than the piece of vinyl it was cut from, we recommend trimming off the extra vinyl before you start weeding.
Just use a pair of scissors to cut around your design. That way, you can use the rest of the vinyl for another project.
To remove the excess heat transfer vinyl, you'll need a weeding hook.
Transferring onto Fabric
Now we're ready to transfer our cut and weeded design onto our T-shirt! 👕
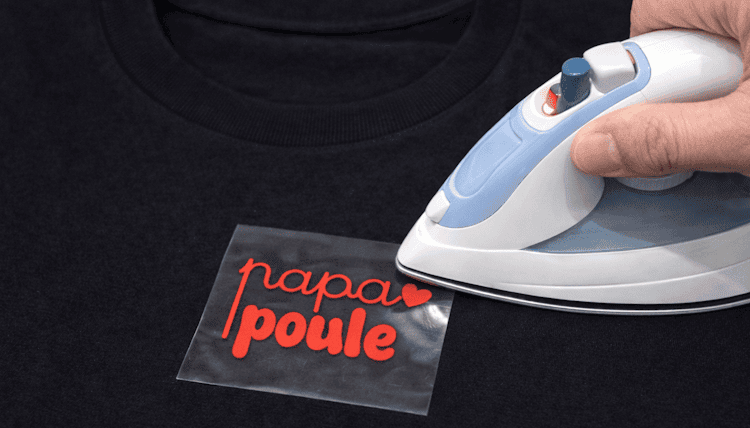
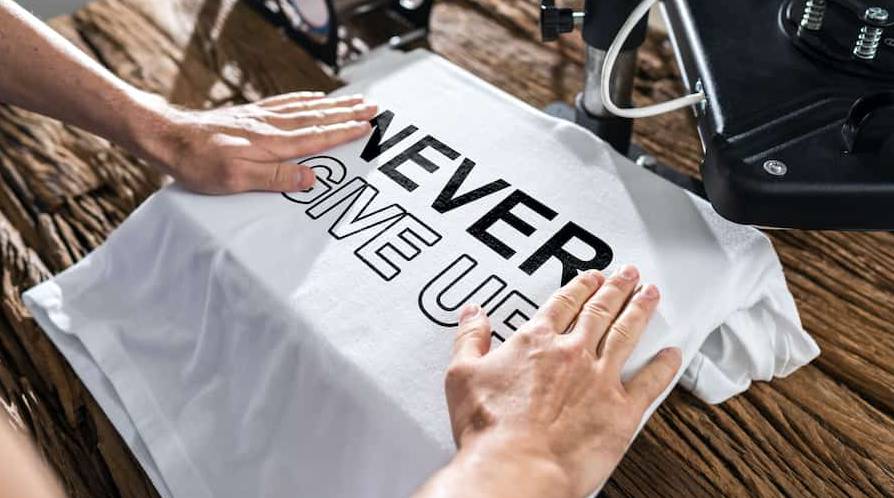
To properly transfer heat transfer vinyl onto fabric, you need two things: heat and pressure. You can use either an iron or a heat press.
How Do You Apply the Vinyl to Fabric?
Start by plugging in your iron or your heat press and setting the temperature to 150°C. Then place your design on the fabric with the clear plastic carrier sheet on top, so the design is facing the right way.
Press down with your iron, applying pressure to every part of the design for about 10 to 20 seconds. Some types of vinyl need more or less pressure, so check the instructions for the material you're using.
If you're using an iron, be sure to move it around as you press so every part of the design gets both heat and pressure.
Once every part of the design has been pressed thoroughly, you can slowly start peeling off the carrier sheet. If the vinyl hasn't stuck to the fabric, you'll need to repeat the process.
NOTE: some types of vinyl are "cold peel," which means you have to let the vinyl cool completely before removing the clear plastic sheet.
Once the heat transfer vinyl has been applied correctly, it's ready to wear. Give the HTV at least 24 hours to bond with the fabric before washing. For best results, wash the T-shirt inside out.
And that's everything you need to know to complete your very first HTV project!
We know that learning a new machine and new software can be a little tricky at times, but luckily, Cricut has created one of the most user-friendly machines and software programs on the HTV market. If you have any questions, feel free to email us at contact@papier-transfert.fr.
If you'd like to make fun HTV projects with the Cricut Maker, Cricut Explore Air, or Cricut Joy, check out our heat transfer vinyl shop! The creative possibilities with this material are endless! 🤩



Comments
No comments yet. Be the first to share your experience.
Leave a comment