
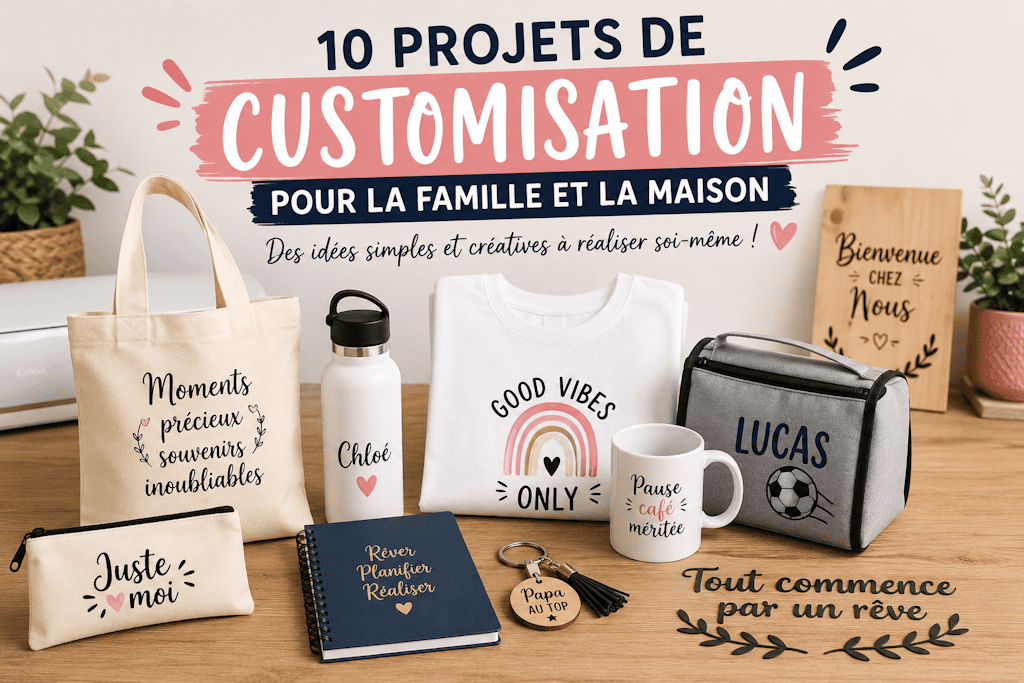
Have you ever looked at an everyday item and thought, "It's handy, but it's missing a little something"? That's exactly how most customization projects start.
A tote bag that's a little too plain, a T-shirt with no personality, a water bottle just like hundreds of others... Yet with a few materials and a little imagination, you can turn these ordinary items into one-of-a-kind creations that truly reflect your personality.
Customization is more popular than ever, and that's no accident. It lets you give existing items a second life, make personalized gifts, and create decorations unlike any other. Better yet, you don't need to be a DIY expert to get professional-looking results.
With heat transfer vinyl and adhesive vinyl, two must-have materials in the world of personalization, it's easy to create original projects right at home. In just a few steps, an ordinary item can become a unique piece that turns every head.
In this article, I'm sharing 10 customization project ideas that are easy to make at home. Whether you're a beginner or already a crafting enthusiast, you're sure to find an idea that makes you want to pull out your supplies and let your creativity run wild.
So let's dive into Alyah's mini tutorials!
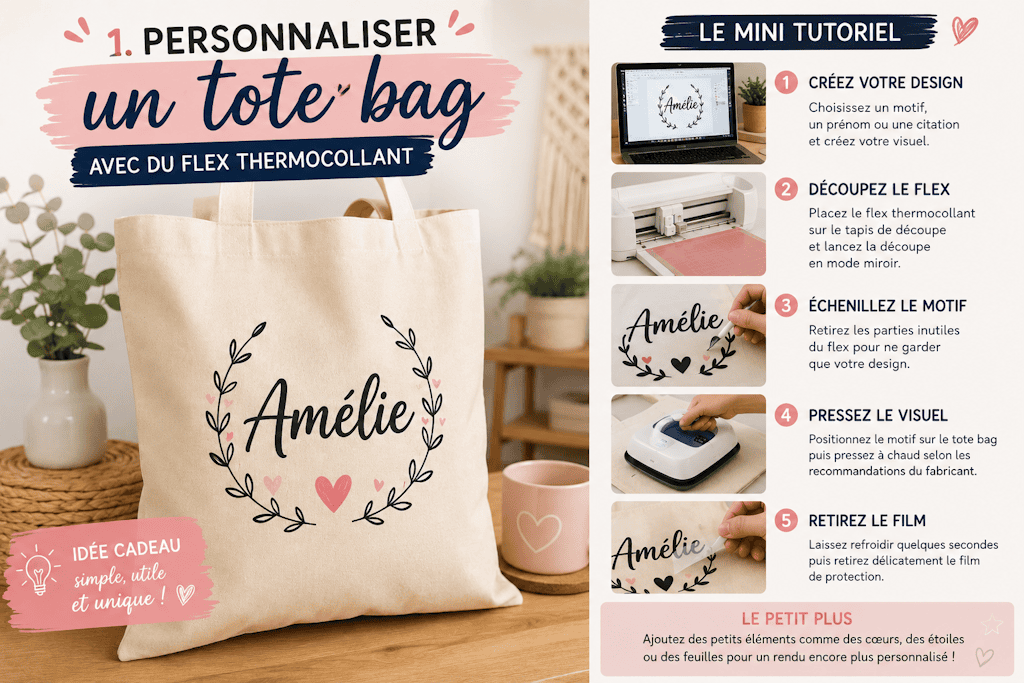
1. Customize a Tote Bag with a Name or a Quote
The tote bag is one of the most popular items to customize. Easy to personalize and useful every day, it's a great first project for getting started with heat transfer vinyl.
What You'll Need
-
A heat press or an iron
-
A design, a name, or a quote
Mini Tutorial
Step 1: Create Your Design
In your design software, type a name or a quote, or pick a simple design. Be sure to size it to fit your tote bag.
Step 2: Cut the Vinyl
Place your heat transfer vinyl on the cutting mat and cut your design in mirror mode.
Step 3: Weed the Design
Carefully remove the excess vinyl so only your design is left.
Step 4: Position It on the Tote Bag
Place your design exactly where you want it and check that it's lined up before pressing.
Step 5: Apply Heat
Use a heat press or an iron, following the manufacturer's recommendations. Once it has cooled, peel off the carrier sheet.
Bonus Tip
For an even more on-trend look, pair a name with a small illustration, like a flower, a heart, or a sprig of eucalyptus. You'll end up with a one-of-a-kind tote bag that's perfect as a gift or for carrying with you every day.
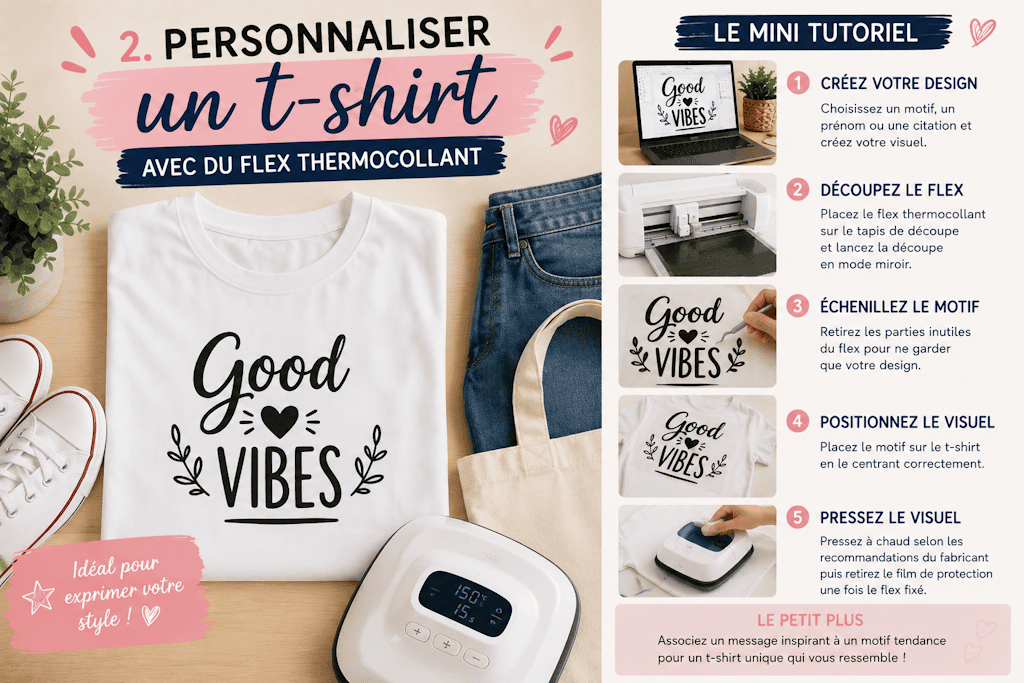
2. Personalize a T-Shirt with a Unique Design
Do you have a plain T-shirt sitting forgotten at the back of your closet? With a little heat transfer vinyl, you can give it a second life and create a piece of clothing that's truly one of a kind.
What You'll Need
-
A heat press or an iron
-
A design, some text, or an illustration
Mini Tutorial
Step 1: Choose Your Artwork
Pick a graphic, an inspiring quote, or an illustration you love. Simple designs often give the best results.
Step 2: Cut the Vinyl
Place the vinyl on your cutting mat and cut in mirror mode so the design faces the right way once it's transferred.
Step 3: Weed Your Design
Remove all the excess vinyl so your design stands out clearly.
Step 4: Position the Design
Place the design in the center of the T-shirt or on the chest, depending on the look you want. Take the time to check that it's lined up.
Step 5: Press the Vinyl
Apply heat at the manufacturer's recommended temperature for the recommended time. Let it cool if needed, then peel off the carrier sheet.
Bonus Tip
For an even more original look, combine several vinyl colors or use glitter, velvet, or holographic HTV. A simple phrase can then become the detail that instantly catches the eye.
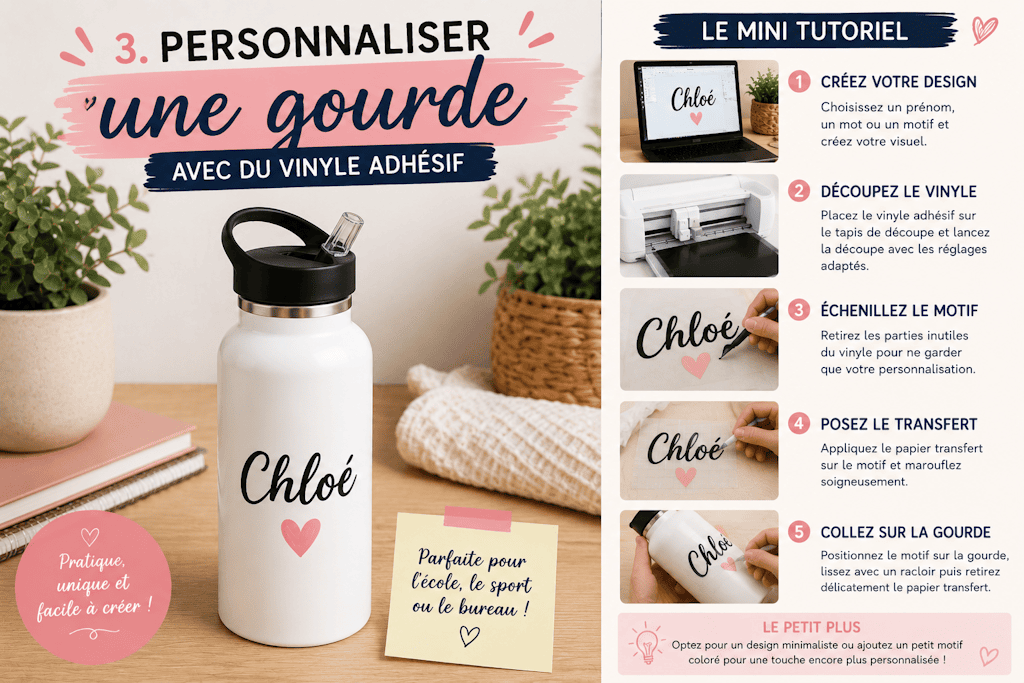
3. Create a Personalized Water Bottle for the Whole Family
Water bottles have become an everyday essential. At school, at the gym, at the office, or on outings, they go everywhere with us. When you personalize them with adhesive vinyl, everyone can easily tell which one is theirs while showing off their own unique style.
What You'll Need
- A clean, dry water bottle
- Adhesive vinyl
- A cutting machine
- Transfer tape
- A weeding kit
- A plastic squeegee
Mini Tutorial
Step 1: Prepare Your Design
Choose a name, a nickname, or a small design. For a water bottle, simple designs and easy-to-read fonts usually work best.
Step 2: Cut the Vinyl
Place the adhesive vinyl on your cutting mat, then cut your design using the right settings.
Step 3: Weed the Design
Carefully remove the excess vinyl so only the design you'll apply to the bottle is left.
Step 4: Use the Transfer Tape
Place the transfer tape over your design, then rub it down firmly so the vinyl sticks to it properly.
Step 5: Apply the Design to the Bottle
Position your design on the bottle, smooth it down with the squeegee to avoid air bubbles, then gently peel away the transfer tape.
Bonus Tip
For an even more original water bottle, add small illustrations tied to its owner's interests: a ball for an athlete, a flower for a nature lover, or a crown for a child. It's a simple personal touch that turns an ordinary bottle into a one-of-a-kind accessory.
4. Make a Personalized Mug to Give as a Gift
Finding a gift that's useful, original, and affordable all at once isn't always easy. But a personalized mug is always a safe bet. Whether it's for a birthday, Mother's Day, Father's Day, or just to make someone happy, it lets you create a unique gift in just a few steps.
What You'll Need
- A sublimation-ready mug
- Sublimation paper
- A sublimation printer
- A mug press
- A custom design
Mini Tutorial
Step 1: Create Your Design
Prepare your design with a name, a photo, a quote, or an illustration, depending on the occasion.
Step 2: Print Your Design
Print your design on sublimation paper using the right settings for your printer.
Step 3: Position the Design
Wrap the paper around the mug, then secure it with heat-resistant tape so it doesn't shift during the transfer.
Step 4: Start the Press
Place the mug in the mug press and use the recommended settings for your equipment.
Step 5: Remove the Paper
When the cycle is done, let the mug cool slightly, then carefully peel off the sublimation paper to reveal the result.
Bonus Tip
Create a mug that's perfectly suited to the person receiving it: a family photo for the grandparents, a funny quote for a friend, or an inspiring design to go with their morning coffee. It's an everyday item that quickly becomes a treasured keepsake.
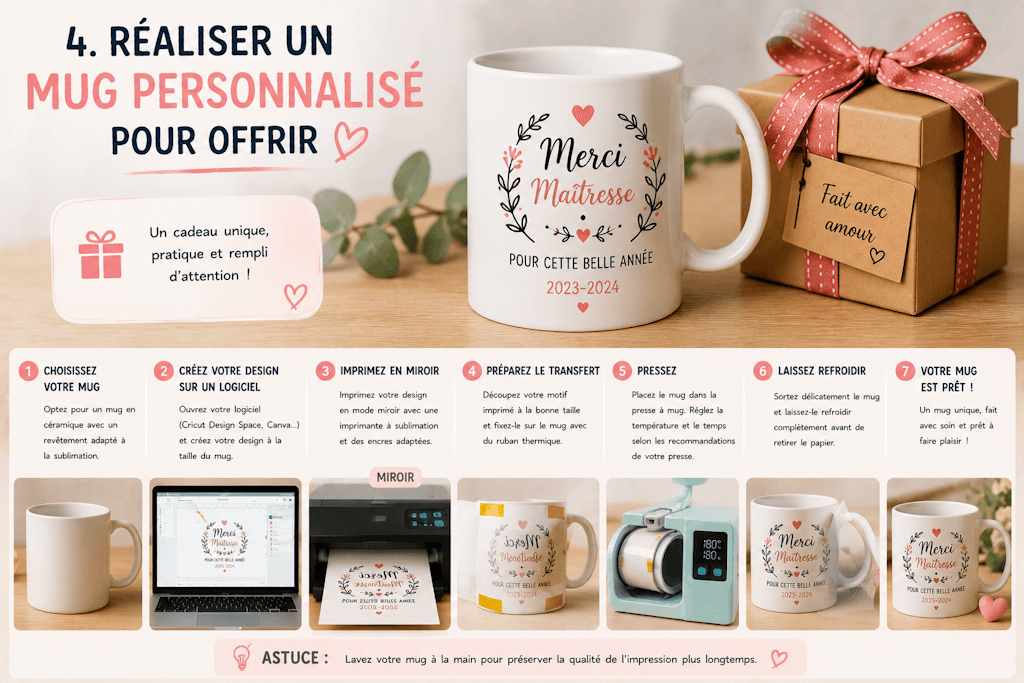
5. Turn a Basic Pouch into a Trendy Accessory
A plain pouch can quickly become a one-of-a-kind accessory with just a few pieces of heat transfer vinyl. It's a quick, easy project that's perfect for personalizing your school supplies, your craft kit, or your makeup bag.
What You'll Need
-
A heat press or an iron
-
A design, a name, or a quote
Mini Tutorial
Step 1: Choose How to Personalize It
Pick a name, initials, or a small design that suits what the pouch will be used for.
Step 2: Cut the Vinyl
Place your heat transfer vinyl on the cutting mat and cut your design in mirror mode.
Step 3: Weed Your Design
Remove the excess vinyl so only the final design is left.
Step 4: Position the Design
Place the design on the pouch, taking care to center it properly.
Step 5: Apply Heat
Press according to the manufacturer's recommendations, then peel off the carrier sheet once the vinyl has bonded properly.
Bonus Tip
For an even more original pouch, pair a name with a small illustration that shows what it's for: a brush for makeup, a pencil for school, or a pair of scissors for sewing lovers. A simple pouch then becomes a fully personalized accessory.
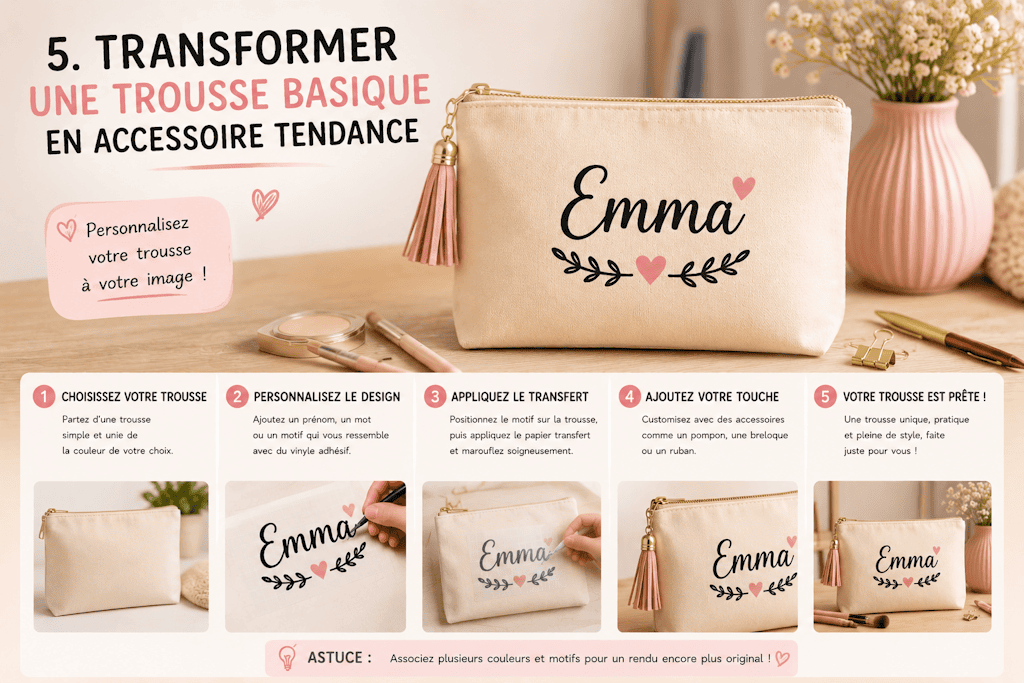
6. Personalize a Lunch Bag for School or the Office
Handy for carrying your meals, the lunch bag has become an everyday essential. When you personalize one, you get an accessory that's useful, good-looking, and easy to spot, whether it's for a child at school or an adult at work.
What You'll Need
-
A heat press or an iron
-
A name, an illustration, or a quote
Mini Tutorial
Step 1: Prepare Your Design
Choose a personal touch that suits whoever will use the bag: a name, a favorite character, an illustration, or a short motivational message.
Step 2: Cut the Vinyl
Place the heat transfer vinyl on your cutting mat, then cut your design in mirror mode.
Step 3: Weed the Design
Carefully remove all the excess vinyl so only the design you'll transfer is left.
Step 4: Position Your Design
Place your design on the lunch bag, making sure it's straight and centered.
Step 5: Press the Design
Apply the recommended heat so the vinyl bonds to the fabric for good.
Bonus Tip
For kids, add a name along with a small, fun illustration. For adults, go for a minimalist design with initials or an elegant quote. It's a simple personal touch that turns an everyday accessory into something one of a kind.
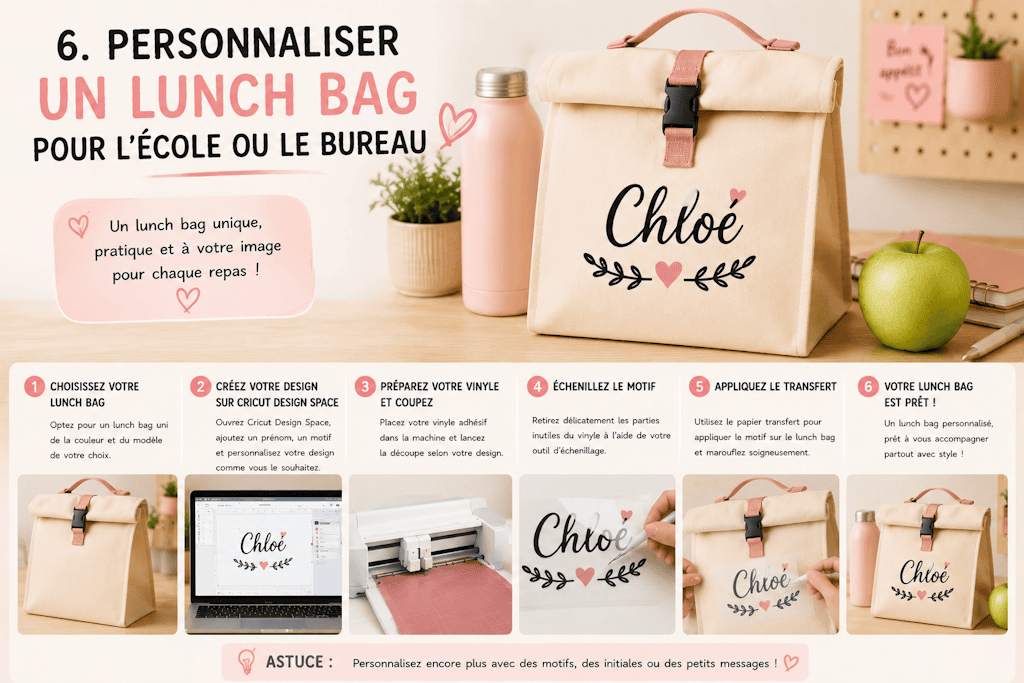
7. Create a Decorative Sign for Your Entryway
Your entryway is the first thing guests see. So why not give it a personal touch with a one-of-a-kind decorative sign? This customization project is perfect for displaying your family name, a welcome message, or a quote that feels just like you.
What You'll Need
-
A wooden sign blank
Mini Tutorial
Step 1: Design Your Sign
Create a design with your family name, a welcome phrase, or a decorative motif that matches your home decor.
Step 2: Cut the Vinyl
Place your adhesive vinyl on the cutting mat, then cut your design using the right settings.
Step 3: Weed Your Design
Remove the excess vinyl so only the text or design you want is left.
Step 4: Prepare the Transfer
Place the transfer tape over your design, then rub it down firmly.
Step 5: Apply It to the Sign
Position the design on the sign, smooth it down with the squeegee, then carefully peel away the transfer tape.
Bonus Tip
Add a few decorative touches like leaves, flowers, or geometric shapes to give your creation more character. Hung in an entryway or on a door, this sign will instantly add a warm, personal touch to your decor.
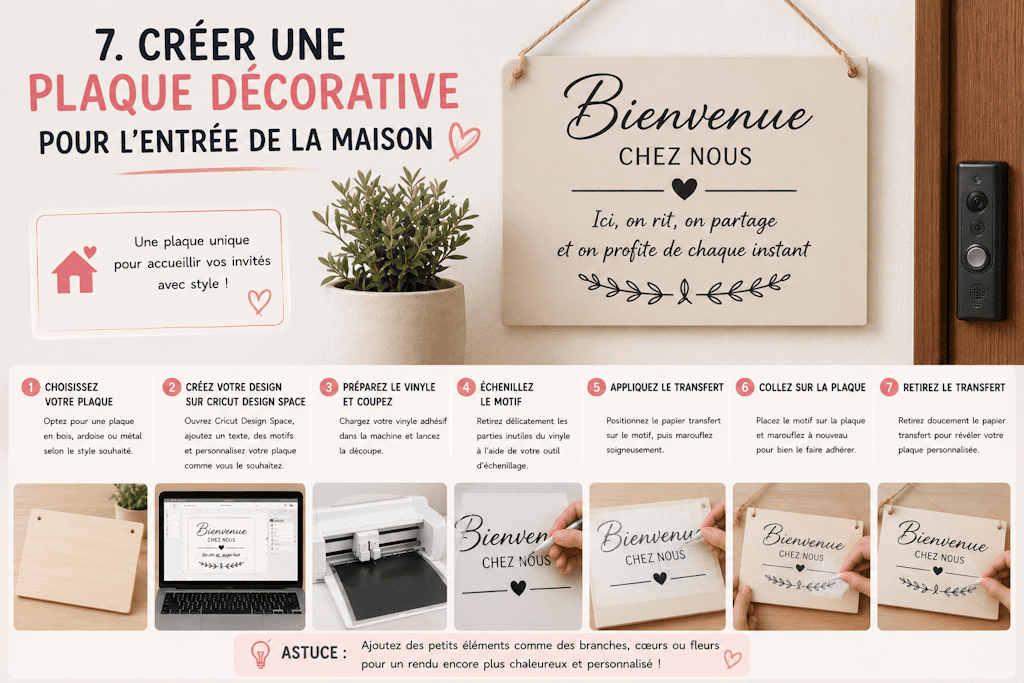
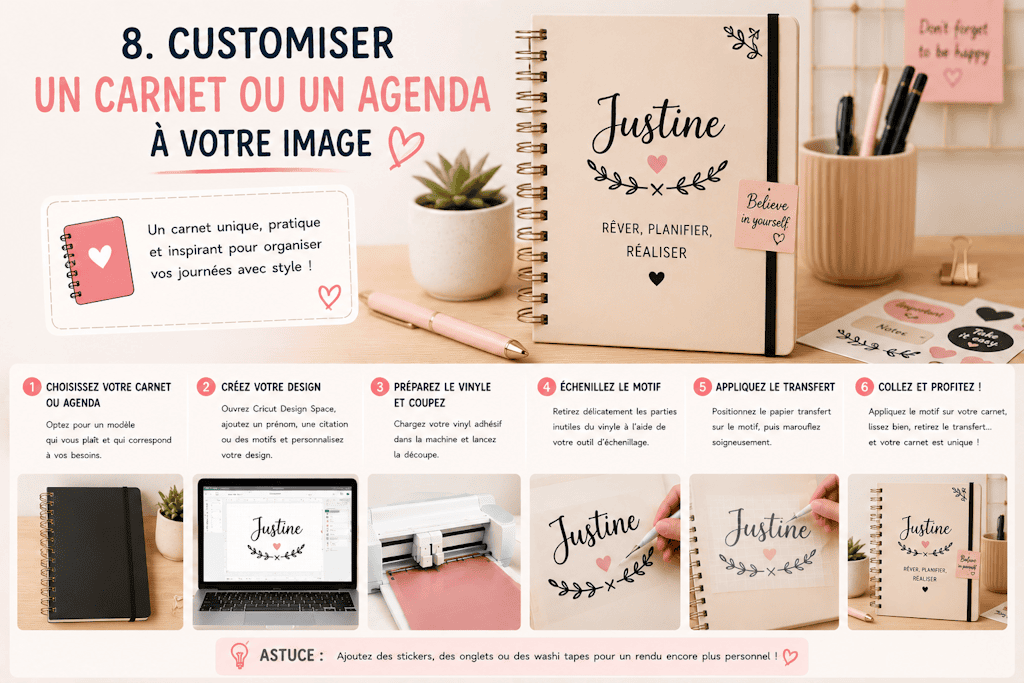
8. Customize a Notebook or Planner to Match Your Style
Whether you use it to take notes, plan your days, or jot down creative ideas, a notebook or planner often stays with you all year long. So why not make it something that truly reflects who you are with a little customization?
What You'll Need
Mini Tutorial
Step 1: Choose How to Personalize It
You can add your name, your initials, a motivational quote, or even a decorative design that matches your style.
Step 2: Cut the Vinyl
Place the adhesive vinyl on your cutting mat and cut your design using the right settings.
Step 3: Weed Your Design
Carefully remove the excess vinyl so only the design you'll apply is left.
Step 4: Use the Transfer Tape
Place the transfer tape over your design and rub it down to make it easier to apply.
Step 5: Personalize Your Notebook
Position the design on the cover, smooth it down with a squeegee, then carefully peel away the transfer tape.
Bonus Tip
For an even more elegant look, pair a name with a small, minimalist illustration, like a sprig of eucalyptus, a star, or a floral design. You'll have a one-of-a-kind notebook that makes you want to write and plan your projects every day.
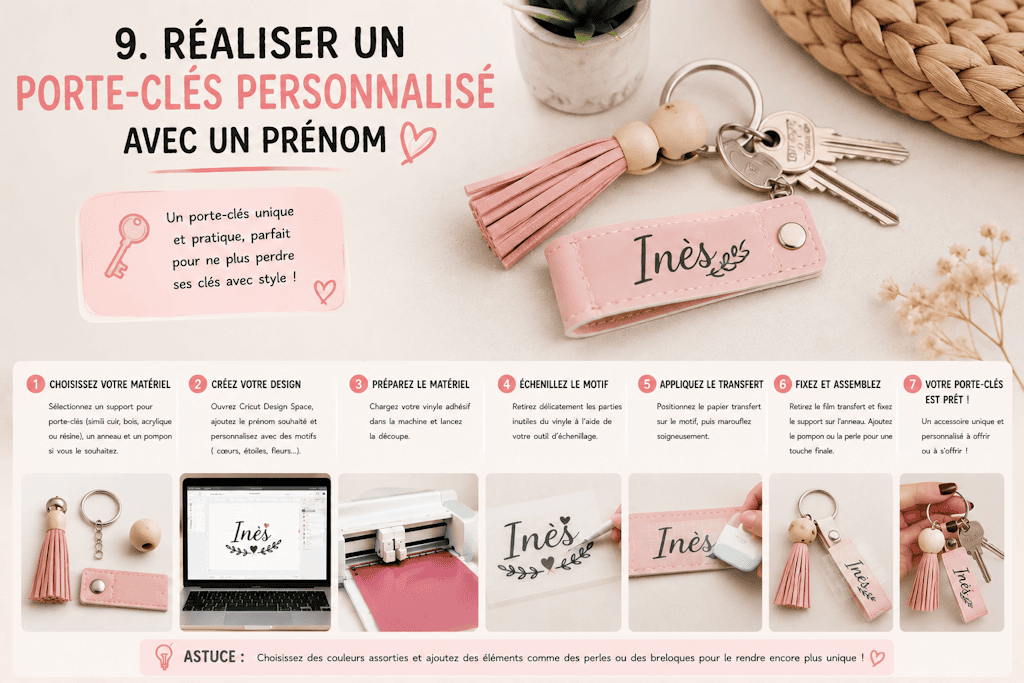
9. Make a Personalized Name Keychain
Small in size but big on impact, a personalized keychain is one of the easiest customization projects you can make. It's also a great gift idea for a birthday, a celebration, or simply to treat someone you love.
What You'll Need
-
A blank acrylic keychain, or a wooden or faux leather one
Mini Tutorial
Step 1: Create Your Design
Choose a name, initials, or a small symbol that represents the person you're making the keychain for.
Step 2: Cut the Vinyl
Place the vinyl on your cutting mat, then cut your design using the right settings.
Step 3: Weed Your Design
Remove the excess vinyl so only your custom design is left.
Step 4: Prepare the Transfer
Place the transfer tape over the design, then rub it down firmly to make it easier to apply.
Step 5: Personalize the Keychain
Position the design on the keychain, smooth it down with the squeegee, then carefully peel away the transfer tape.
Bonus Tip
Add a small illustration tied to the recipient's passion: a paw print for an animal lover, a ball for an athlete, or a heart for a gift full of love. As simple as it is, this project always makes an impression and lets you create something truly one of a kind.
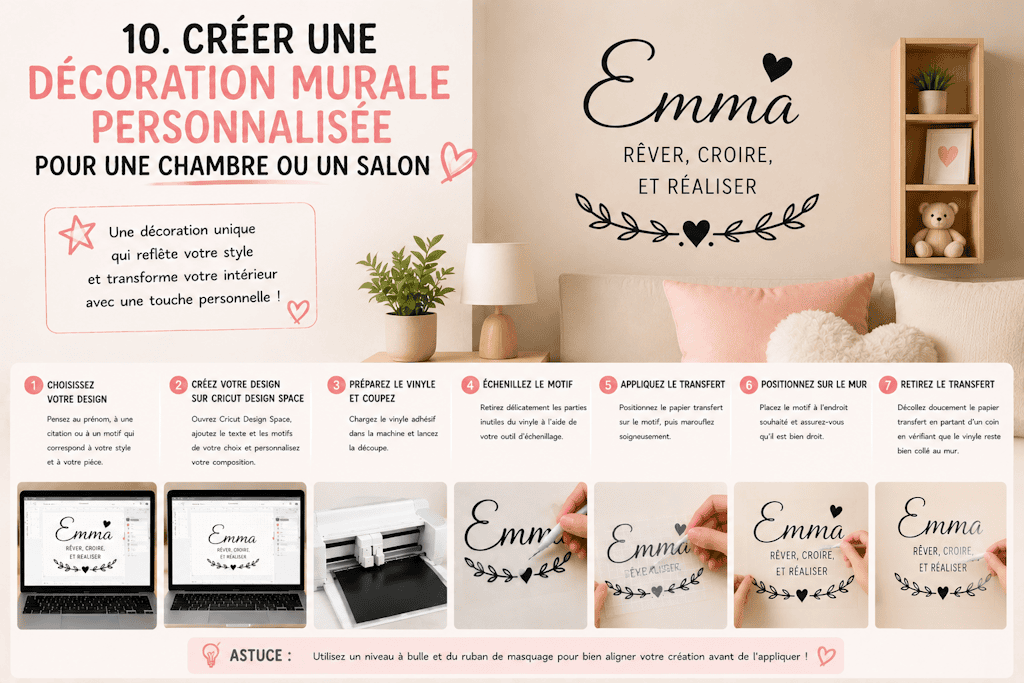
10. Create Personalized Wall Decor for a Bedroom or Living Room
Sometimes all it takes is a single decorative piece to completely change the feel of a room. With adhesive vinyl, you can easily make one-of-a-kind wall decor that reflects your personality and fits right in with your home.
What You'll Need
-
A design, a quote, or a name
Mini Tutorial
Step 1: Choose Your Decor
Pick an inspiring quote, a name, an important date, or a decorative design suited to the room you want to brighten up.
Step 2: Cut the Vinyl
Place the adhesive vinyl on your cutting mat, then cut your design using the recommended settings.
Step 3: Weed Your Design
Carefully remove the excess vinyl so only the final design is left.
Step 4: Prepare the Transfer
Place the transfer tape over your design, then rub it down firmly so it grips well.
Step 5: Put Up Your Decor
Position the design directly on the wall or on your decorative surface, smooth it down with the squeegee, then carefully peel away the transfer tape.
Bonus Tip
Quotes work especially well in a living room, while names or soft, gentle designs are perfect for a child's bedroom. You can also create a layout that mixes text and illustrations for decor that's completely unique and personalized.
Customization is much more than just a creative hobby. It's a way to turn ordinary items into unique creations that tell a story, reflect a personality, or mark an important event.
As you've seen with these 10 projects, you don't need to be a DIY expert to get professional-looking results. With a few tools, a little inspiration, and the right materials, like heat transfer vinyl or adhesive vinyl, you can personalize all kinds of everyday items.
From tote bags and T-shirts to water bottles, lunch bags, and even wall decor, every project is a chance to give your creativity free rein while making unique, useful items.
So, what will your next customization project be? One thing's for sure: once you start personalizing your creations, it's hard to stop, because the possibilities are endless.



Comments
No comments yet. Be the first to share your experience.
Leave a comment