
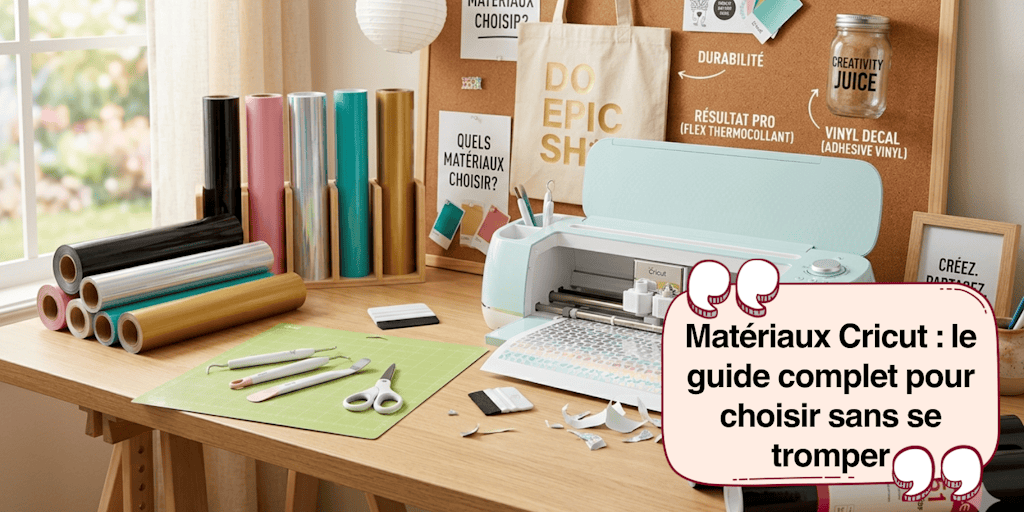
The "buying the Cricut" step is finally done and here comes a question crossing our mind: "Ok, I have the tool. But now, what kind of project do I make with this cutting machine?"
Because the truth is, the machine does not do the work for you (and thankfully so, otherwise we could say bye to all our imagination).
For a cutting machine (because yes, we always talk about the Cricut but there are tons of brands of cutting machines such as Silhouette or Loklik), the Cricut materials you choose will decide everything:
- the final result
- how well it lasts over time
- the perceived quality
- and above all... whether your product can sell or not
And nobody tells you this clearly when you start out. They talk to you about creativity, design, files...
But never about what really makes the difference between an amateur result and a product that sells, which is the quality of the personalization material.
And that is simply why, in this article, I am going to teach you which Cricut materials to use, the ones that bring in the most and how to avoid the mistakes that make you waste time (and above all money)!
Spoiler alert: if you want fast and clean results, you are going to understand very quickly why heat-transfer vinyl and adhesive vinyl are MUST-HAVES!
1. Understanding Cricut materials
At first, we all think the same thing. That all Cricut materials are equal. Except that this is actually... a serious mistake!
Because you have to know that each material obviously has its use, its constraints and above all... its profitability potential.
And if you choose badly, you risk struggling with the cutting, ruining your transfer, getting a cheap result or worse... having an unsellable product, UN-SELL-ABLE! And to explain all this to you as best I can, we are going to look together at everything you need to know to have a quality personalized product!
The main categories of Cricut materials
To be on top of things and become a future Cricut pro, you actually do not have much to remember:
1. Heat-transfer materials (heat-transfer vinyl)
→ they are there to beautify all your textiles (t-shirts, tote bags, sweatshirts...)
2. Adhesive materials (adhesive vinyl)
→ these are made for hard surfaces (glass, wood, plastic...)
3. "Creative" materials
→ paper, cardstock, faux leather, balsa... (these are materials that are more expensive)
If your goal is to create to sell, you should focus first on:
Um yes but why? Well simply because these are the materials:
- the easiest to master
- the most in demand on the market
- and the fastest to use to produce quality creations
And that is exactly what you need if you want to be fast and efficient (everything we need for a profitable business)!
What we very often forget...
You can have the best design and the best idea, but if your material is poorly chosen from the start, your product will not make the cut and that is a disaster!
It is like trying to sell a luxury piece of jewelry... with a low-end finish. People feel it immediately.
At Paper Transfer, we guarantee the quality of our materials, and they are already validated by thousands of creators. Easy to use and inexpensive, they will be your allies for your first creations!
2. Heat-transfer vinyl: the profitable material par excellence
If I had to recommend a single Cricut material to start selling your projects quickly... It would be this one.
Heat-transfer vinyl is typically the kind of product that is simple to use, fast to produce and above all has a **high perceived value.
**
And that is exactly what you are looking for when you want to turn a creation into a profitable product.
Why heat-transfer vinyl is a gold mine
Textiles sell all year round. Tote bags, t-shirts, sweatshirts, pouches...
These are useful products, endlessly customizable and easy to adapt to every niche (moms, kids, business, events...)
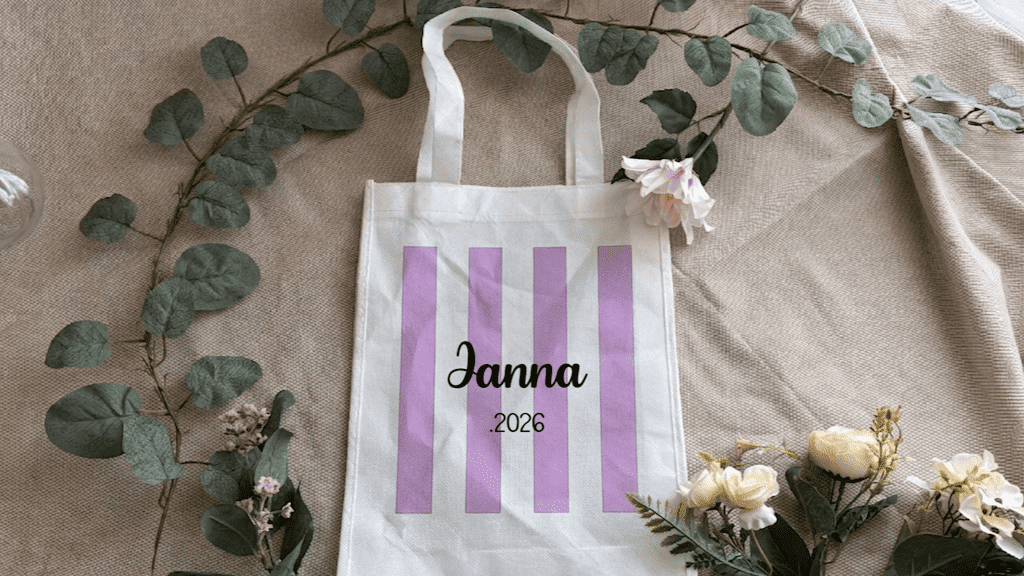
Mini tutorial: personalize a tote bag with heat-transfer vinyl
No need for complicated equipment. Just your personalization idea and a few tools that I list for you below!
Materials:
- Heat-transfer vinyl, have fun with the colors and textures
- Cutting machine
- Cotton tote bag
- Heat press
- Weeding kit
Steps:
1. Create your design
Choose a simple text and/or a visual that speaks to you, but above all a visual that speaks to your target audience (e.g. a first name, a trendy phrase, a funny message...)
A little tip by Alyah: a simple product is simpler and sells better than an overloaded product :) . Of course, feel free to create products to your own taste!
Simple = effective = sells well.
2. Cutting the vinyl
Place the heat-transfer vinyl shiny side against the mat (heat-transfer vinyl is always cut on the back!).
Do not forget to mirror your design (it is a classic beginner mistake, but if we can avoid it and avoid ruining our first cut!), this option is visible when you want to start the cut.
3. Weeding
Weeding is the moment when you remove the unnecessary parts of the heat-transfer vinyl to keep only what will be transferred. Be careful not to go too fast and remove parts that were supposed to be transferred in the first place (yes, yes, I am speaking from experience here!).
4. Pressing
Position your design on the textile, taking the time to place it just right. Be careful, this step is really super important!
Once your design is properly placed, press it with your heat press, but do not forget to add your Teflon sheet which acts as protection. As a general rule, you should heat your press to around 150 to 160°C, for 10 to 15 seconds depending on the heat-transfer vinyl. At Paper Transfer, the advantage is that you have this info available at all times on the site!
Once the press is finished, you can remove the plastic film. Be careful, some heat-transfer vinyls have a hot or cold peel depending on the brand (meaning you have to remove the plastic film according to its temperature).
5. Result
A clean, sharp, professional result. And above all... ready to be sold. So what do you think?
Heat-transfer vinyl is not just a material. With glitter HTV, velvet-effect HTV or even premium-quality HTV you can create a real range of products. And there, you are no longer just making "creations"... You are building a shop that sells!
So ready to move on?
3. Adhesive vinyl: fast, efficient, addictive
If heat-transfer vinyl is the king of textiles...
Adhesive vinyl is the king of fast production.
No press, no heat, no hassle. You cut, you stick... and it is done. Yes, yes, it is as fast and simple as that!
Adhesive vinyl lets you personalize:
- glasses
- jars
- boxes
- wood
- plastic
- decorative objects
and tons of other objects!
Put simply: anything with a smooth surface, you can stick your adhesive vinyl design on it.
And above all... You can produce much faster than with textiles (the heating step for heat-transfer vinyl takes quite a bit of time even if the result is Wow).
So if your goal is to save time, multiply your products and test lots of ideas, adhesive vinyl is clearly your ally.
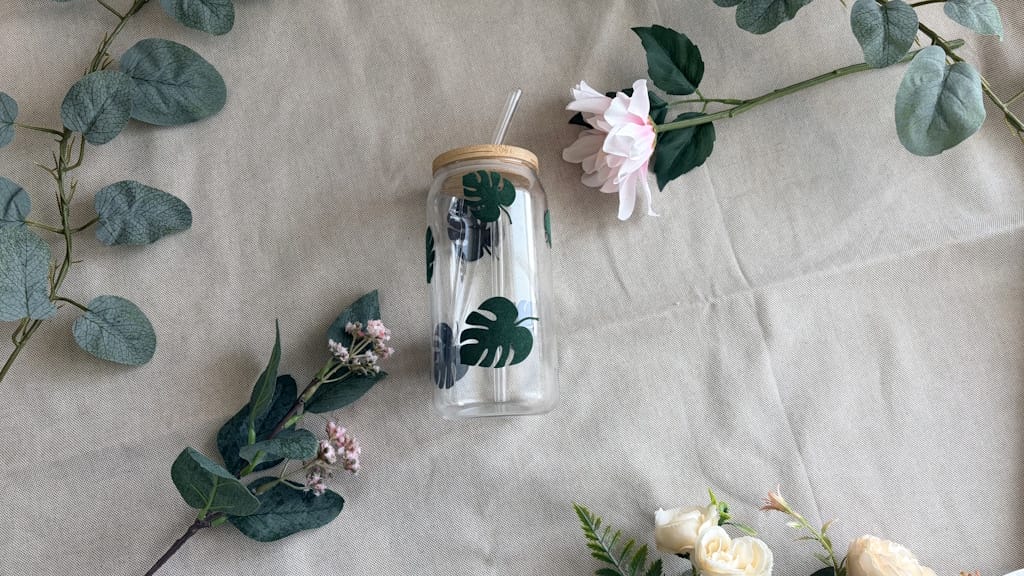
Mini tutorial: personalize a jar with adhesive vinyl
Simple, fast, efficient. Perfect for selling.
Materials:
- Adhesive vinyl
- Cricut machine (or any other cutting machine)
- Glass jar
- Transfer film (transfer tape)
Steps:
1. Create your design
Go for:
- short words
- first names
- legible fonts
Example: "Sugar", "Coffee", "Mom", "Spices"
2. Cutting the vinyl
Place your adhesive vinyl normally (no need to mirror adhesive vinyl, which is cut on the front side) and start the cut.
3. Weeding
Remove the excess with your weeding tools,
to keep only your text or design.
4. Application with transfer film
Place the transfer film over your design and remove the plastic backing on the back of it. Apply your design onto the jar. Smooth it down well with your application squeegee (press firmly to fix it in place). Gently remove the transfer tape
5. Result
A clean, modern result, ready to be used... or sold!
You can be proud of your result! But do not forget: choosing a low-end vinyl is a struggle with bubbles, peeling or even a struggle to cut out the designs! So aim for quality at a low price with the adhesive vinyl from Paper Transfer!
Alright, let me give you a few extra tips for a flawless result on every creation:
Poorly cleaning the surface before sticking your design = it does not hold (grrrrrr how infuriating!)
A design that is too thin and it is a struggle to apply and even to weed.
But above all: wanting to go too fast without being precise! It is better to take your time and succeed with your DIY, rather than going super fast and completely ruining your creation!
Vinyl is fast... but it requires cleanliness in the execution!
Now that you have mastered these two materials, we are going to look together at the mistakes to avoid :) .
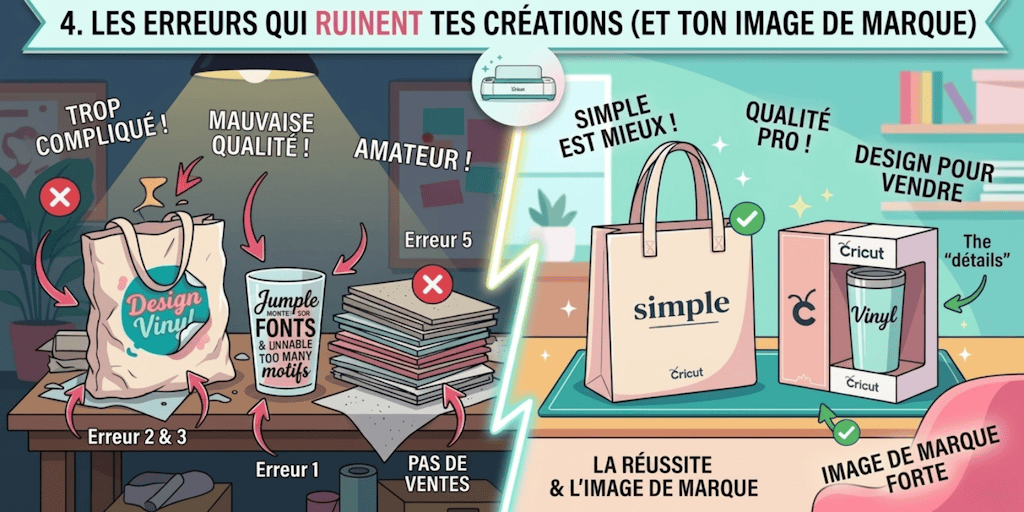
4. The mistakes that ruin your creations (and your brand image)
You can have:
- a good machine
- good Cricut materials
- good ideas
And despite that... sell nothing. And there you start asking yourself 10,000 questions about why it is not working?
Well, I have an answer for you: because it is not the tools that make the difference. It is the details.
And these details are often... avoidable mistakes.
❌ Mistake 1: trying to do too much
This is the most common mistake.
You want to:
- add patterns
- mix several fonts that do not go together
- fill the space with unnecessary patterns or text
The result? A messy, unreadable, unprofessional result.
Just remember this: A simple design always sells better than a complicated design. Simplicity often sells more easily.
❌ Mistake 2: neglecting material quality
Want to save a few euros on your heat-transfer vinyl or your vinyl? How can I put this, that is a bad idea. Because your customer only sees one thing: the final result.
And if it peels off, bubbles, or gets damaged quickly... You lose their trust. Permanently. And there you can say it, it is a CATASTROPHE!
❌ Mistake 3: rushing the application
Whether it is poorly pressed heat-transfer vinyl, poorly applied vinyl... It shows immediately. Creases, bubbles, misalignments...
And there, you go from a "clean" product to an "amateur" product. It does not pass your customers' quality control at all!
❌ Mistake 4: choosing a bad base
A bad tote bag.
A low-end glass.
A textile that is too thin.
Even with a good design, your product loses value. And that is a point many people ignore. But customers do not miss these "details".
❌ Mistake 5: creating without thinking about the sale
That, in my opinion, is the biggest mistake.
You create:
- what you love
- what you find pretty
As a creator that is great. But it is not necessarily what people want to buy. Except that in the end you pile up stock... that does not move.
If you just fix these mistakes... You immediately move up to another level of DIY!
In the end, choosing your Cricut materials is anything but trivial.
It is even one of the most decisive factors in the success of a creation. Behind a clean, durable and professional result, there is almost always a well-considered choice of material.
Heat-transfer vinyl and adhesive vinyl did not become must-haves by chance. They meet specific needs, offer an accessible learning curve and make it possible to quickly achieve a quality result, even without advanced experience.
Understanding their differences, their advantages and their limits not only helps you avoid the classic mistakes, but also helps you gain efficiency in your creative projects.
Over time, these are no longer just "materials" that you use, but real tools serving a more structured, more controlled, and more coherent approach.
And it is often at that moment that creations take on another dimension.
By the way, if you liked these tips, subscribe to the newsletter and get an email every time articles go online (and learn even more along the way!).
FAQ: Cricut materials
What is the best Cricut material for beginners?
The simplest one to start with is adhesive vinyl. It does not require a heat press, it is fast to use and lets you easily create personalized objects.
Which Cricut material should I choose for textiles?
Heat-transfer vinyl is the best choice. It offers a clean, durable, and professional result on all textile bases.
Are all vinyls equal?
No. A low-end vinyl can:
- adhere poorly
- make bubbles
- peel off quickly
The quality of the material directly affects your final result.
Can you make a living from personalization with a Cricut?
Yes, but only if you:
- choose the right materials
- simplify your designs
- and think in terms of sellable products
Do you need to use several materials right from the start?
No. The most effective approach is to start with:
- heat-transfer vinyl
- adhesive vinyl
Then expand later once you have mastered them.


