Does Cricut ring a bell? If you're the creative type and you spend your time watching homemade tutorials and DIY projects, then you've definitely heard of it. Cricut is the go-to brand for cutting, drawing, engraving, marking and personalizing all kinds of textures and materials, whether it's cardboard, fabric, leather, wood, paper or even mugs.
🌟
In short, cricut products are not only well designed, they're also very versatile: from the small portable model to the big machine capable of cutting even more materials, their products are renowned the world over.
We're going to look step by step at how to make your very first textile transfer using the Cricut cutting machine and heat press.
#Cricut Tutorial: What is textile flocking?
Textile flocking is a personalization technique that lets you apply the pattern, text or design of your choice onto any fabric by heating heat-transfer flex. Heat-transfer flex is very easy to use and, above all, it comes in a very wide range: velvet, 3D, puff, pastel... there's something for every taste! On top of that, it's super resistant to washing and to UV, so the result is that your gorgeous personalized garment will never leave your side!
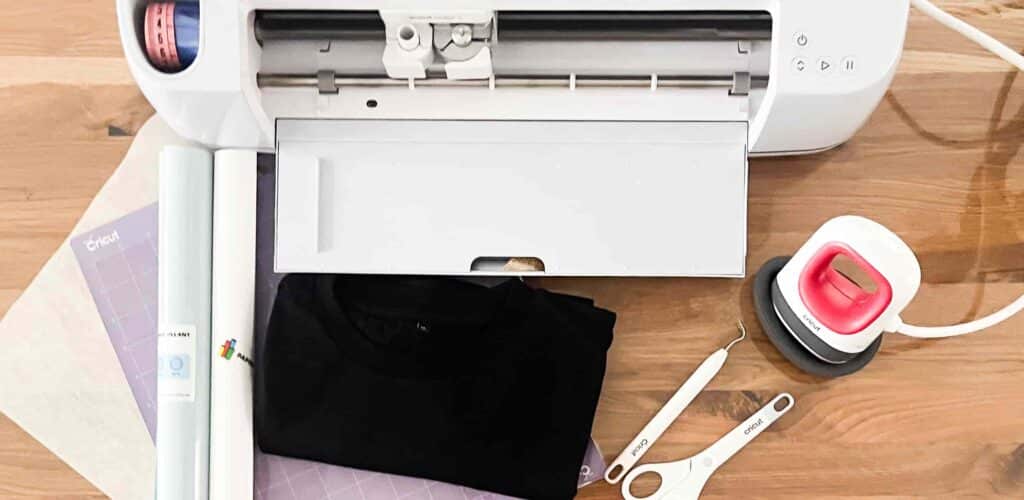
#Cricut Tutorial: Equipment to complete this Cricut tutorial
To complete this beginner tutorial, you'll need:
- The fabric base of your choice: a t-shirt, a pillowcase or even a napkin.
- A Cricut cutting machine, such as the Explore or Maker model
- A cutting mat: this will hold your flex in place properly for a snag-free cut
- The heat-transfer flex of your choice
- A graphic design software: the Cricut Design Space software comes with the machine
- A weeding tweezer or hook
- A sheet of Teflon or, failing that, parchment paper
- The Cricut heat press or mini press
And that's all: easy, fast and effective, all that's left is to bring your first transfer to life.
#Cricut Tutorial: Create your design with the Cricut Design Space software
Once you've downloaded the Cricut Design Space software and followed the various steps to sign in, you can start creating your very first personalized design. To do this, click the "start a new project" button to open your work surface (a canvas).
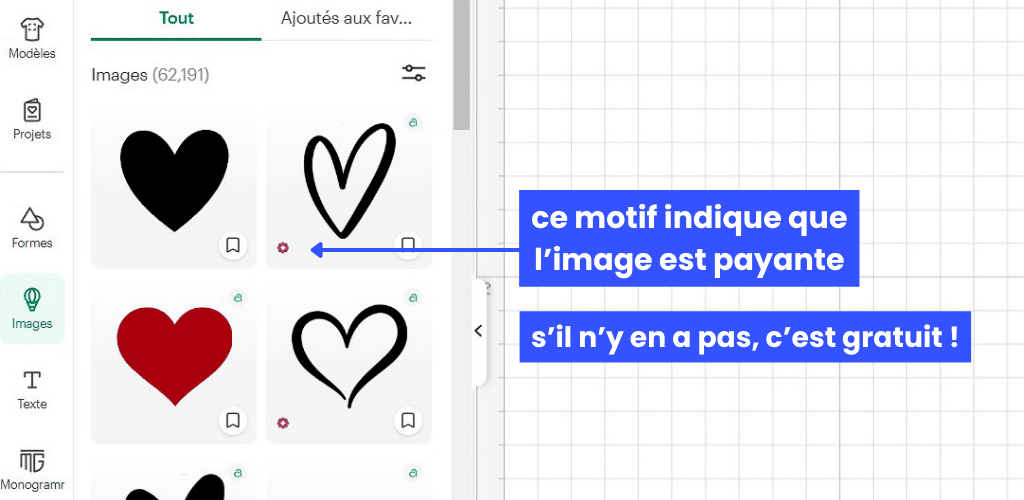
Now, time to get creative! The Cricut Design Space software is full of resources for creating the design of your dreams: add text, shapes and patterns and, above all, have fun. Just note that cricut has a library of royalty-free illustrations and patterns, but some can also be purchased directly from the software.
🛒
If you go for text, you can format it using the panel above the canvas. You can choose your typeface, the alignment, the letter spacing or even the weight of your text. Be careful, remember to select a font that's easy to cut and to weed. If you select a font that's too thin, you might have trouble with the steps that follow and your text could be illegible. If you're not sure of yourself, remember to do a test cut to see how your creation turns out.
Then add shapes to round it out: heart, star, circle, flower. Here too, get those brain cells working: you can choose to enlarge them, to simply cut out the outlines or even to place them behind your text for a stunning result.
Already have your design and want to use it in the software? No problem, just click "upload" and choose your file. I recommend always importing your design in SVG format, which is the preferred one for cutting. If you don't have a design with this extension, you can also import a PNG or a JPG, just remember to remove the background properly. If your design is too complex, the conversion may be imperfect; in that case, you can touch up your design in the next panel that appears. Once your design is imported, click "add to canvas".
That's it, your design is ready! Before moving on to the next step, and to make sure the cut is perfect: group the elements you want to print together, so that everything cuts out on a single piece.
#Cricut Tutorial: Prepare the flex and start the cut
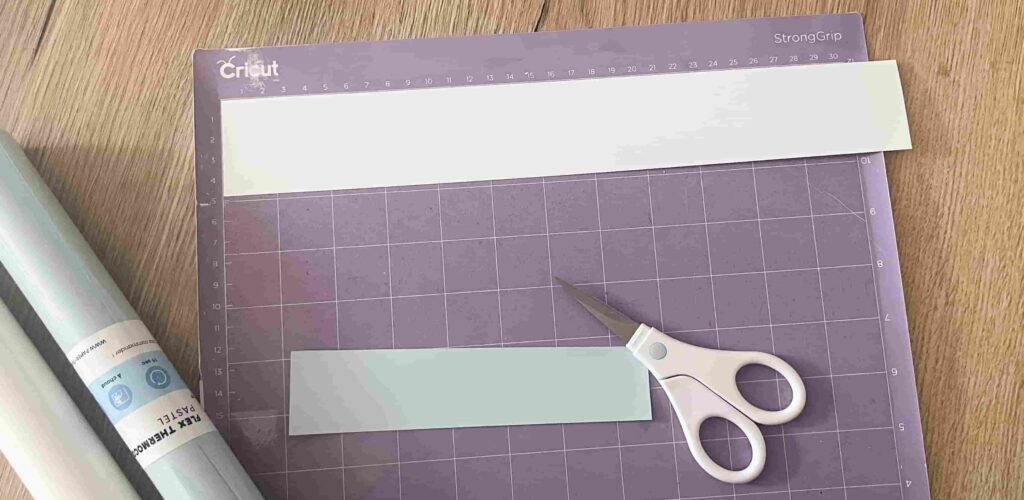
Cut your flex to a size slightly larger than that of your design (refer to the ruler markings on your work surface); that way, no waste. Then place your piece of flex on the cutting mat, lined up with the grid (always the same as the one in your software). The cutting mat is sticky, which is what will make sure your flex doesn't slip during the cut. The shiny side of it must be positioned face down, against the cutting mat. Once that's done and you've placed your mat into the machine, press the arrow button so that it positions itself properly and start the cut.
#Cricut Tutorial: Apply the transfer
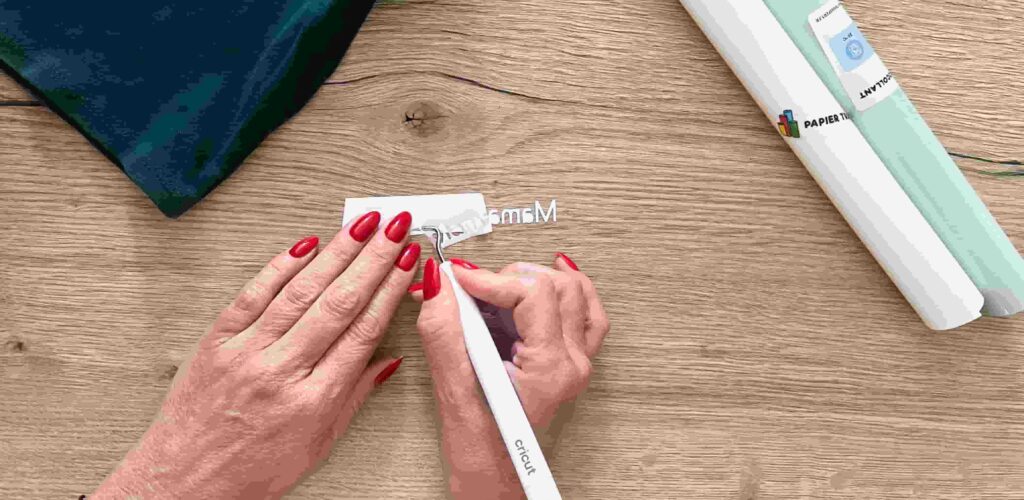
Your design is cut and ready to be positioned on your fabric. But before that, you'll need to weed it. For this, I recommend using a weeding tweezer or hook. Weeding consists of removing the unwanted bits of heat-transfer flex so that your design shows through. Be gentle during this step; it's easy to grab the flex in the wrong spot and damage your design. Once weeded, in principle you're left with your flex design as well as the transfer paper.
Place your design on your fabric, in the spot of your choice. I recommend using small pieces of tape to stabilize your design and make sure it won't move when you put it in the heat press (you can find high-temperature tape over here).
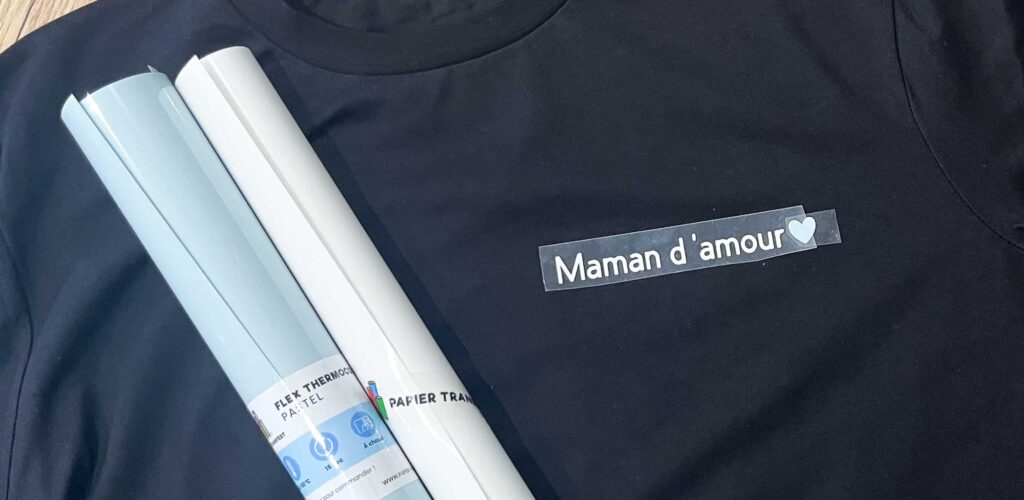
Finally, place your fabric on your cricut heat press, lay down the Teflon sheet or your parchment paper and hold for the time indicated on the label of your paper-transfer.com heat-transfer flex. If you have a mini press, heat it up then hold it over the Teflon sheet or the parchment paper sheet in the same way.
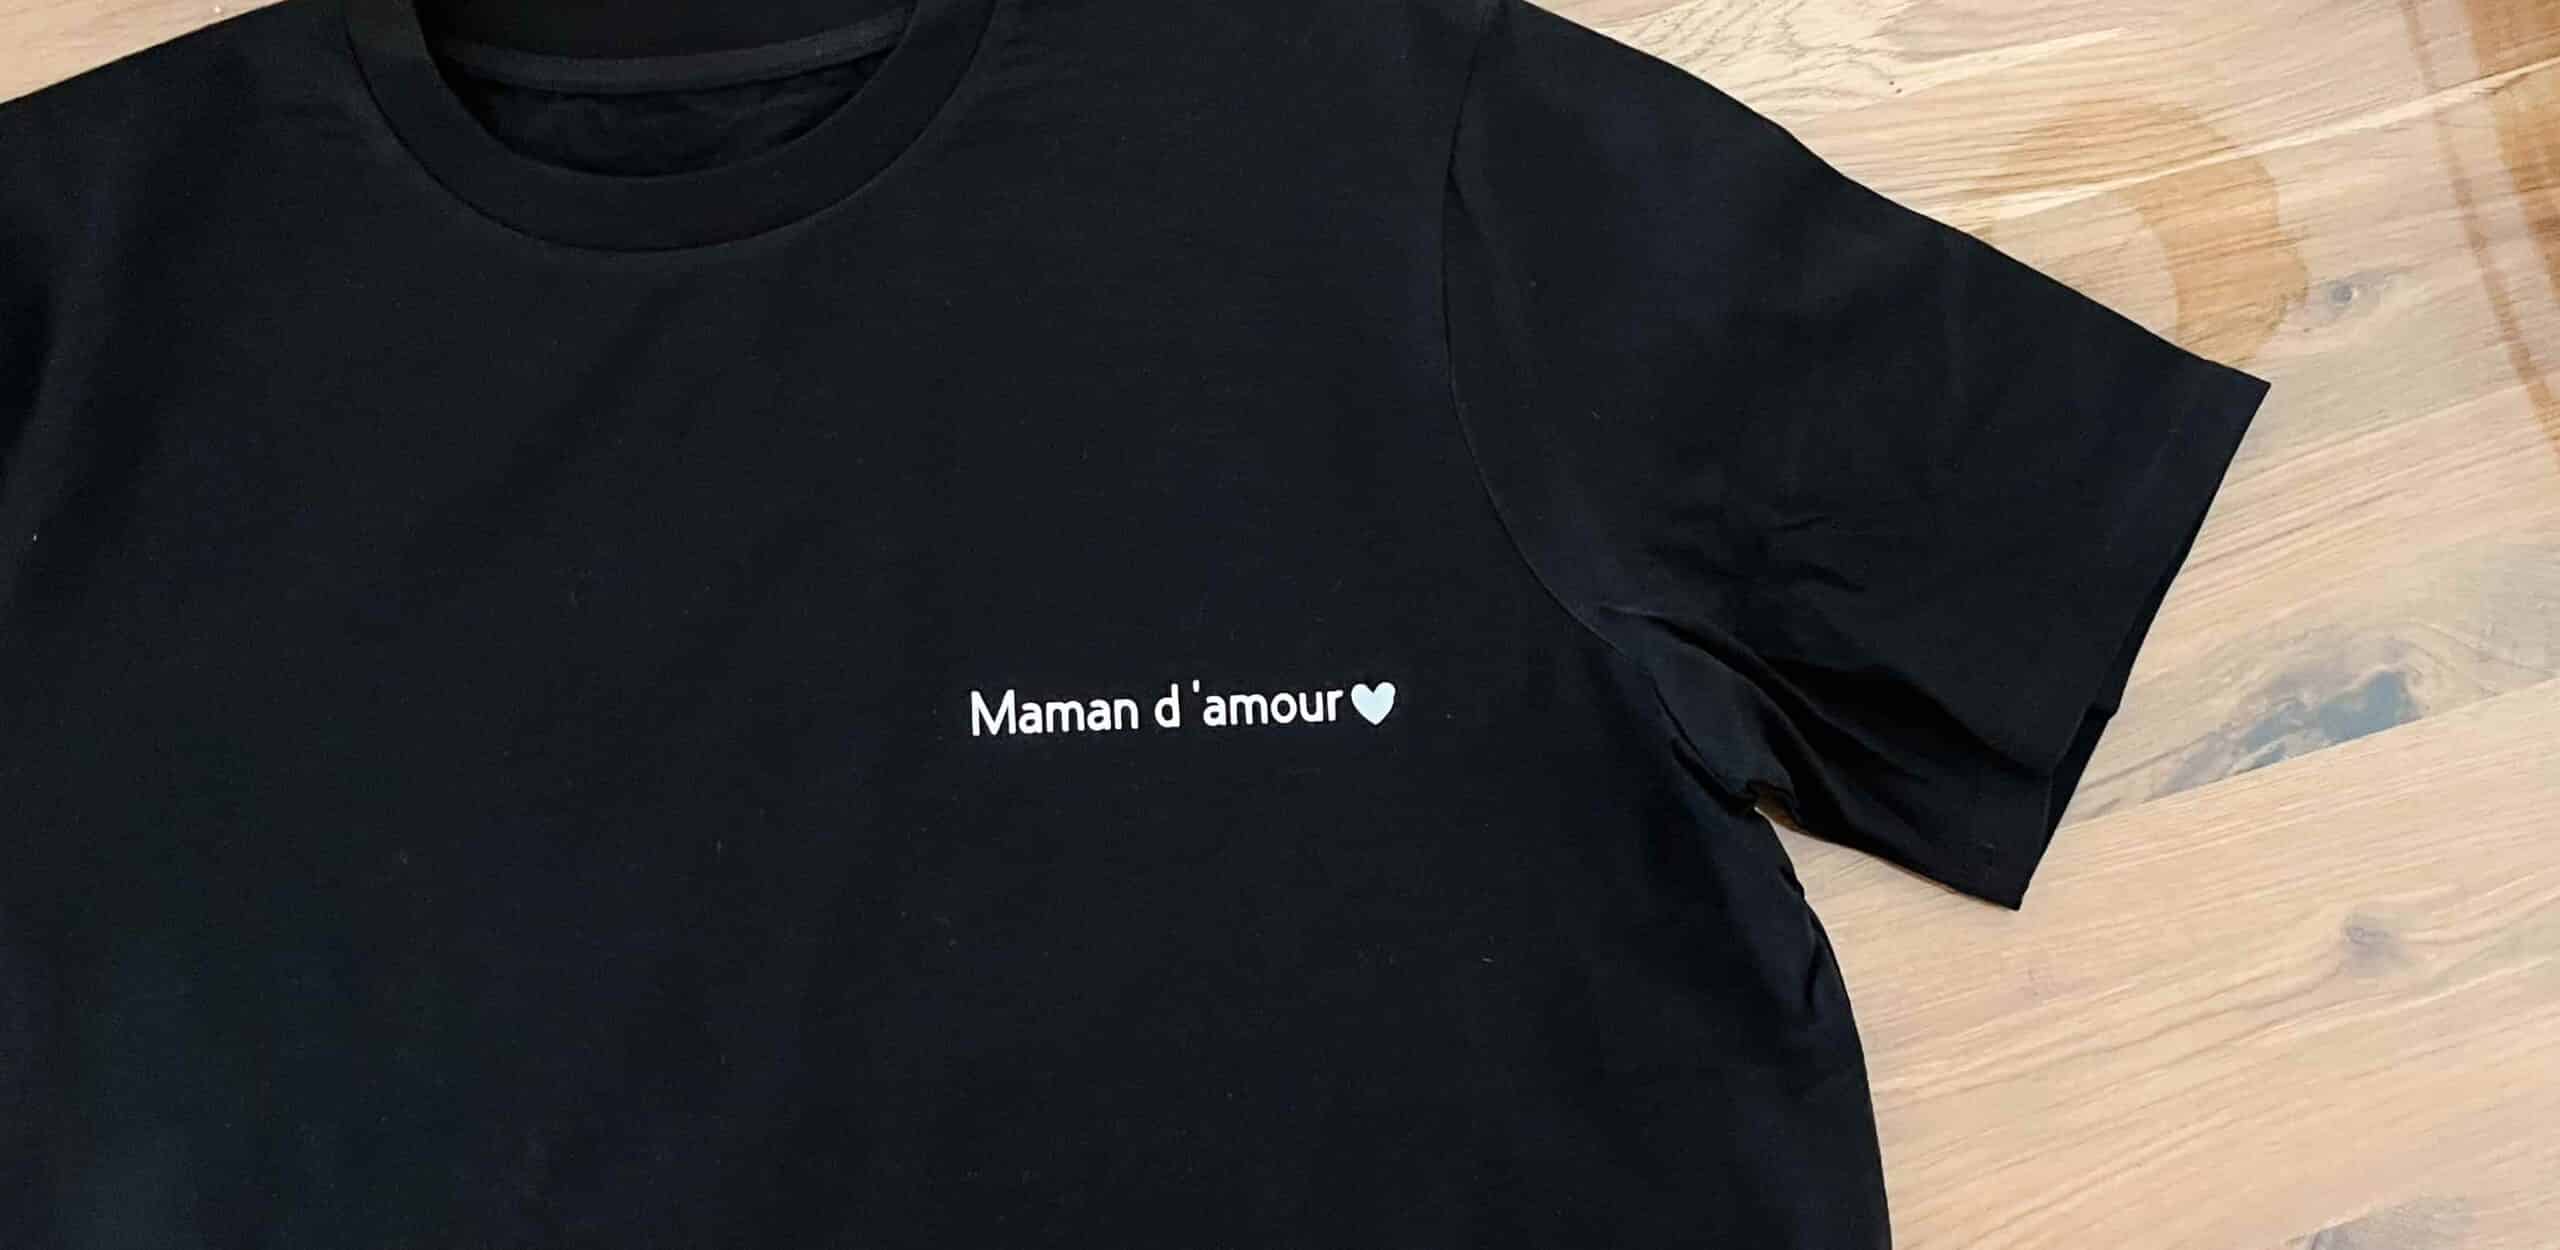
And there you go, in a flash you've succeeded with your first cricut textile transfer. You can be proud of yourself. Well done, creatives!
#Cricut Tutorial: Extra tips
To take it further, here are a few little tips that may come in handy:
- Keep your flex scraps for your other projects (you'll see, at one point or another you'll surely need that super flashy color again).
- When you want to cut your pattern with the machine and you're not sure of the size of certain elements, don't hesitate to do a test cut on flex scraps (see the first tip).
- Always clean your fabric before applying the flex: if it's pilled, the flex might not take, so remember to use a lint roller if that's the case.
- And finally, wait at least 24h before washing your fabric and always wash it inside out. That way, your flex will last even longer.

Here's to your creativity, artists! 🎨