
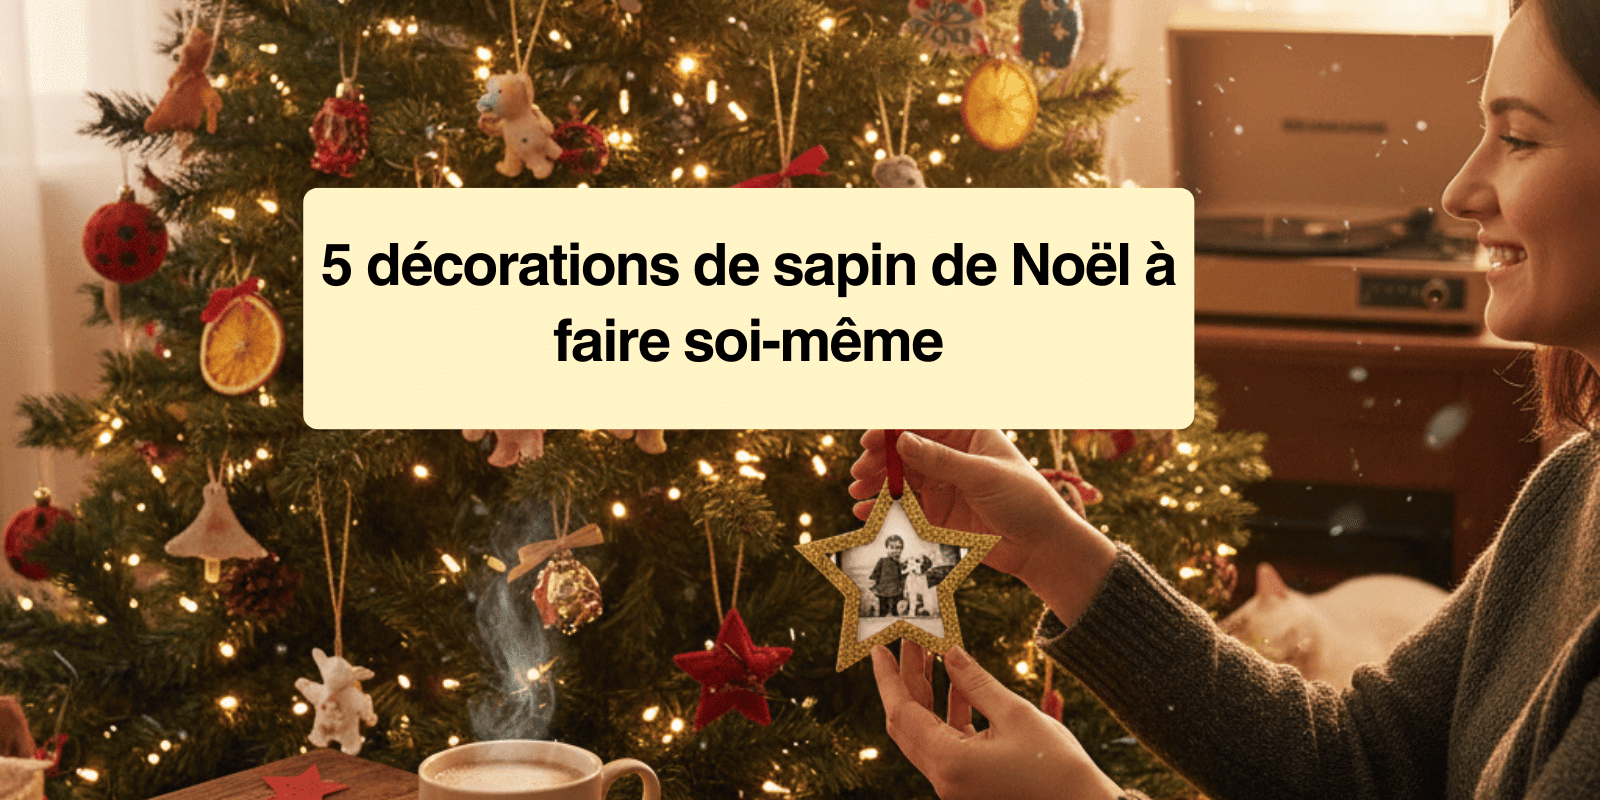
You know, every year I find myself thinking the same thing as I stand in front of my tree: "Why does a handmade decoration feel so magical?"
Maybe it's because it always tells a story. A cozy evening, a fit of giggles, a moment stolen between chores, and suddenly a simple piece of wood, a ribbon, or a bit of air-dry clay becomes more than an object. It becomes a memory.
The first time I made a DIY Christmas tree decoration, I was sure it would take hours. But it's actually the opposite: a few minutes, a little inspiration, and the tree already starts to transform. And that's where the real power lies: you're not just making a decoration, you're creating your very own Christmas atmosphere.
In this article, I've rounded up 5 DIY Christmas tree decoration ideas that are quick, easy, and full of charm, even if you're not a natural-born crafter. Whether you want to personalize your Christmas tree, keep the kids busy, or simply add a more authentic touch to your decor, you'll find exactly what you need right here.
Come on, let's put on some Christmas music and make a hot chocolate...
And let the magic begin
✨
.
🎄
- Personalized Name Ornaments
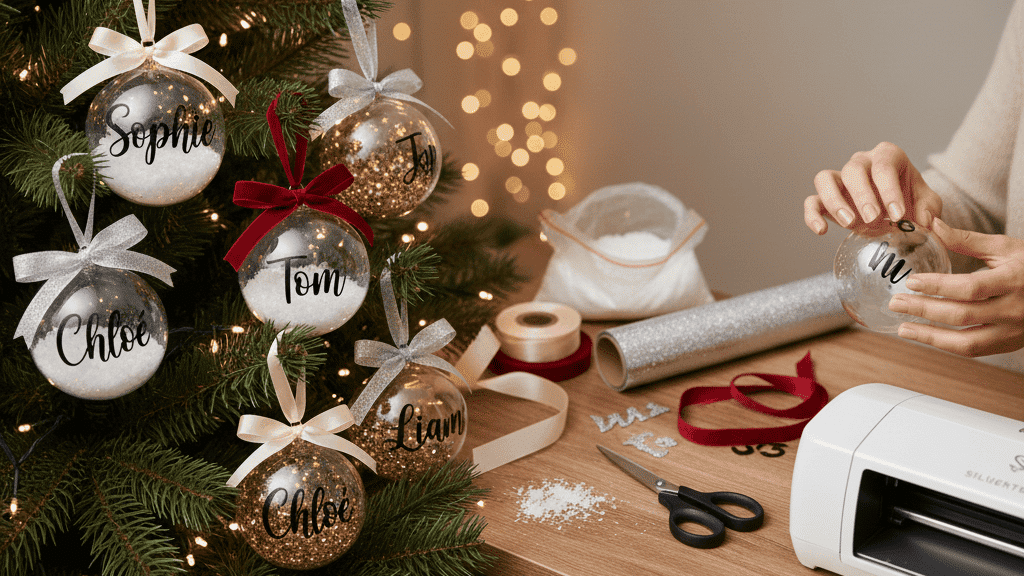
I still remember the first time I wrote someone's name on a Christmas ornament. It was a December evening, the tree lights were softly twinkling, and I felt the urge to add a more personal, heartwarming detail. When I hung up that Christmas creation, I felt my tree come alive in a new way: it became our tree, not just a store-bought decoration.
What You'll Need
-
Clear ornaments in plastic or glass
-
Small items to slip inside the ornament: confetti, fake snow, mini stars, glitter...
How to Make It
-
Cut out the name you want to feature with your Silhouette Cameo 5 (or a Cricut).
-
Gently stick it onto the ornament.
-
Add whatever you like inside: a little fake snow, glitter, a message...
-
Tie on a pretty ribbon to finish it off.
In just a few minutes, you'll have a completely handmade Christmas tree decoration that's both simple and full of emotion. What I love most about these ornaments is that they almost become little family treasures: every year, we take them out with the same smile.
Tip
For an even more polished look, choose a satin or velvet ribbon: it adds an elegant touch that instantly transforms the ornament, without any extra effort.
🌲
2. Engraved Wooden Ornaments
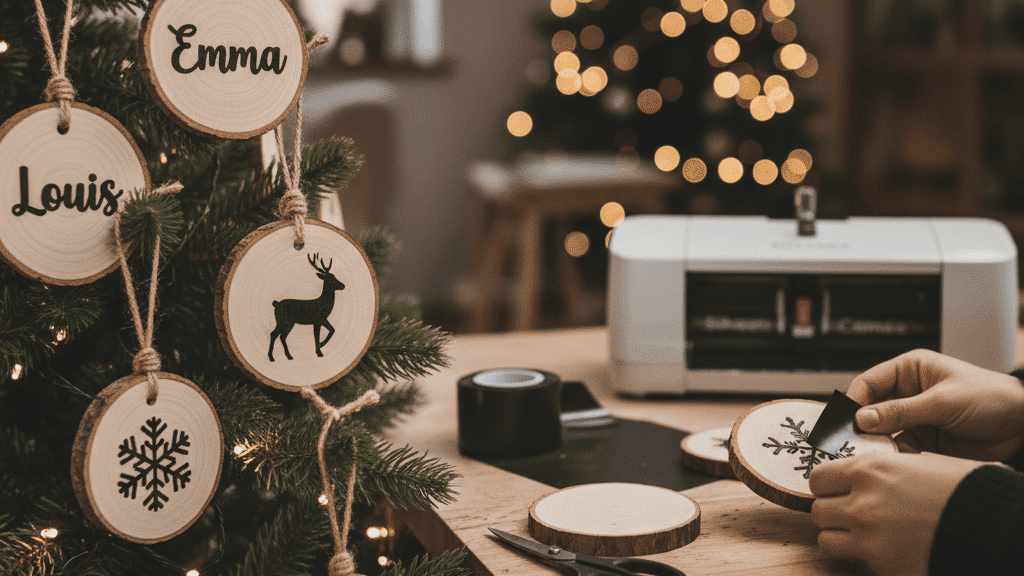
There's something timeless about wood. As soon as I work with it, I get this soothing feeling of getting back to basics: the gentle scent, the natural texture, the simple pleasure of making something that lasts. The first time I personalized a wooden ornament, I never expected such a small thing to be so much fun to make myself, and above all, to look so pretty on my Christmas tree!
What I love about this idea is that it combines simplicity and authenticity. You start with a very plain wooden ornament, and little by little, it turns into a warm, rustic decoration that's ready to take its place on our beautiful tree.
What You'll Need
-
Twine or thin cord
-
Varnish (optional)
How to Make It
-
Choose a design: a name, a star, a tree, a silhouette...
-
Cut out your design with your cutting machine.
-
If you want your decoration to last longer, add a thin coat of varnish.
-
Thread some twine through the hole in the ornament so you can hang it on the tree.
In just a few minutes, you'll have a DIY Christmas tree decoration that gives your tree that warm, almost Scandinavian feel we all love at Christmas.
Tip
For an even more natural look, use jute twine or twisted cotton string. And if you want your whole tree to look coordinated, make several wooden ornaments with matching designs: a little set that makes all the difference.
These wooden ornaments have that special magic of simple things... the kind that say so much. And trust me: once they're on the tree, they never go unnoticed.
⭐
3. Air-Dry Clay Stars
I think stars are the most symbolic Christmas decorations of all. And yet, making them yourself, with your own hands, adds a kind of magic nothing else can match. The first time you use air-dry clay, it feels a little unusual to work with: it's somewhere between modeling clay and salt dough, and it takes a while to figure out how to use it best. But once you get the hang of it, I promise you'll use it every year to make new decorations!
What I adore about these stars is that they look professional, even if you're a total DIY beginner.
What You'll Need
-
Air-dry clay (white or terracotta effect)
-
Toothpicks (for the hole and small details)
-
String, ribbon, or thin cord
-
Paint (optional)
-
Glitter (optional... but so pretty!)
How to Make It
-
Roll out your clay to about 5 mm thick.
-
Cut out your stars with a cookie cutter.
-
Use a toothpick to poke a small hole at the top of the star so you can hang it.
-
Let it dry for 24 hours (or longer, depending on the clay).
-
Paint, decorate, add glitter... let your imagination run wild.
-
Thread a string or ribbon through to finish.
And there you have it: a simple, elegant, lightweight DIY decoration that suits any tree style, from the most traditional to the most modern.
Tip
For a true "artisan boutique" look, lightly sand the edges with sandpaper once the clay is dry. The result is FLAW-LESS, almost good enough for a professional Christmas market.
These little stars are so charming: they're easy to make, perfect for doing with kids (they'll keep them busy for a few hours on the weekend!), and above all... they tell a little piece of your story. And on a tree, that's the most precious part!
PS: Don't hesitate to wet your fingers with a little water to smooth the edges after using your cookie cutter.

🎀 4. Ribbon Decorations: Bows, Spirals, and Mini Garlands
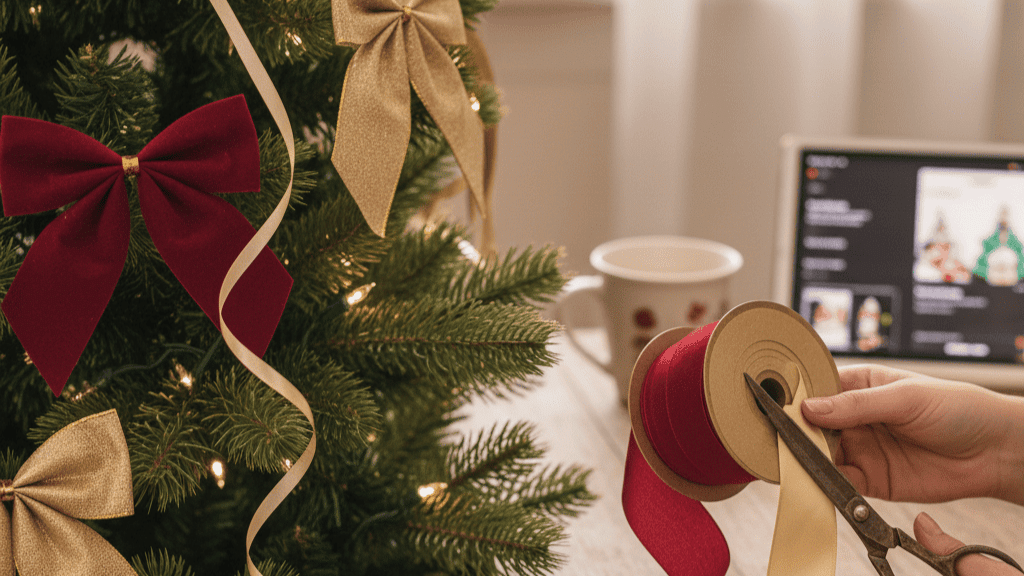
You know what has always amazed me about ribbon? How it can transform a tree in just a few seconds. The first time I bought a roll of ribbon thinking "Okay, I'll try something simple", I never expected the result to be so stunning!
A simple piece of ribbon, a pair of scissors... and suddenly the tree has an elegant look worthy of a big shopping mall.
What I adore about this tutorial is that it takes no skill at all. None. Just the desire to dress up your tree without any fuss. And the result is always stunning.
What You'll Need
-
Ribbon (satin, velvet, organza... depending on the style you want)
-
Scissors
-
String or an ornament hook
Steps: Bow Version
-
Cut a piece of ribbon about 25 to 30 cm long.
-
Tie a single or double bow, depending on how much volume you want.
-
Adjust the loops so they're nice and round and symmetrical.
-
Attach it directly to a branch of the tree, or use a small hook or your string.
Quick Mini Garland
-
Take a thin ribbon.
-
Tie little bows every 8 to 10 cm.
-
Drape the garland over the branches for a chic, minimalist look.
Both options let you create an ultra-elegant Christmas garland that's quick to make and, above all, easy to adapt to your style: pastel, gold, traditional, modern, Scandinavian... it all works!
Tip
If you want a truly coordinated tree, choose two ribbon colors max. Too many colors break the luxurious effect, while two well-chosen shades create a cohesive, professional look.
Ribbon really is the secret behind those "magazine-worthy" trees. And the best part is that you can use it even at the last minute: three well-placed bows and your tree instantly looks elegant!
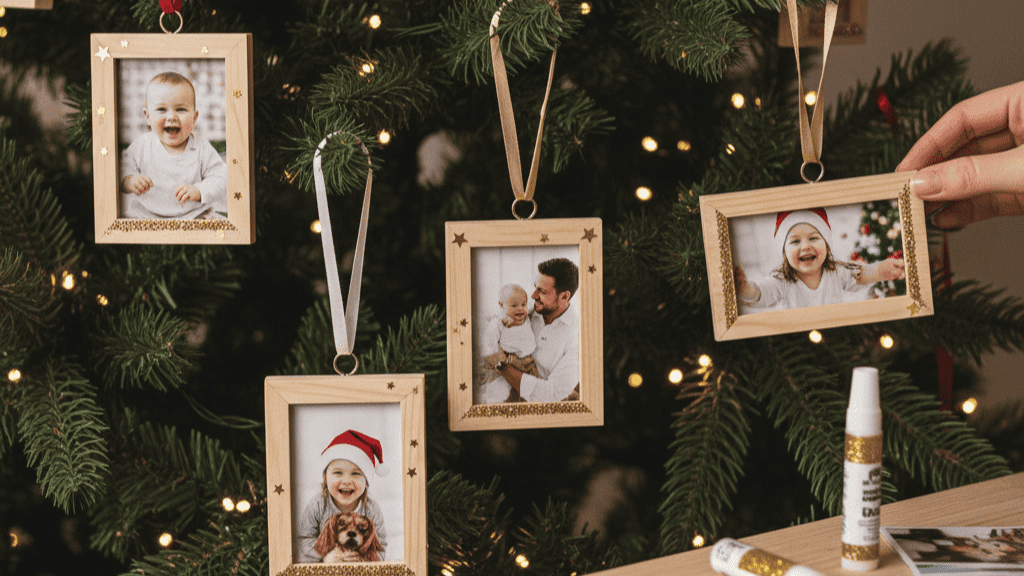
🖼️ 5. Mini Photo Frames, Christmas Edition
Some decorations aren't just pretty... they're sentimental. A beautiful family photo in a mini frame, hung on the tree (or even placed beneath it), instantly tugs at your heartstrings. You know, that mix of nostalgia and tenderness.
When I hung this frame, I realized that some Christmas decorations do much more than decorate: they tell our story, our joys, our big moments, but above all, our everyday lives. And what's great about these mini frames is that they're simple, quick, and incredibly touching!
What You'll Need
-
Mini wooden frames or plastic ones (you can find them everywhere)
-
Small photos (square or rectangular)
-
String, ribbon, or a hook
-
Optional: stickers made from adhesive vinyl, glitter, small embellishments
How to Make It
-
Choose a meaningful photo: your child laughing, a moment with your partner, your baby, your pet, a family photo...
-
Trim the photo to fit the frame.
-
Decorate the frame with mini adhesive vinyl stickers or a touch of gold paint.
-
Add a string or ribbon so you can hang it.
-
Hang it on your tree at eye level for maximum impact.
And there you go, you've just made a DIY Christmas tree decoration that instantly draws the eye. Even guests stop to look at it. It's the kind of decoration that makes people say:
"Oh, that's so cute, did you make it yourself?"
Tip
Go for photos with soft lighting or warm colors: they blend in better with the tree's atmosphere and create an irresistibly cozy effect.
These mini frames are a bit like sprinkling your tree with happy little memories... and trust me, they completely change the soul of your Christmas decor ✨.
✨ The Magic Continues...
When I think back on all the moments I've spent making decorations for my tree, I realize they aren't just objects I hang up... they're precious moments I give myself.
A few minutes when the world slows down and I reconnect with what really matters: the warmth of my home, the joy of creating, the DIY projects I make with my kids, the simple yet profound magic of Christmas.
With these 5 ideas, I hope I've shown you that you don't need complicated supplies or DIY pro skills to turn your tree into a truly personal work of art. A decoration that reflects who you are, that tells your story, and that creates memories for you and the people around you.
And the best part of all?
Every handmade decoration you create today will come back out next year, and the year after that... like a little piece of your story you'll be happy to find again with the same smile.
So trust yourself, experiment, create, and most of all, have fun!
Your tree is just waiting for you to make it sparkle ✨.
Ready to keep the magic going?
❓
FAQ: Everything You Need to Know About DIY Christmas Tree Decorations
1. Can I Make a DIY Tree Decoration Even If I'm Not Crafty?
Absolutely! These ideas are designed to be simple, easy, and quick. Even if you're new to DIY, you can make a beautiful homemade Christmas tree decoration. Often, it's the charm of imperfection that makes a decoration feel even more authentic.
2. How Long Does It Take to Make Handmade Tree Ornaments?
Most of these ideas take between 5 and 20 minutes. The only tutorial that takes a bit more patience is the air-dry clay one, because it needs time to dry. For the rest, you can make an original Christmas tree decoration right before you decorate your tree.
3. What Budget Do I Need to Make These Decorations?
A very small one! That's the great thing about it. A DIY Christmas tree decoration can cost less than 1 euro, depending on the supplies you already have. Ribbon, wood slices, vinyl, air-dry clay... these are all very affordable supplies, and you'll often find them already lying around a craft room or a home.
4. Where Can I Find Supplies for My Homemade Christmas Decorations?
You can find everything at:
-
craft stores like Cultura,
-
online shops,
-
discount stores like Action, Stockomanie, and Gifi,
-
or even outdoors (for wood, for example).
Even with very little, you can create a one-of-a-kind DIY Christmas tree decoration.
5. How Do I Keep My Decorations on the Tree?
The easiest way is to use:
-
string,
-
ribbon,
-
mini hooks,
-
or metal ties.
That way, your DIY Christmas tree decoration will stay firmly in place, even if the kids touch the tree... or your cat decides to take an interest in it.
6. How Do I Coordinate My Tree If I Make Several Different Decorations?
Choose a palette of 2 or 3 colors max: gold, red, white, natural...
Then make your DIY Christmas tree decorations using only that palette.
That's the secret to a tree that looks cohesive, stylish, and even professional.
7. Can I Do These DIY Christmas Tree Decoration Ideas with Kids?
Yes! And they love it.
The clay stars, mini frames, and ribbons are perfect for them.
It's a simple, creative moment full of magic, which is exactly what we love about Christmas.
8. How Many Homemade Decorations Do I Need to Fill a Tree?
It depends on the size of the tree, but in general:
-
10 to 20 homemade decorations are enough to give it a truly personalized style.
You can fill in the rest with simple ornaments.
The idea is for every DIY Christmas tree decoration to become a focal point✨
.




Comments
No comments yet. Be the first to share your experience.
Leave a comment