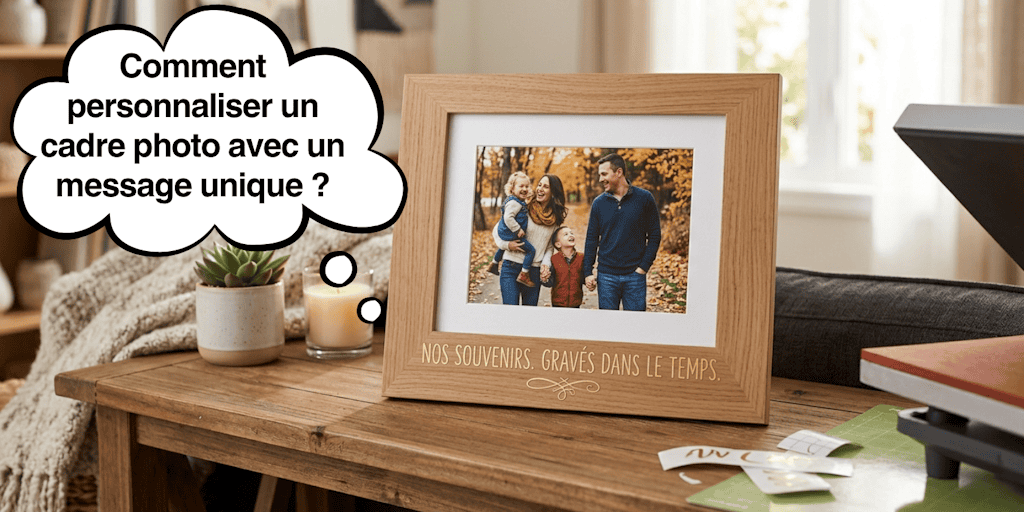
Alcune foto hanno un valore particolare. Catturano un momento preciso, un ricordo importante, un'emozione che vogliamo conservare nel tempo. La cornice permette di metterle in risalto, ma nella sua forma classica resta spesso piuttosto neutra.
Personalizzare una cornice permette di andare oltre. Aggiungendo un messaggio, non ci si limita più a esporre un'immagine, le si dà un contesto, un senso. La cornice diventa allora un vero e proprio mezzo di espressione, capace di raccontare una storia o di sottolineare un momento importante.
Questa personalizzazione non richiede per forza competenze tecniche avanzate. Con il flex termoadesivo è possibile ottenere un risultato pulito, preciso e duraturo, mantenendo al tempo stesso grande libertà nella scelta del messaggio e dello stile.
In questo articolo vedremo come personalizzare una cornice con un messaggio unico, usando un metodo semplice e accessibile, ma con una resa abbastanza curata da poterla regalare o addirittura proporre in vendita!
1. Perché personalizzare una cornice cambia tutto
Una cornice classica svolge la sua funzione: mette in valore un'immagine e si integra facilmente in un arredamento. Ma resta spesso impersonale. La appoggiamo, la guardiamo di tanto in tanto, poi finisce per confondersi con il resto della decorazione.
Personalizzare una cornice permette di cambiare completamente questa percezione. Aggiungendo un messaggio, anche semplice, si dà una dimensione in più all'oggetto. Non è più soltanto un'immagine incorniciata, ma un ricordo che si esprime, che racconta qualcosa di preciso.
Un nome, una data o una breve frase bastano a trasformare una cornice banale in un oggetto carico di significato. Lo sguardo non si posa più solo sulla foto, ma anche sul messaggio che la accompagna. L'insieme diventa più forte, più coerente, più memorabile.
È anche questo a fare tutta la differenza in un'ottica di creazione o di vendita. Oggi gli oggetti standard sono disponibili ovunque. Ciò che attira davvero è ciò che è unico. Scegliendo di personalizzare una cornice, si offre un valore che non si trova in un prodotto classico: un'intenzione, una storia, un'emozione.
Il flex termoadesivo si inserisce perfettamente in questo approccio. Permette di ottenere un risultato pulito, preciso e duraturo, senza complessità tecnica. È uno strumento accessibile che rende la personalizzazione allo stesso tempo semplice ed efficace.
2. Il materiale indispensabile per una resa pulita e professionale
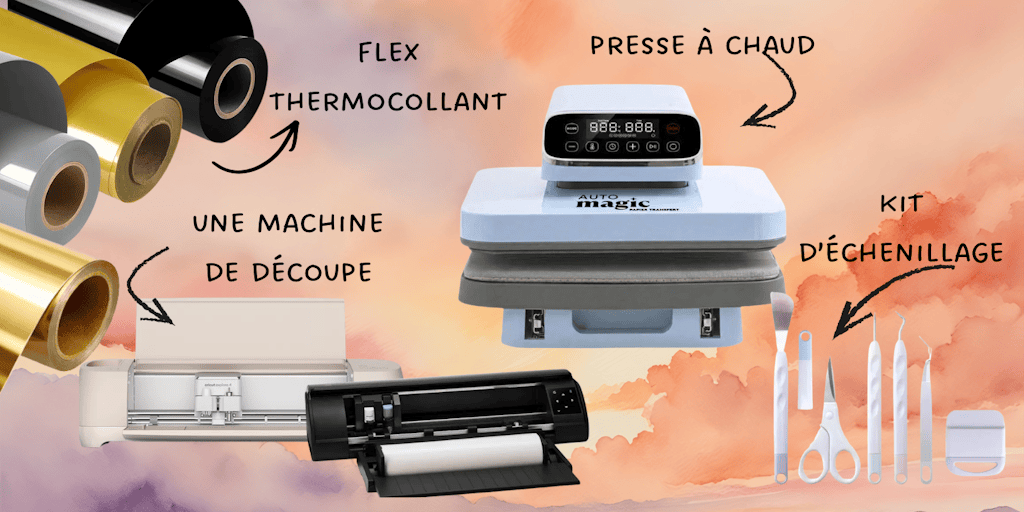
La qualità della resa dipende direttamente dal materiale utilizzato. Non è necessario avere un'attrezzatura professionale, ma alcuni elementi sono indispensabili per ottenere un risultato netto e duraturo.
Il flex termoadesivo è l'elemento centrale. È lui che permetterà di aggiungere il messaggio sulla cornice. Esiste in diverse finiture, ma le versioni opache sono quelle che preferisco per una resa più sobria ed elegante. Un flex termoadesivo di buona qualità è essenziale per garantire una buona tenuta nel tempo ed evitare difetti visivi.
Una macchina da taglio, come una Cricut o una Silhouette caméo 5 (o un'altra marca di macchina da taglio, del resto), permette di ottenere lettere precise e regolari. Facilita molto il lavoro, soprattutto per i caratteri sottili. Detto questo, per i disegni semplici un taglio manuale resta possibile, a patto di prendersi il proprio tempo ed essere precisi nel taglio.
Per fissare il tutto, una pressa a caldo è l'alleata ideale. A differenza di un ferro da stiro classico, permette di distribuire il calore in modo perfettamente uniforme e di esercitare una pressione costante su tutto il disegno. È il segreto perché il flex si fonda davvero con le fibre del legno della cornice, garantendo così che la tua creazione non si muova di un millimetro con gli anni. Se sei alle prime armi, un ferro da stiro può andare bene, ma fai attenzione alla temperatura e alla forza che eserciti!
Infine, la scelta della cornice ha la sua importanza. Le cornici semplici, dai colori neutri, permettono di mettere in valore il messaggio senza distogliere l'attenzione. Non resterà che applicare il flex termoadesivo tagliato sul legno!
Abbiamo parlato abbastanza del materiale, ora lasciamo spazio al tutorial by Alyah!
3. I passaggi per personalizzare una cornice con il flex termoadesivo
La personalizzazione di una cornice si basa su una serie di passaggi semplici, ma che richiedono precisione. Ogni fase ha un ruolo nella qualità della resa finale.
Il primo passaggio consiste nel definire il messaggio. Deve essere breve, leggibile e adatto alla foto. I messaggi troppo lunghi appesantiscono visivamente la cornice e perdono di impatto. Anche la scelta del carattere è importante, perché influenza direttamente la leggibilità e lo stile della resa. Per questo usa il tuo software di taglio, come il design space per le macchine della marca Cricut o il silhouette studio per le macchine della marca Silhouette Caméo.
Una volta pronto il disegno, arriva il taglio del flex termoadesivo. Se si usa una macchina, basta avviare il taglio con i parametri giusti; il vantaggio da Paper Transfer è che i parametri di taglio sono indicati su ogni flex termoadesivo (e questo è davvero un plus per non sprecare la materia prima!). Nel caso di un taglio manuale, è preferibile restare su forme semplici, a meno che tu non sia super a tuo agio con le tue forbici e i tuoi cutter!
Da parte mia ho scelto di non personalizzare direttamente sul legno, ma piuttosto di aggiungere un tessuto al posto della foto e di personalizzare su quello.
Poi la scartatura permette di rimuovere le parti inutili per conservare solo il messaggio. Durante questo passaggio, fai bene attenzione a non togliere parti del tuo disegno (sì, sì, un errore può capitare così in fretta!).
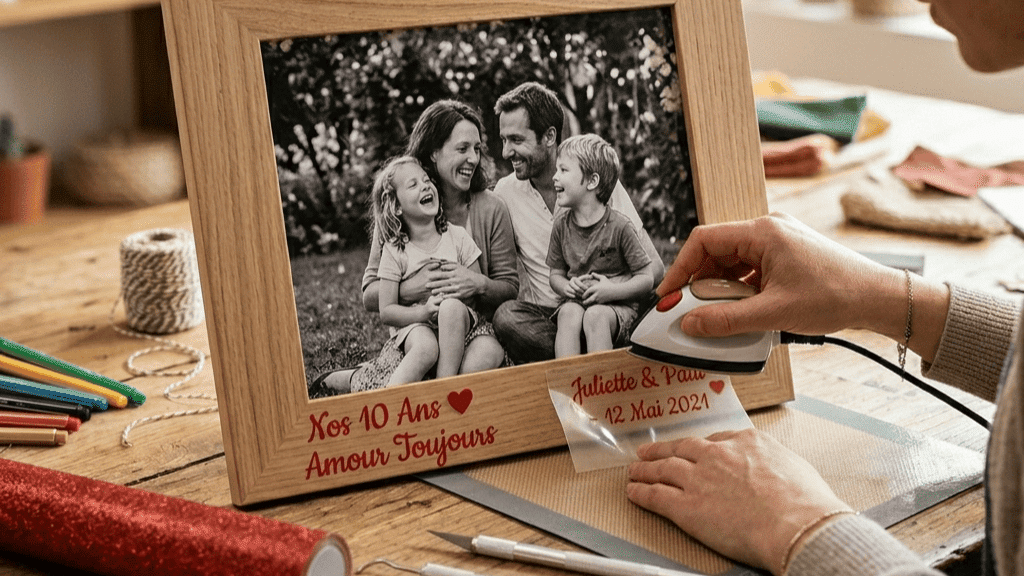
Prima di passare alla pressa a caldo, assicurati di centrare bene il tuo disegno e di posizionarlo esattamente dove lo desideri. Una volta applicato, è difficile rimuoverlo, e gli eventuali residui di colla rendono il risultato poco pulito se devi ricominciare!
Una volta sicuro del posizionamento, puoi passare il tuo motivo alla pressa a caldo. Un ferro da stiro può toglierti d'impaccio, ma resta una soluzione di ripiego. Regola la giusta temperatura, la pressione e il tempo di riscaldamento... ed ecco che la protezione di plastica è pronta per essere rimossa (attenzione, alcuni hanno una pellicola a freddo o a caldo, cioè devi togliere la protezione di plastica in base alla temperatura della stessa).
Infine, il film di trasferimento si rimuove delicatamente. Se alcune parti del flex termoadesivo non restano in posizione, basta ripassarci leggermente sopra prima di riprovare.
4. Idee di messaggi unici per personalizzare una cornice
La scelta del messaggio è un elemento determinante per la riuscita del progetto. Un messaggio troppo generico rischia di rendere la cornice banale, anche con una buona realizzazione tecnica.
I messaggi più efficaci sono spesso i più personali. Un nome accompagnato da una data, un riferimento a un momento importante o una frase legata a una storia particolare permettono di creare un oggetto davvero unico.
Anche i messaggi brevi, legati a un'emozione, funzionano molto bene. Rafforzano l'impatto della foto senza appesantirla. L'obiettivo non è scrivere molto, ma scrivere giusto.
È anche possibile introdurre un tocco di originalità, a patto di restare coerenti con il contesto. Un messaggio leggermente fuori dagli schemi può dare carattere, soprattutto in un contesto familiare o per un regalo.
Infine, il messaggio deve sempre essere adatto all'occasione. Una nascita, una coppia o un ricordo di famiglia non implicano gli stessi codici. Tenere conto di questo contesto permette di creare un insieme armonioso e pertinente.
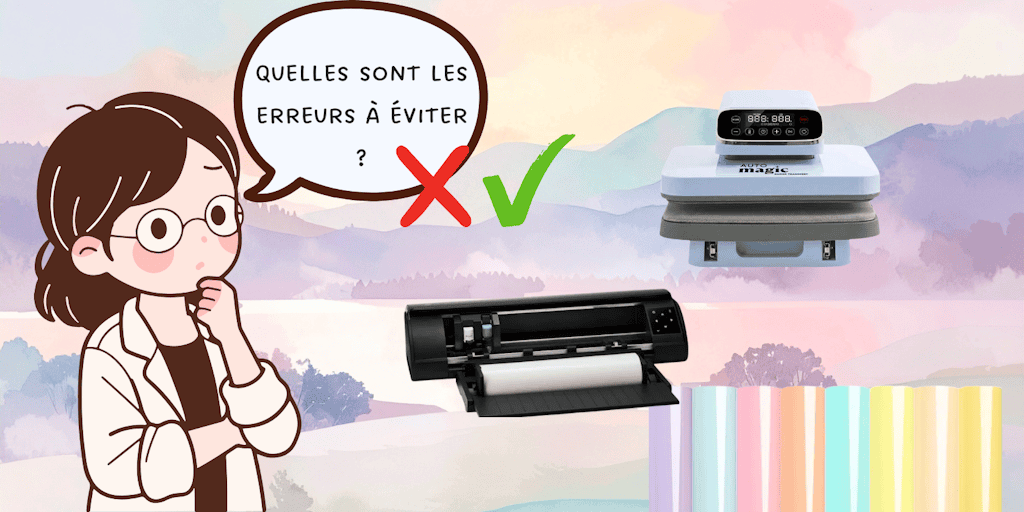
5. Gli errori da evitare per una resa pulita e duratura
Alcuni errori ricorrono di frequente e possono compromettere il risultato finale, anche se il resto del lavoro è ben fatto.
Un messaggio troppo lungo è spesso all'origine di una resa sovraccarica. Riduce la leggibilità e squilibra l'insieme. È preferibile restare semplici e concisi.
Anche la scelta del carattere può creare problemi. Un font troppo complesso o troppo sottile può essere difficile da tagliare e da applicare correttamente. Questo può causare difetti visibili o una scarsa tenuta nel tempo.
Il posizionamento del flex termoadesivo è un altro punto delicato. Un disegno mal allineato dà subito un'impressione di poca cura. È importante prendersi il tempo di verificare l'equilibrio visivo prima dell'applicazione.
La preparazione del supporto a volte viene trascurata, mentre è essenziale. Nel caso dell'uso di vinile adesivo, una cornice pulita male impedisce una buona adesione e favorisce la comparsa di bolle.
Infine, la fretta durante l'applicazione è un errore frequente. Un'applicazione troppo rapida aumenta i rischi di pieghe e difetti. Un'applicazione progressiva permette di ottenere un risultato più pulito e più duraturo.
Conclusione
Personalizzare una cornice permette di trasformare un oggetto semplice in un elemento portatore di significato. Aggiungendo un messaggio, si rafforza l'impatto della foto e si crea un insieme coerente e unico.
Grazie al flex termoadesivo, questa personalizzazione resta accessibile e non richiede competenze tecniche avanzate. Con un materiale adatto, un messaggio ben scelto e un'applicazione curata, è possibile ottenere una resa pulita e duratura.
Che sia per regalare o per creare un prodotto, l'interesse sta nella capacità di proporre qualcosa di diverso. Una cornice personalizzata non si limita a essere decorativa, si inserisce in un approccio più personale, più intenzionale.
FAQ: Personalizzare una cornice
Come personalizzare una cornice facilmente?
L'uso del flex termoadesivo è il metodo più semplice. Permette di aggiungere un messaggio preciso e pulito sul vetro o sulla cornice, senza materiale complesso.
Si può personalizzare una cornice senza macchina da taglio?
Sì, per i disegni semplici. Un taglio manuale è possibile, ma una macchina permette di ottenere un risultato più preciso.
Quale flex termoadesivo scegliere?
Si consiglia un flex termoadesivo di buona qualità. Una finitura metallica per una resa più elegante, glitterata, olografica oppure brillante a seconda del progetto scelto!
Come evitare le bolle durante l'applicazione?
Bisogna pulire il supporto e applicare il flex termoadesivo progressivamente, lisciando man mano.
Il flex termoadesivo dura nel tempo?
Sì, a patto di usare un flex termoadesivo di qualità e di rispettare i passaggi di applicazione.