Ogni anno la festa della mamma torna con il suo carico di domande. Quale regalo fare per fare piacere, senza cadere nel solito già visto? E con il passare del tempo diventa complicato trovare idee per un regalo fai da te!
I fiori restano un classico intramontabile, i cofanetti sono facili da comprare, ma queste opzioni mancano spesso di personalità. Eppure questa occasione merita un po' più di una scelta veloce. È il momento ideale per rallentare e riflettere su ciò che farebbe vibrare il cuore della tua mamma.
Creare un regalo con le proprie mani permette proprio di andare oltre. Un regalo fai da te per la festa della mamma porta con sé una dimensione personale che non si ritrova in un prodotto standard. Riflette un'attenzione particolare, un tempo dedicato e soprattutto un'intenzione: quella di dire "io ti conosco" attraverso un oggetto unico.
Non serve essere un artista esperto per cominciare. Con tecniche accessibili come il flex termoadesivo e il vinile adesivo, oggi è possibile personalizzare oggetti di tutti i giorni con un risultato pulito e duraturo, anche senza un'esperienza avanzata. Che tu voglia personalizzare un tessile accogliente o un accessorio decorativo elegante, l'unico limite sarà la tua immaginazione.
Prepara le tue macchine, scegli i tuoi più bei ritagli di materiale e lasciati guidare da queste ispirazioni pensate per lasciare il segno (negli animi e nei cuori).
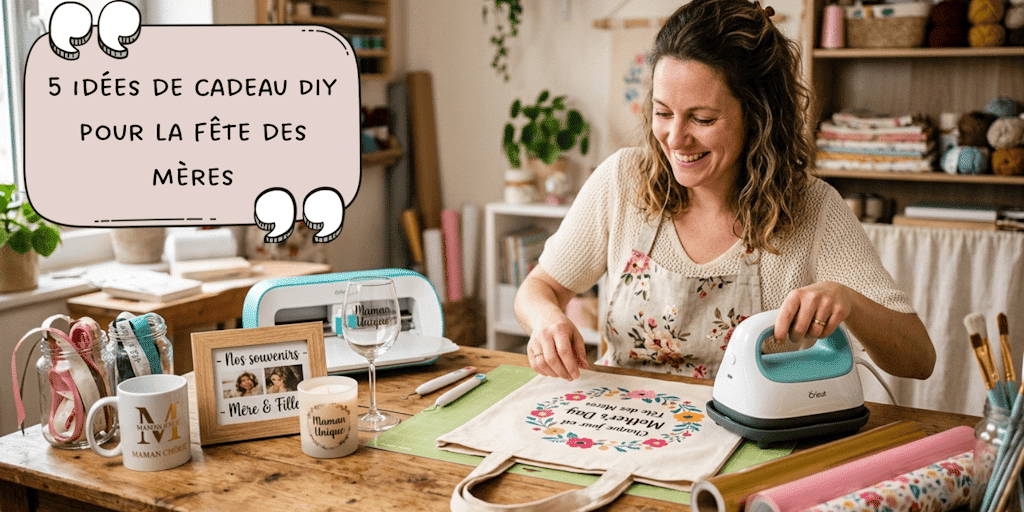
Ecco un articolo del blog, arricchito da 5 idee di regalo fai da te in formato mini tutorial dettagliato, e tutto questo sono i mini tuto by Alyah!

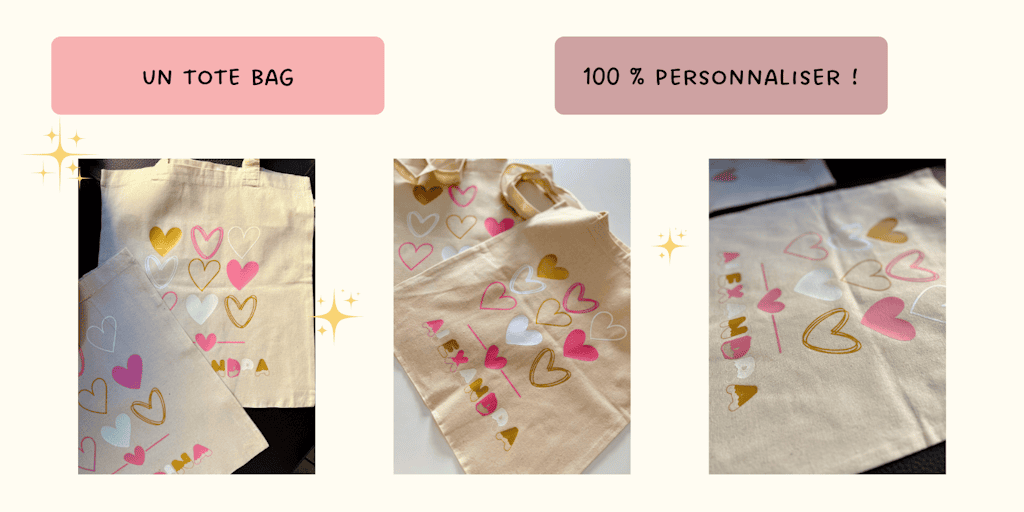
1. Una tote bag personalizzata con un messaggio
La tote bag è un supporto ideale per iniziare con la personalizzazione. È al tempo stesso pratica, riutilizzabile e facile da lavorare.
Regalare una tote bag personalizzata significa proporre un oggetto di tutti i giorni che assume un valore particolare grazie al messaggio che porta con sé. Una frase semplice, una parola affettuosa o persino un nome possono bastare a creare un effetto forte.
Mini tutorial: realizzare una tote bag personalizzata
Per questo progetto, è consigliato usare una tote bag in cotone chiaro per garantire un buon contrasto con il flex termoadesivo.
Comincia creando il tuo design sul tuo software di taglio. Prediligi un messaggio breve e leggibile. I caratteri troppo fini o troppo complessi possono complicare il taglio e il risultato finale.
Una volta pronto il design, avvia il taglio del flex termoadesivo facendo attenzione a posizionare il materiale correttamente, ovvero con il lato lucido contro il tappetino.
Dopo il taglio, passa alla scrostatura. Questa fase consiste nel rimuovere tutte le parti inutili per conservare solo il motivo o il testo con l'aiuto del tuo kit di scrostatura.
Posiziona poi il tuo visual sulla tote bag. Prenditi il tempo di centrarlo bene e per questo non c'è niente di meglio di un righello di centratura, perché un cattivo allineamento si nota immediatamente una volta realizzato il trasferimento.
Applica il calore con l'aiuto di una pressa a caldo di qualità o, in mancanza, di un ferro da stiro. Una pressione ferma e uniforme è essenziale affinché il flex termoadesivo aderisca correttamente al tessile. Rispetta le raccomandazioni del produttore riguardo alla temperatura e al tempo di posa (da Paper Transfer, tutto è indicato su ogni pagina prodotto!).
Una volta terminato il tempo della pressa a caldo, lascia raffreddare se necessario e poi rimuovi il film di protezione. Attenzione, alcuni flex termoadesivi hanno una pellicola che si stacca a caldo o a freddo!
I miei consigli per un risultato pulito:
Un design semplice funziona sempre meglio di un visual sovraccarico. L'obiettivo è ottenere un risultato leggibile e armonioso.
Pensa anche a preparare il tuo tessile stirandolo prima dell'applicazione per evitare le pieghe che potrebbero compromettere l'adesione.
Infine, evita di maneggiare la tote bag subito dopo la posa, per dare il tempo al flex termoadesivo di fissarsi bene!
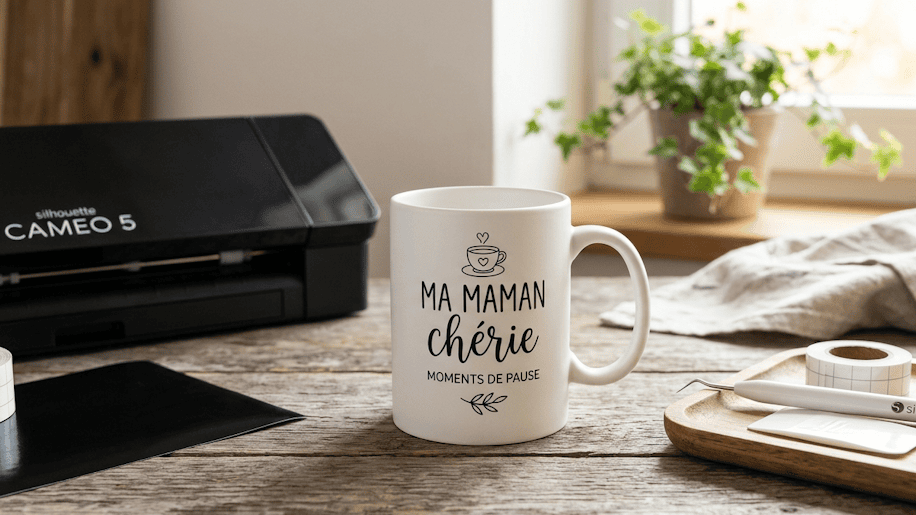
2. Una tazza personalizzata per i suoi momenti di pausa
La tazza personalizzata fa parte dei regali fai da te più efficaci, a condizione di essere ben pensata. È un oggetto che tua madre userà regolarmente, sia per il caffè del mattino sia per una pausa durante la giornata.
Qui l'interesse non è semplicemente personalizzare una tazza, ma piuttosto creare un visual che le corrisponda davvero. Una frase che dice spesso, una parola affettuosa o una piccola attenzione discreta possono bastare a rendere questo regalo totalmente unico.
Mini tutorial: personalizzare una tazza con il vinile adesivo
Per questo tipo di progetto, il vinile adesivo è perfettamente adatto, in particolare per un uso decorativo.
Comincia scegliendo una tazza liscia e pulita. La superficie deve essere perfettamente sgrassata affinché il vinile adesivo aderisca correttamente.
Crea poi il tuo design sul software della tua macchina da taglio. Come per la tote bag, prediligi un visual semplice e leggibile. I piccoli dettagli sono più difficili da posare, soprattutto se sei alle prime armi. E soprattutto, per un uso quotidiano della tazza, se i tuoi elementi in vinile sono troppo piccoli non terranno a lungo!
Avvia il taglio del vinile adesivo con l'aiuto della tua Silhouette Cameo 5, poi passa alla scrostatura rimuovendo le parti inutili con l'aiuto del tuo kit di scrostatura.
Applica poi un film di trasferimento (tape di trasferimento) sul tuo design per poterlo maneggiare facilmente. Posizionalo sulla tazza prendendoti il tempo di allinearlo bene.
Una volta a posto, premi progressivamente per far aderire il vinile con l'aiuto della tua spatola di posa, poi rimuovi delicatamente il film di trasferimento.
Consigli per un risultato duraturo
Evita di posizionare il visual su una zona troppo curva, perché complica la posa e può creare delle pieghe.
Questo tipo di personalizzazione è ideale per un uso delicato. È preferibile evitare la lavastoviglie e prediligere un lavaggio a mano per conservare il visual il più a lungo possibile.
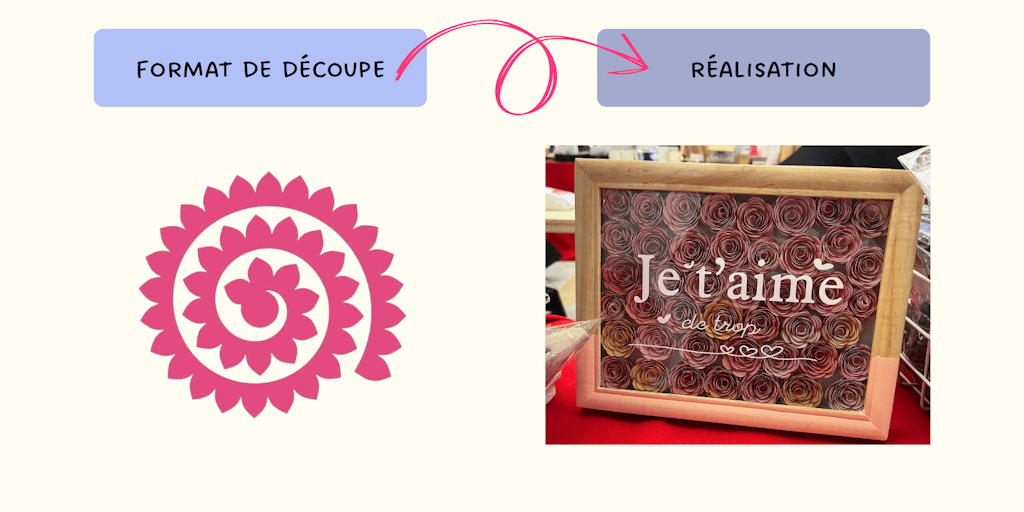
3. Una cornice fiorita sotto vetro per un effetto "wow"
Se cerchi di fare un regalo che unisca delicatezza e rilievo, la cornice riempita di fiori di carta è un'opzione irresistibile.
L'idea qui non è soltanto esporre un oggetto, ma creare un vero scrigno di dolcezza: un cuore floreale vibrante protetto da un vetro elegantemente personalizzato con il vinile adesivo.
Mini tutorial: creare una cornice di fiori in rilievo
-
Prepara il tuo supporto: Scegli una cornice "box" (con una certa profondità) dotata di un vetro. È questo spazio vuoto che accoglierà i tuoi fiori tagliati con la tua Silhouette Cameo 5.
-
Confeziona il tuo cuore: Realizza una moltitudine di piccoli fiori di carta (tipo rose arrotolate). Fissali sul fondo della cornice in modo da formare un cuore denso e regolare (da parte mia ho semplicemente incollato dei cuori su tutto il fondo della cornice).
-
Prepara il tuo messaggio: Taglia il tuo design o il tuo testo nel vinile adesivo. Una scrittura sottile aggiungerà un tocco di leggerezza in più.
-
Posa il vinile adesivo sul vetro: Pulisci bene il vetro, poi applica il tuo visual direttamente sulla faccia esterna. Questo crea un superbo effetto di profondità tra il testo in primo piano e i fiori sullo sfondo.
-
Assembla il tutto: Richiudi la cornice. Il contrasto tra il rilievo dei fiori e la finezza del vinile adesivo sul vetro dà un risultato professionale e poetico!
Consigli per un risultato estetico
-
Gioca sulle sfumature: Usa una gradazione di colori per i tuoi fiori (un camaïeu di rosa o di bianchi) per dare movimento al cuore.
-
Cura la tipografia: Poiché lo sfondo è texturizzato dai fiori, prediligi un carattere di scrittura essenziale affinché il tuo messaggio resti perfettamente leggibile, ma soprattutto lascia spazio alla tua immaginazione!
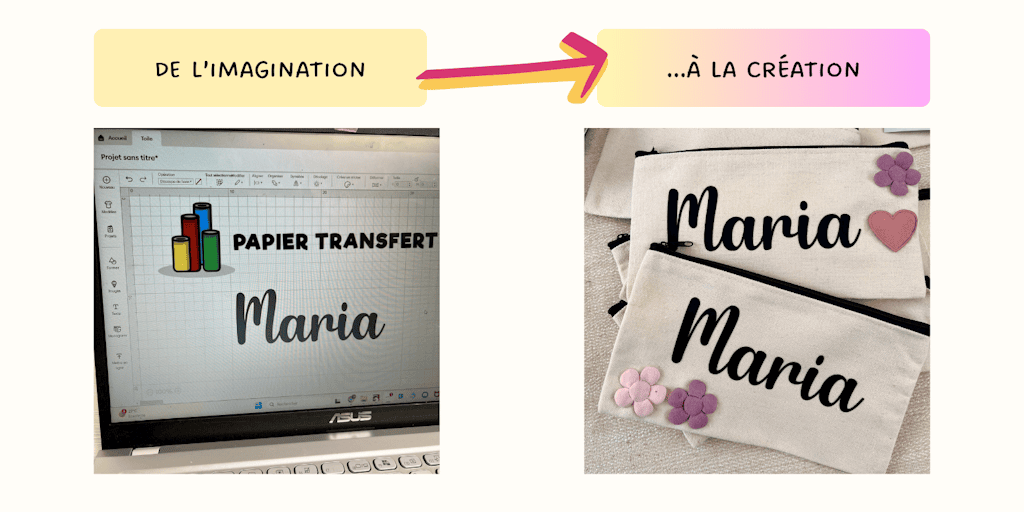
4. Un astuccio personalizzato utile ogni giorno
L'astuccio personalizzato è un regalo al tempo stesso pratico e facile da adattare. Può servire da beauty case, da contenitore o persino da pochette da viaggio.
È un'idea interessante se vuoi regalare un oggetto che sarà davvero usato ogni giorno.
Mini tutorial: personalizzare un astuccio in tessile
Scegli un astuccio in cotone o un astuccio in tela, preferibilmente con una superficie abbastanza liscia.
- Crea un design adatto alla dimensione dell'astuccio. Una parola, un nome o una frase breve bastano ampiamente.
- Taglia il tuo visual nel flex termoadesivo, poi scrostalo con l'aiuto del tuo kit di scrostatura.
- Posiziona il design sull'astuccio tenendo conto delle cuciture e delle chiusure per evitare ogni fastidio all'applicazione.
- Applica il calore con l'aiuto della tua pressa a caldo o di un ferro da stiro, ma attenzione ad avere una pressione uniforme. Se l'astuccio è spesso o presenta delle cuciture, adatta la pressione per garantire una buona adesione.
Consigli per un'applicazione riuscita
Fai attenzione alle zone irregolari come le cerniere lampo.
Prenditi il tempo di posizionare bene il tuo visual prima dell'applicazione, perché le superfici più piccole lasciano meno margine d'errore.
Allora, che ne dici di questo astuccio totalmente personalizzabile, eh? È davvero niente male per cominciare!
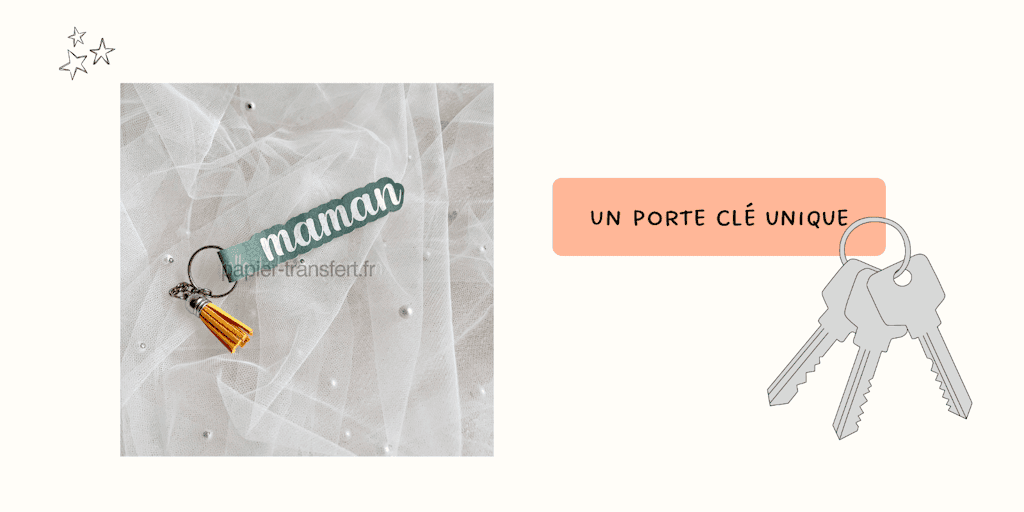
5. Un portachiavi in similpelle da portare ovunque
Per un regalo al tempo stesso pratico, elegante e totalmente unico, il portachiavi personalizzato è l'oggetto ideale. Non si tratta di decorare un oggetto esistente, ma di fabbricarlo interamente affinché corrisponda ai suoi gusti, ricordandole al tempo stesso una parola dolce a ogni utilizzo.
Mini tutorial: creare un portachiavi in similpelle e flex termoadesivo
-
Preparazione del materiale: Procurati una macchina da taglio, della similpelle, del flex termoadesivo, un anello da portachiavi e una piccola pinza per l'assemblaggio.
-
Taglio della forma: Usa la tua macchina da taglio per creare la forma di base del tuo portachiavi nella similpelle. Un semplice rettangolo o una forma a cuore sono dei classici intramontabili.
-
Creazione del design: Crea il tuo testo o il tuo motivo sul software della tua macchina da taglio. Ricordati di metterlo in "specchio" prima di avviare il taglio sul tuo flex termoadesivo.
-
Scrostatura precisa: Una volta tagliato il flex termoadesivo, scrostalo con l'aiuto del tuo kit di scrostatura con cura per conservare solo il motivo da trasferire.
-
Applicazione del flex termoadesivo: Posiziona il tuo motivo in flex sul pezzo in similpelle. Usa una pressa a caldo (o, in mancanza, un ferro da stiro) esercitando una pressione ferma e uniforme. Rispetta bene i tempi e le temperature raccomandati per la similpelle E per il flex termoadesivo.
-
Distacco della pellicola e assemblaggio: Una volta fissato il flex termoadesivo, lascia raffreddare prima di rimuovere delicatamente il film di protezione. Infine, usa la pinza per assemblare il tuo portachiavi all'anello.
I miei consigli per un risultato riuscito
-
Semplicità prima di tutto: Per il flex termoadesivo, prediligi un design semplice e un carattere leggibile. I dettagli troppo fini saranno più complessi da lavorare e rischiano di non aderire bene.
-
Contrasto elegante: Scegli dei colori che si abbinano bene e che permettano al testo in flex di risaltare bene sulla similpelle (ti garantisco che il risultato non si farà attendere!).
È già la fine...
È già la fine... Eh sì, è già la fine di questi tutorial, ma non preoccuparti, ci ritroviamo molto presto per nuove idee di fai da te!
Spero che questi spunti ti abbiano fatto venire voglia di tirare fuori i tuoi attrezzi e di lasciar parlare la tua creatività. Fare un regalo fai da te per la festa della mamma permette di uscire dalle opzioni classiche e di portare un vero valore emotivo. Non è solo un oggetto che si dona, è un ricordo che si fabbrica.
Con materiali come il flex termoadesivo e il vinile adesivo, è possibile trasformare un oggetto banale in un pezzo unico, utile e duraturo, senza alcuna complessità tecnica. Non dimenticare: l'essenziale resta nella scelta del messaggio e nella semplicità del design. Sono spesso le creazioni più essenziali, quelle che vengono dal cuore, ad avere il maggiore impatto.
Prendersi il tempo di creare significa anche regalarsi una parentesi creativa per sé prima di fare piacere agli altri. Anche un progetto semplice fa sempre la differenza perché porta la tua impronta. Allora, quale idea proverai per prima?
FAQ: Le vostre domande, le mie risposte
Qual è il materiale minimo per cominciare?
Una macchina da taglio (tipo Cricut o Silhouette), qualche foglio di flex termoadesivo o di vinile adesivo, uno scrostatore e una pressa a caldo (o un ferro da stiro) bastano per realizzare la maggior parte di questi progetti. Non serve un laboratorio completo per fare meraviglie!
Queste creazioni durano nel tempo?
Assolutamente! A condizione di rispettare le temperature di posa, il tempo di pressione e le istruzioni di manutenzione (come il lavaggio al rovescio). Il flex termoadesivo è particolarmente duraturo sul tessile e sopporta molto bene i passaggi in lavatrice.
Si possono realizzare questi progetti senza macchina da taglio?
È possibile con pazienza e un buon taglierino di precisione, ma il risultato sarà inevitabilmente meno dettagliato. La macchina fa davvero risparmiare tempo e permette di ottenere quel risultato pulito e professionale che adoriamo.
Quanto tempo ci vuole per realizzare un regalo?
È tutto il vantaggio di queste tecniche! La maggior parte di questi progetti può essere realizzata in meno di un'ora, una volta pronto il tuo design. È la soluzione perfetta per un regalo dell'ultimo minuto che non sembra esserlo.
Dove trovare l'ispirazione per i design?
L'ispirazione è ovunque! Puoi partire da una citazione che le somiglia, da una data importante o semplicemente dai suoi motivi preferiti. L'importante è che il visual racconti una storia: la vostra.