

You know that moment at the start of the school year when your child comes home from school so proud... except two days later, their pencil case has mysteriously disappeared? Classic. Same color, same model, same style as their friend's... and just like that, it has a new owner without anyone noticing.
We've all been there: pencil cases that all look alike, get mixed up, lost, or swapped... and a child who's upset because they can't find "theirs" anymore. And yet a pencil case isn't just a school supply. It's a little piece of their world, something that stays with them all year long, sits on their desk, travels between home and school, and says a bit about who they are.
What if, instead of settling for identical pencil cases, you turned your child's into a one-of-a-kind, personalized item that no one could mix up? Personalizing a pencil case with your little one's name gives them much more than a simple label: it gives them something that truly belongs to them.
And here's the good news: you don't need to be a sewing or DIY pro to pull this off. With heat transfer vinyl from Transfer Paper, you can make a personalized pencil case easily and quickly, with a professional finish, right at home. In this article, I'll show you step by step how to personalize a pencil case with your child's name, even if you're a beginner.
1. Why Personalize a Pencil Case for Your Child?
At first glance, a pencil case is just a pencil case: a simple holder for pens, pencils, and erasers. But from a child's point of view, it's so much more. It's something they take out every day, handle, carry everywhere, and bring along as they learn. It's kind of like their own little territory in the middle of the classroom.
Personalizing a pencil case with your child's name is, first and foremost, a super practical solution. No more accidental swaps, mix-ups, or "but that's not my pencil case!" With their name clearly visible, there's no mistaking whose it is. Even in a class where everyone bought the same model, theirs is instantly recognizable. And for you, as a parent, it's also a way to cut down on lost and forgotten items.
But beyond the practical side, there's above all the emotional side. When a child sees their name on their pencil case, they feel genuinely proud. It's no longer just an ordinary item from the supermarket; it's THEIR pencil case. The one that belongs to them, reflects who they are, and was made just for them. It may seem like a small thing, but this little detail boosts their confidence and their attachment to their belongings.
So personalizing a pencil case helps you avoid everyday school hassles while giving your child a one-of-a-kind item that strengthens their sense of identity and independence. And the best part? You can make this personalized pencil case yourself, easily, with this tutorial (and some heat transfer vinyl), no DIY expertise required.

2. What You Need to Personalize a Pencil Case with Heat Transfer Vinyl
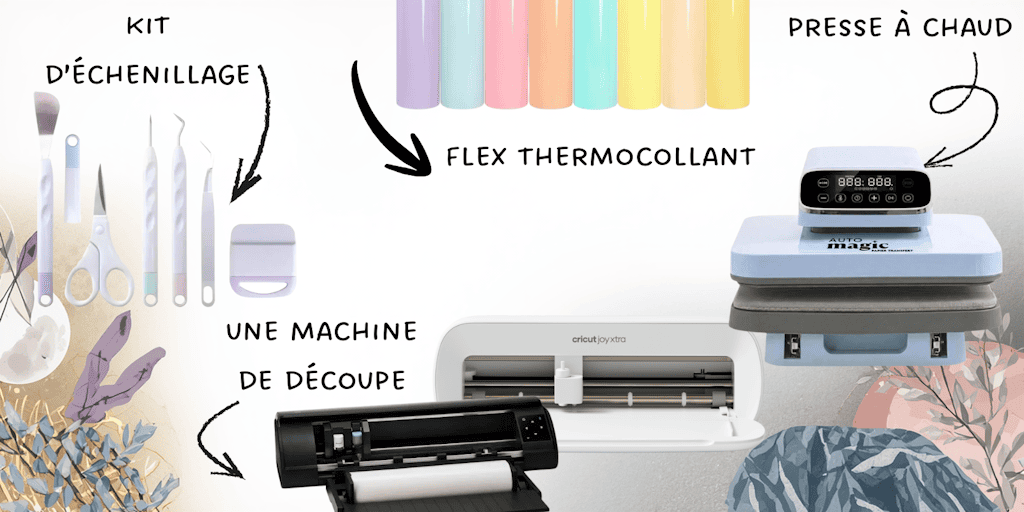
Before you get started, here's some good news: you don't need a professional workshop or any fancy equipment. Everything you need is easy to find, simple to use, and perfect for a clean, long-lasting finish.
First, you need... the pencil case.
Go for a fabric pencil case that can handle heat: cotton, polyester, or a blend of both. The smoother and flatter the fabric, the easier and cleaner the vinyl application will be. If you're a beginner, avoid materials that are heavily textured, waterproof, or plastic-coated, because vinyl doesn't stick to them as well (or at all).
Next, the key element: heat transfer vinyl.
This is what lets you put the name on the pencil case. You can choose from several types of heat transfer vinyl, depending on the look you want:
-
Premium HTV for a simple, elegant style,
-
Glitter HTV or holographic HTV for a fun, sparkly effect,
-
Pastel HTV to stand out nicely on a light or dark pencil case.
The big advantage of heat transfer vinyl is that it's opaque and works really well on both dark and light fabrics.
For cutting: a cutting machine (optional but highly recommended).
If you have one (like a Cricut or a Silhouette Cameo 5), it's ideal for cutting out the name and designs cleanly. Create your design in the software, then send it straight to the machine to cut the vinyl.
If you don't have a machine, you can also use pre-cut vinyl or ready-made heat transfer vinyl letters.
For application: heat.
You have two options:
-
An iron, perfect for getting started at home,
-
A heat press, if you have one (it'll make your life easier).
Finally, a few essential little tools:
-
A weeding kit (or a toothpick) to remove the excess heat transfer vinyl after cutting,
-
A Teflon sheet (or parchment paper) to protect the fabric and the heat transfer vinyl during pressing.
With these supplies, you're all set to personalize a pencil case easily and cleanly, with a finish that looks truly professional.
3. How to Personalize the Pencil Case, Step by Step
Now that we have all our supplies on hand, let's get down to business: making it. This is where the magic happens and your plain pencil case becomes one of a kind. No stress, we'll take it one step at a time, as if you were right next to me in your craft room (or your kitchen, let's be honest 😄).
3.1 Choose and Prepare Your Design
Before you even get to printing, you need to think about the final look. What name do you want to add? A simple font that's elegant and easy to read works really well. But if your child already has strong opinions, this is also your chance to make them happy: stars, little animals, hearts, cars, rainbows... anything goes.
The key is to size the name to fit the pencil case. Too big, and it may spill over the edges or not sit right. Too small, and it won't be visible enough. The ideal? A design that's nicely centered, easy to read, and in proportion to the available space.
Once your design is ready on the computer, you're all set for the next step.
3.2 Prepare and Cut the Heat Transfer Vinyl
We're not talking about printing on iron-on transfer paper here, but about heat transfer vinyl, which works differently.
The vinyl you choose matters, depending on the look you want and the color of your pencil case.
First, create the name (and a design, if you want one) in your cutting software (like Cricut Design Space or Silhouette Studio). Then place your sheet of vinyl on your cutting mat, shiny side down, and start the cut with your machine (in MIRROR mode!).
Once it's cut, it's time for weeding: gently remove the excess vinyl around the letters so only the name is left. It's a meticulous step, but it's so satisfying when the design really starts to show.
A little pro tip: always do a test on a scrap of fabric before working on the pencil case, especially if you're using a new type of vinyl or a new material. It'll keep you from completely ruining your pencil case (and losing your mind, haha).
3.3 Position the Vinyl on the Pencil Case
Once your name is cut and weeded, it's time to place it on the pencil case.
Carefully lay the heat transfer vinyl where you want it, clear side (carrier sheet) up, with the matte side of the vinyl against the fabric. Take the time to center the name properly: not too high, not too low, and above all, nice and straight.
If needed, you can make a small, discreet mark with a pencil or lightly hold the carrier sheet in place with a piece of heat-resistant tape so it doesn't shift during pressing. This step may seem minor, but it's the one that makes all the difference in the final result.
3.4 Apply the Vinyl with Heat
This is where the vinyl becomes a permanent part of the pencil case.
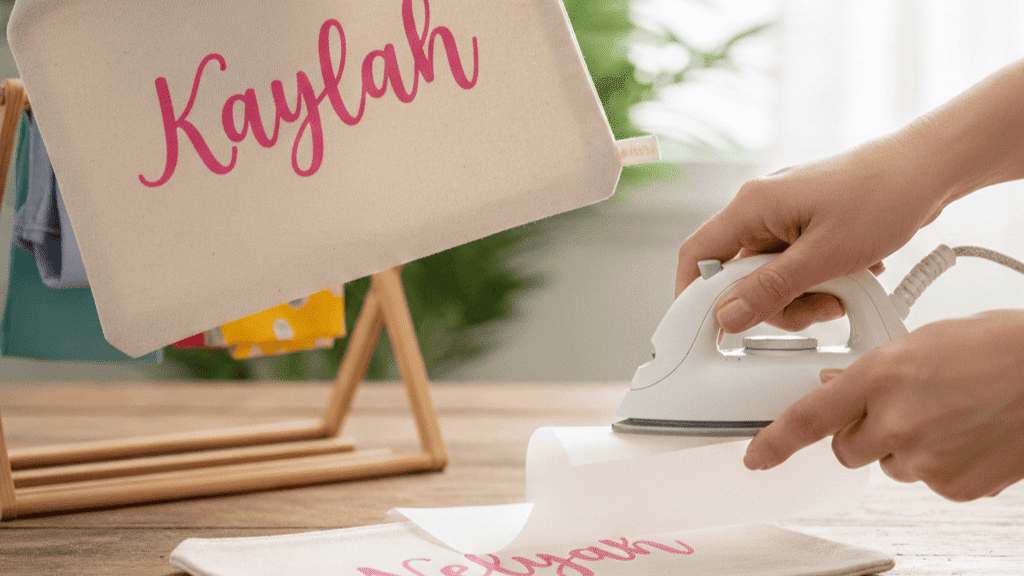
Place a protective sheet (parchment paper or a Teflon sheet) over your design, then:
-
With an iron: set it to the right temperature for the fabric (usually cotton), with no steam. Press down firmly and evenly for several seconds over the entire name.
-
With a heat press (if you have one): set the temperature and time according to the vinyl manufacturer's recommendations.
The goal is for the heat to slightly melt the heat-activated adhesive so it bonds perfectly to the fabric. That means you need steady, even pressure, without sliding the iron all over the place.
3.5 Remove the Carrier Sheet and Check the Result
Depending on the type of vinyl you're using, you'll need to do a hot or cold peel to remove the carrier sheet:
-
Either hot (right after pressing),
-
Or cold (after letting it cool for a few seconds).
Peel the carrier sheet off slowly and gently. If you notice a letter starting to lift, lay the sheet back down and apply a little more heat with the protective sheet on top.
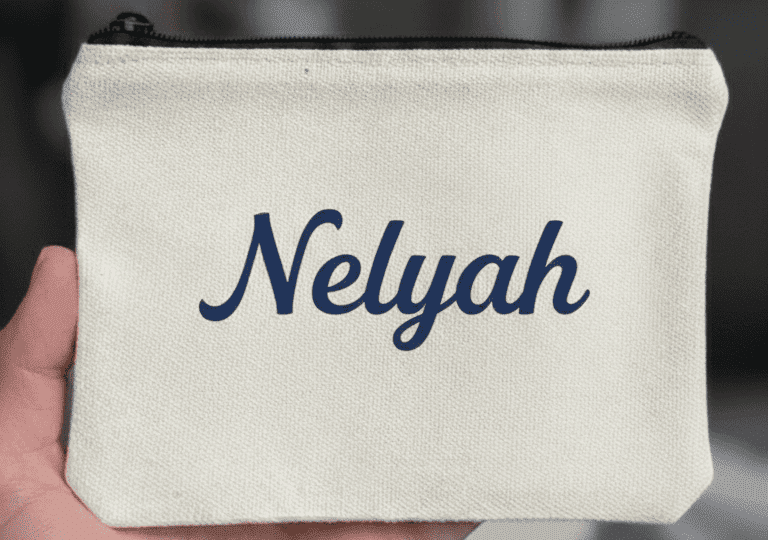
Once the carrier sheet is off, run your hand lightly over the name: it should feel smooth, firmly attached, and completely bonded to the fabric. And there you have it... your personalized HTV pencil case is ready! 🎉
4. Care Tips for Your Personalized HTV Pencil Case
Now that your child's name looks great in heat transfer vinyl, the goal is simple: make it last as long as possible. Because between pens, pencils, hands rubbing over it, and trips through the washing machine, that pencil case is going to live its best life... but it's also going to get a lot of wear.
The first must-do: wash the pencil case inside out.
This really is the number one habit to get into. Turning the pencil case inside out protects the vinyl from rubbing directly against the washer drum and other items. It reduces wear and helps the design stay crisp longer.
Next, skip the dryer.
Even though the vinyl is durable, the high heat of a dryer can weaken the bond over time. Let it air-dry instead, nice and easy on a drying rack. It's gentler on the vinyl... and on the fabric.
Another important rule: never iron directly over the vinyl.
If you really have to iron the pencil case (which is rare, let's be honest), always do it inside out or place a protective sheet (parchment paper or a Teflon sheet) between the iron and the vinyl. That keeps the vinyl from getting shiny, warping, or getting damaged.
Finally, if after several washes you notice a small corner of the vinyl starting to lift, don't panic. Just put a protective sheet back over it and give it a quick burst of heat with the iron to reattach it.
With these few precautions, your personalized HTV pencil case will stay looking great, easy to read, and durable all school year long... and well beyond.
Your Turn!
In the end, personalizing a pencil case with heat transfer vinyl proves that you can get a professional finish without being a pro. You don't need a workshop or high-tech equipment: just a little patience, some creativity... and the right vinyl.
It's not just a name stuck on a pencil case. It's a one-of-a-kind item, made with your child in mind, that tells a story. It's also time you spend creating something for them, and that's priceless.
Heat transfer vinyl gives you tons of freedom: colors, textures, effects (glitter, matte, iridescent...), anything is possible. And once you've got the hang of it, you can use this technique on all kinds of other things: bags, tote bags, toiletry bags, aprons, pillows, clothes...
So now it's your turn. Go for it, experiment, tweak things, and above all have fun with personalization. Because beyond the end result, the process itself is what's truly enjoyable.
✨
FAQ: Answers to Frequently Asked Questions
**1️⃣
Can You Personalize Any Pencil Case with Vinyl?**
Yes, as long as the pencil case is made of heat-resistant fabric (cotton, polyester, or a blend). Avoid plastic-coated, waterproof, or heavily textured materials, which keep the vinyl from sticking properly.
**2️⃣
Does the Vinyl Hold Up in the Wash?**
Yes, if it's applied correctly and cared for properly. If you wash the pencil case inside out, skip the dryer, and never iron directly over the vinyl, it can last a very long time.
**3️⃣
Can You Put Vinyl on an Insulated Pencil Case or a Bag?**
Yes, for many fabric bags (tote bags, classic pencil cases, cotton bags). For an insulated pencil case, it depends: if the outside is fabric, it's often possible. If the surface is fully plastic-coated or waterproof, the vinyl won't hold well (or worse, your pencil case will melt from the heat of the heat press).
**4️⃣
Do You Need a Heat Press to Apply Vinyl?**
No. A regular iron is enough to get started, as long as you apply firm, even pressure. A heat press is a nice bonus if you have one, but it's not a must.
**5️⃣
Can You Personalize a Dark Pencil Case with Vinyl?**
Yes, and that's actually one of the big advantages of vinyl: it stands out really well on dark fabrics, unlike iron-on transfer paper, which requires a special type of paper.



Comments
No comments yet. Be the first to share your experience.
Leave a comment