
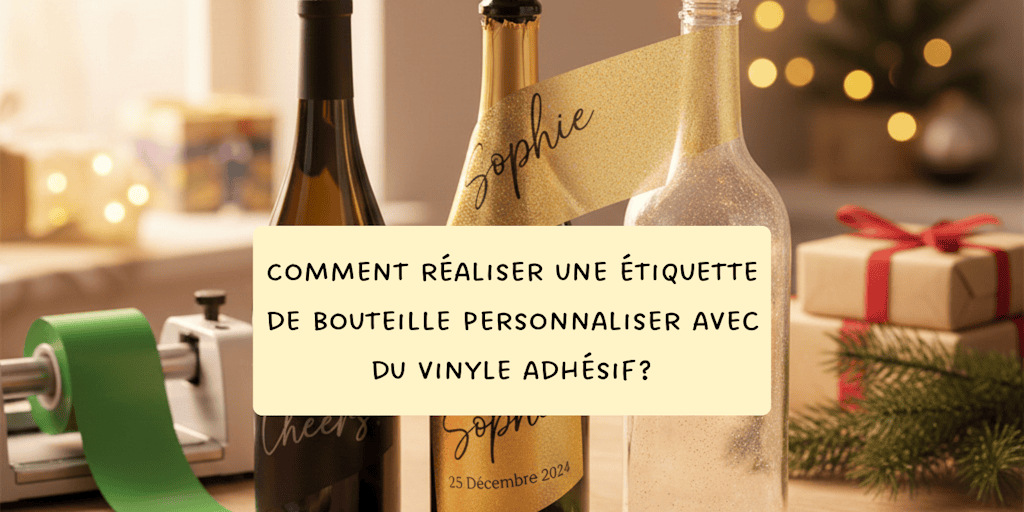
Creative inspiration often starts with a challenge to the ordinary. Looking at a simple bottle, about as everyday an object as you can find, I keep coming back to one question: how can I make it unique? During the holiday season, we give wine and share champagne, but the packaging always looks the same. A standard label, a predictable shape... in short, a story that falls a little flat.
Then the idea hits. Add a name. A date. A word that means something. And suddenly, the bottle becomes something more. It's no longer just a container; it's a keepsake. That's exactly where a personalized label on a bottle really comes into its own.
With adhesive vinyl, personalizing a bottle becomes a creative project anyone can take on, even if you're not a DIY expert. All you need is a few tools, a little imagination, and above all the desire to make someone happy or mark a special moment. Whether it's for a gift, an event, or your own brand, a personalized label turns an everyday object into a one-of-a-kind gesture.
In this article, I'll show you step by step how to make a personalized label for a bottle with adhesive vinyl, simply and cleanly, with results that really stand out. Because sometimes, it's the little details that tell the best stories.
Okay, let's not waste any time. We've got labels to make!
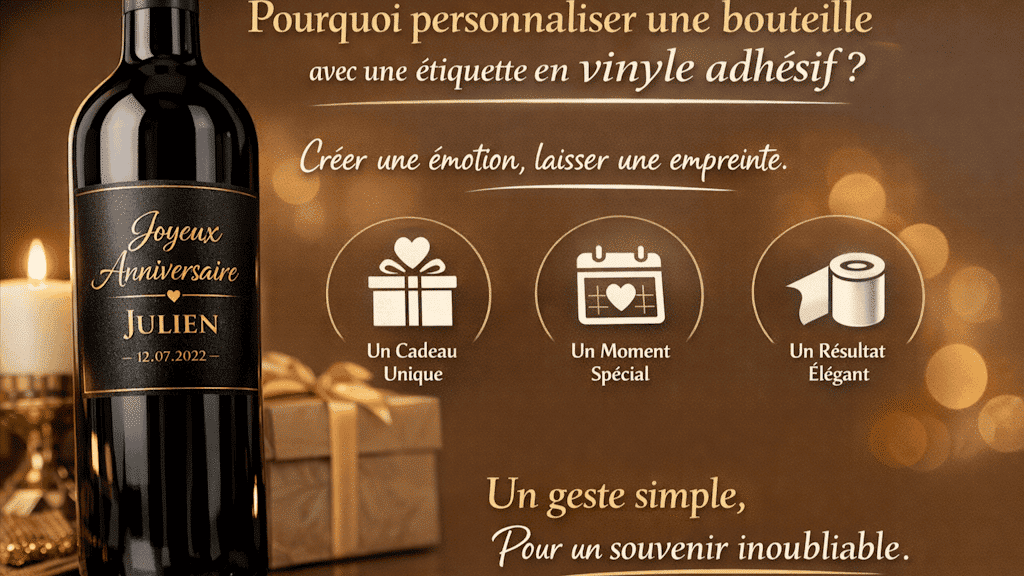
1. Why Personalize a Bottle with an Adhesive Vinyl Label?
Personalizing a bottle isn't just about adding a pretty design. It's about telling a story, creating a connection, and sharing a sentiment. A personalized bottle label catches the eye right away, but more importantly, it touches people. It says, "This bottle wasn't picked at random."
Whether you're giving a gift, celebrating, or showing off something you made, a personalized label turns a simple gesture into a memorable one. A name, an important date, a sweet word, or a meaningful message is all it takes to stir up emotion. And that little detail is often what people remember.
Adhesive vinyl is especially popular for this kind of personalization. It gives you a clean, crisp, elegant finish without weighing down the look of the bottle. Unlike traditional paper labels, it hugs the surface perfectly, resists moisture, and keeps looking good even after some time in the fridge. It's the perfect choice for creating a personalized bottle label that's both attractive and long-lasting.
Another big advantage is creative freedom. Vinyl comes in a huge range of colors, finishes, and styles. Minimalist, festive, chic, or bold, you can tailor your label to the occasion and the feeling you're going for. And best of all, anyone can do it. All you need is a little imagination and some vinyl, and you're good to go!
So personalizing a bottle with adhesive vinyl is a solution that's simple, modern, and eye-catching all at once. It's an elegant way to express your creativity while giving an everyday object real sentimental value.
2. The Supplies You Need to Make a Personalized Bottle Label
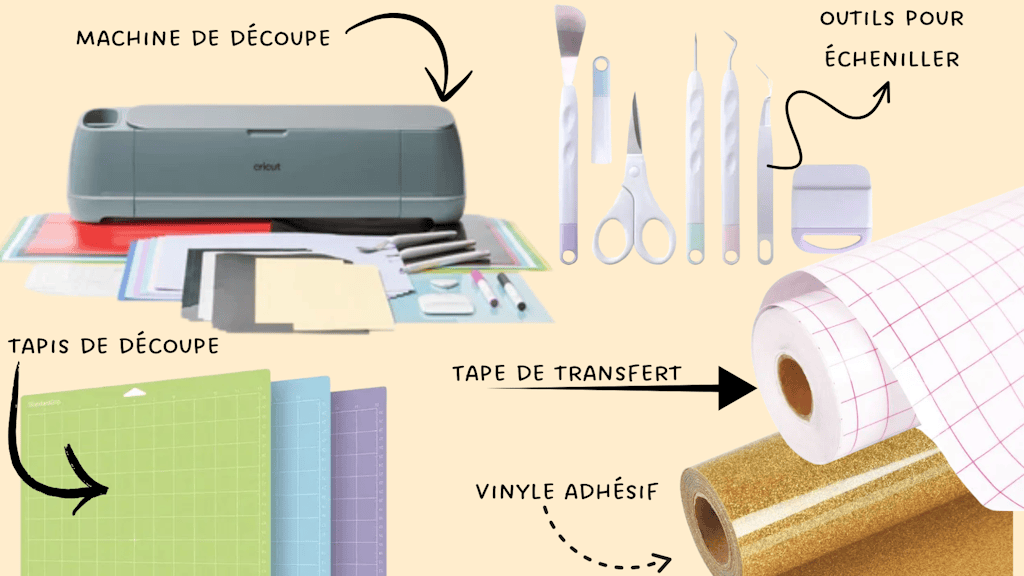
Before you start creating, there's one essential step: gathering the right supplies. Don't worry, you won't have to turn your living room into a professional workshop (although that happens more often than you'd think!). To make a personalized bottle label with adhesive vinyl, a few well-chosen tools are more than enough!
The heart of the project is, of course, adhesive vinyl. It comes in matte, glossy, and even rainbow versions, depending on the look you want. For a bottle, I always go for a good-quality vinyl that's flexible and moisture-resistant, so it stays put even after time in the refrigerator. That's the detail that makes all the difference between a label that looks "homemade" and one with a truly polished finish.
For cutting, a cutting machine like a Cricut or a Silhouette Cameo 5 (and there are plenty of other brands out there!) makes the job so much easier. It gives you perfect precision, especially for thin text or delicate designs. That said, you can absolutely make a personalized bottle label without a machine by sticking to simple shapes cut by hand. What matters is creativity, not the tool.
When it comes to accessories, here are a few essentials:
-
a vinyl squeegee or a stiff card to apply the vinyl without bubbles,
-
a weeding tool to remove the unwanted bits of vinyl,
-
transfer tape (sometimes called transfer film) to move your design onto the bottle easily,
-
a clean cloth to prep the surface.
Finally, the materials and supplies you choose play a key role in the final result. Working with reliable materials designed for personalization saves time and gives you a professional-looking result, even on your very first project.
Once your supplies are ready, you're all set for the most exciting step: bringing your idea to life and coming up with the design for your personalized bottle label.
3. Steps to Make a Personalized Adhesive Vinyl Bottle Label
Step 1: Come Up with Your Label Design
This is where it all really begins. Before you even cut or apply the vinyl, there's that creative moment when you picture what you want on your bottle label. A great personalized label on a bottle isn't just pretty: it sends a message!
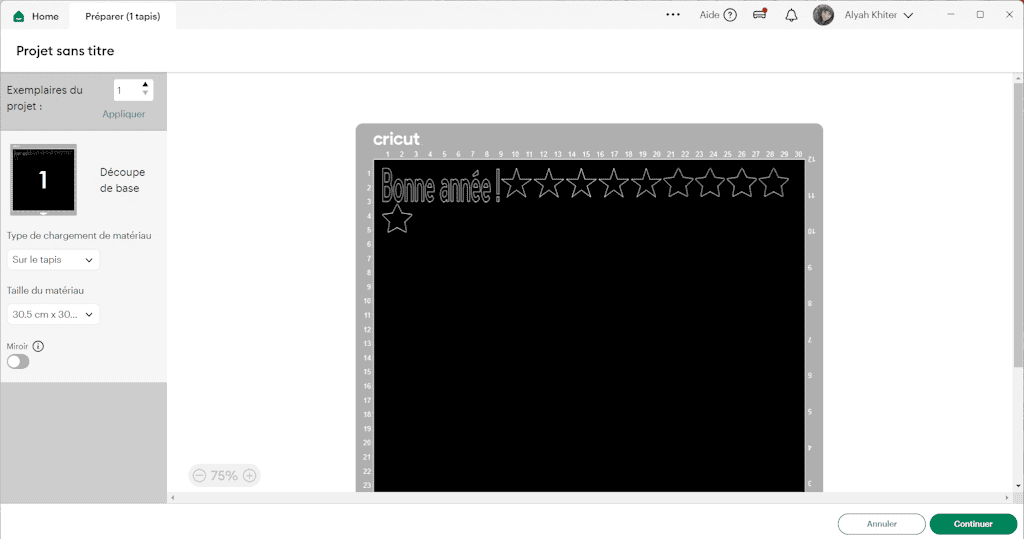
Start by opening your cutting machine software (Silhouette Studio, Cricut Design Space, or another program, depending on your machine). I always start with the message. A name, a date, a short phrase, sometimes just a single word or a simple motif (a star, a heart... those usually work for anything!). The idea isn't to overdo it but to choose elements that fit the occasion. For a gift, you're going for emotion. For an event, a cohesive look. For a professional project, consistency with the brand's identity!
The font you choose plays a big role on your bottle! A handwritten script feels soft and authentic, while a straighter, cleaner font gives a modern, elegant look. Keep readability in mind: on a bottle, space is limited, and every detail counts. A simple message that's well showcased is better than text that's too busy.
The shape of the bottle also affects the design. A curved surface calls for a balanced design that's neither too wide nor too tall. I like to picture the label on the bottle before I even create it: it helps me adjust the proportions and avoid unpleasant surprises when applying it (it's so frustrating when your design turns out too big, grrrrr!).
Finally, when it comes to the color of your adhesive vinyl, pick one that goes with the color of the bottle and what's inside (although a totally unexpected color instantly adds a fun twist!). Well-chosen contrast catches the eye without being harsh. This is often the moment when the label comes to life in your mind, before it even physically exists.
Coming up with the design means setting the intention behind your personalized bottle label. It's a key step, and a gentle, inspiring one, that gives the finished piece all its value.
But what if the hardest part isn't the technique, but knowing where to start? That classic question: "Okay... but what do I cut?" If you don't have a ready-to-use file yet, don't let that hold back your creativity. Sometimes a little nudge is all you need. By clicking here, you can download 50 free files, designed to be easy to cut and ready to use right away. They're simple, versatile designs made above all to help you go from idea to finished project quickly, without the headache.
Step 2: Cut the Adhesive Vinyl
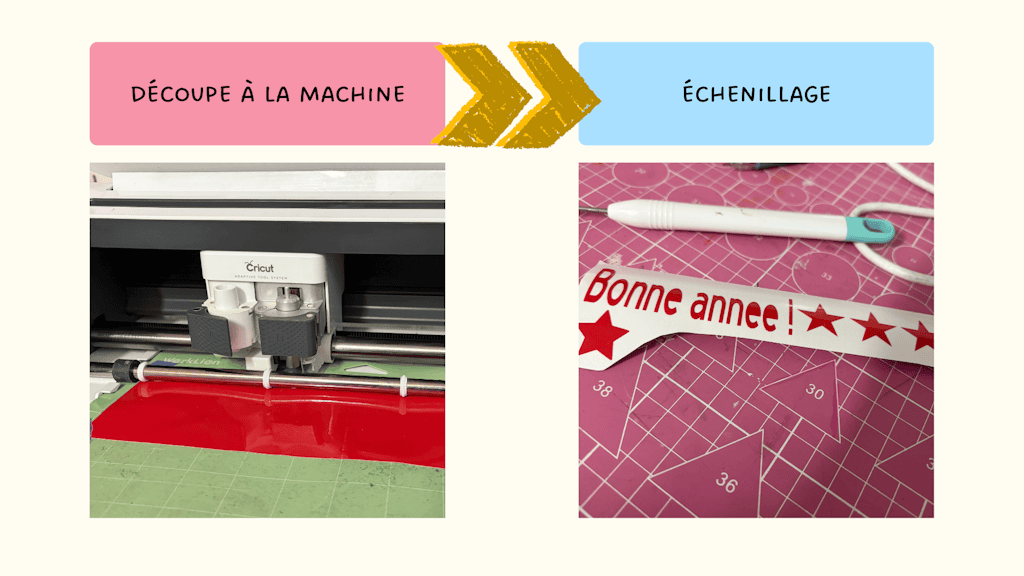
Once you've come up with your design, it's time to bring it to life. Cutting is a key step in making a personalized label for a bottle: it's what ensures fine details and a high-quality finished result.
If you're using a cutting machine, take a moment to check your settings: selecting the right material type, using the proper pressure, and having a clean blade make all the difference. If the cut is too light, the vinyl won't come away cleanly, while too much pressure can damage the backing. These are small adjustments, but they'll save you a lot of frustration during a project.
After cutting comes weeding, that almost meditative moment when you DE-LI-CATE-LY remove the unwanted parts of the vinyl. I like to take my time with this step, especially for thin letters or detailed designs. If you rush, you risk damaging the design or removing a piece that was supposed to stay... This is when the design really reveals itself, and you can start to picture the personalized bottle label as it will look once it's applied.
If you're cutting by hand, stick to simple shapes and use a sharp craft knife. What matters isn't how complex the design is, but how clean the edges are. A simple, well-cut design will always have more impact than one that's too busy.
Before you move on to application, do one last check: make sure every element is properly cut, aligned, and ready to transfer. This quick final check lets you tackle the next step calmly and confidently (instead of crying your eyes out over a mistake you spotted too late!).
At this point, your personalized bottle label is almost ready. All that's left is to apply it and watch the magic happen.
Step 3: Apply the Personalized Label to the Bottle
This is often the step everyone looks forward to most, the one where it all comes together. Applying the personalized bottle label is when your creation leaves the work table and makes its way onto the bottle, and when you finally get to see the finished result.
First things first, you need to prep the surface. The bottle should be clean, dry, and free of grease and dust. A quick wipe with a soft cloth usually does the trick, but this step is essential to make sure the adhesive vinyl sticks well.
Once you've applied transfer tape over your cut and weeded adhesive vinyl, I always take the time to do a dry fit, positioning the label without sticking it down. This lets you check the alignment and find the perfect spot. On a bottle, a few millimeters can make a big visual difference. Once everything is nicely centered, you can start applying it.
I stick it down gradually, from the center outward, smoothing it gently with a squeegee or, if you don't have one, a stiff card (like an old credit card). This simple technique prevents bubbles and helps the vinyl naturally hug the rounded shape of the bottle. There's no need to rush: the secret to a great personalized bottle label is a gentle touch and patience!
Once the adhesive vinyl is firmly in place, all that's left is to carefully peel off the transfer tape. That's often the exact moment the "wow" factor kicks in. The bottle is transformed. It now has an identity, a purpose, and a story to tell.
This final step proves that with a little method and patience, you can get a clean, elegant, long-lasting result, even on your very first project!
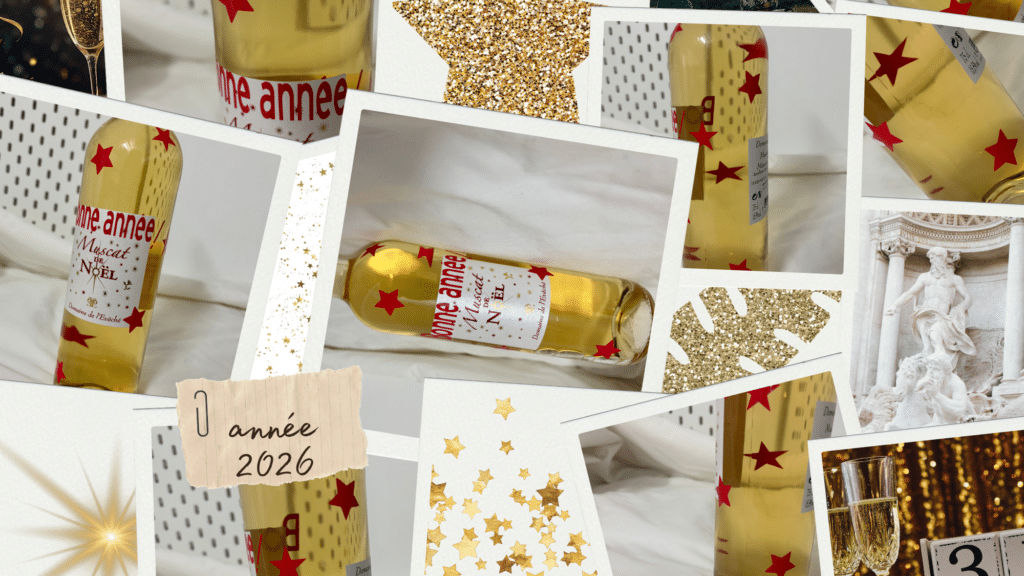
4. Tips for a Professional, Long-Lasting Result
A personalized label for a bottle can be easy to make, but it's often the little details that give it a truly professional look. After application, a few good habits can take your result to the next level and help it hold up perfectly over time.
First, choosing where to place your label is essential. A label that's centered and well aligned with the shape of the bottle naturally draws the eye. Take into account any raised textures, curves, or engravings in the glass. A smooth surface will always show off adhesive vinyl better and help prevent peeling.
Also think about how everything looks together. The color of the vinyl should work with the color of the bottle, the cap, and even what's inside. Well-balanced contrast adds elegance, while a tone-on-tone look can create a chic, understated effect. The goal isn't to overload the bottle but to strengthen the identity of your personalized bottle label.
For better durability, I recommend letting the bottle sit for a few hours after application before handling it or putting it in the fridge. This gives the adhesive time to bond properly. If the bottle is going to be refrigerated, quality adhesive vinyl will keep its look without warping or peeling.
Finally, here's a little "pro" tip that makes all the difference: avoid touching the vinyl with your fingers right after application. Fingerprints can spoil the finish, especially on matte vinyl. One last gentle pass with the squeegee will perfect the whole thing.
These simple habits turn a DIY project into a personalized bottle label with a polished, elegant finish, ready to give or display, with the pride of saying, "Yep, I made that myself!"
5. What Occasions Are Perfect for a Personalized Bottle Label?
One of the biggest strengths of a personalized bottle label is its versatility. It adapts to every situation, every wish, and above all, every emotion you want to share. A simple bottle becomes a real way to express yourself.
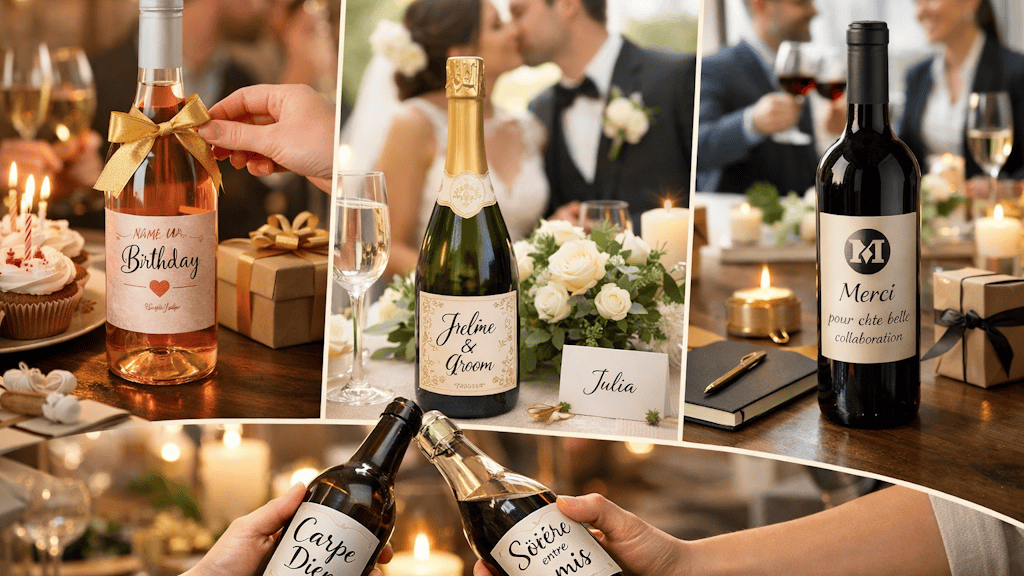
As a gift, a personalized label makes all the difference. Giving a bottle with a name, a date, or a personal message turns a classic gift into a one-of-a-kind gesture. A birthday, Mother's Day or Father's Day, a thank-you, or a little spur-of-the-moment surprise: the message lasts, even after the bottle is empty.
At an event, a personalized label on a bottle fits right in. A wedding, christening, baby shower, birthday, or evening with loved ones... It can work as a place card, a take-home keepsake, or a decorative touch that blends perfectly with the theme. It's often this kind of detail that guests notice and remember.
On the professional side, a personalized label becomes a powerful way to showcase your work. For a brand, a maker, or a corporate event, it helps establish a visual identity, reinforce a quality image, and create a memorable experience. A personalized bottle leaves a lasting impression, long after the moment has passed.
And then there are all those occasions that aren't on any calendar. An impromptu dinner, a moment worth celebrating, or simply the urge to create for no particular reason. In moments like these, a personalized bottle label is an easy way to make the occasion feel more special.
Whatever the occasion, it always reflects a thoughtful intention. And that's exactly what makes it so valuable.
6. A Small Project That Makes a Big Difference
Creating a personalized bottle label is so much more than just a craft project. It's a way to turn an everyday object into something that carries emotion, memories, and care. With adhesive vinyl, a few tools, and a clear idea, anyone can get a polished result.
At every step, from coming up with the design to the final application, personalization takes on its full meaning: taking your time, creating with intention, and bringing joy in a different way. A personalized bottle tells a story, marks a moment, and leaves something behind, even after it's been shared.
Whether it's for a gift, an event, or showcasing a professional creation, a personalized bottle label stands out as a simple yet incredibly powerful detail. It proves you don't have to go overboard to make a difference; you just have to think about making someone happy.
If you're ready to dive in, try things out, experiment, and create your own labels, all that's left is to get started. Because sometimes, the smallest projects have the biggest impact.
FAQ
Will Adhesive Vinyl Stay on a Cold Bottle?
Yes, as long as you use quality adhesive vinyl. Once it's properly applied and has been left to set for a few hours, it holds up in the refrigerator with no problem. For the best hold, it's a good idea to apply the label to a bottle at room temperature.
Can You Remove a Personalized Bottle Label Without Leaving Marks?
In most cases, yes. Adhesive vinyl peels off easily, especially if it hasn't been on for too long. If any residue is left behind, a soft cloth lightly dampened with rubbing alcohol is all you need to clean the surface.
What Type of Vinyl Should You Use for a Personalized Bottle Label?
Permanent adhesive vinyl is recommended for a strong hold, especially if the bottle will be handled or kept in the fridge. Choosing a matte or glossy finish then comes down to your style and the look you want.
Do You Need a Cutting Machine to Make a Personalized Bottle Label?
It's not required. A cutting machine gives you more precision, especially for thin text, but you can absolutely make simple designs by hand. What matters most is creativity and the quality of your materials.
Is a Personalized Bottle Label Moisture-Resistant?
Yes, adhesive vinyl is designed to resist moisture. It doesn't warp like paper and keeps its look, even in cool conditions, which makes it an ideal choice for personalizing bottles.



Comments
No comments yet. Be the first to share your experience.
Leave a comment