
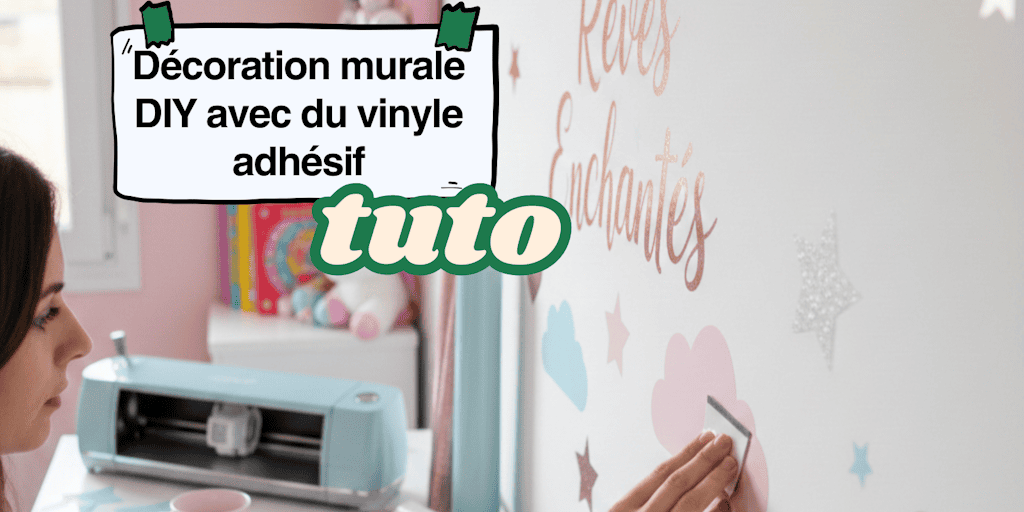
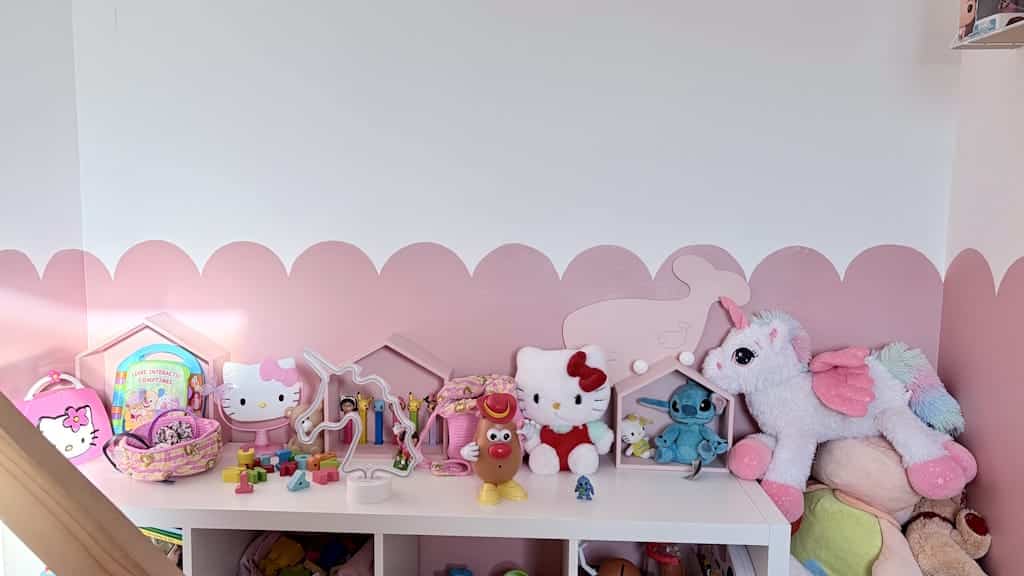
I was tidying up my daughters' bedroom when, without really noticing, I started looking at their walls.
I love this room: very pink, very girly, and full of softness. It's genuinely pretty. But it was missing that little something extra. The kind of detail that turns a cute bedroom into a wow space, one that's unique and designed with love.
I said to myself:
"Okay, it's pretty... but we could definitely take this further. We could add something to these walls to really make the decor shine."
And just like that, I didn't think twice.
I pulled out my Cricut, grabbed my rolls of adhesive vinyl, and within minutes, I was completely absorbed in what I love doing most: creating.
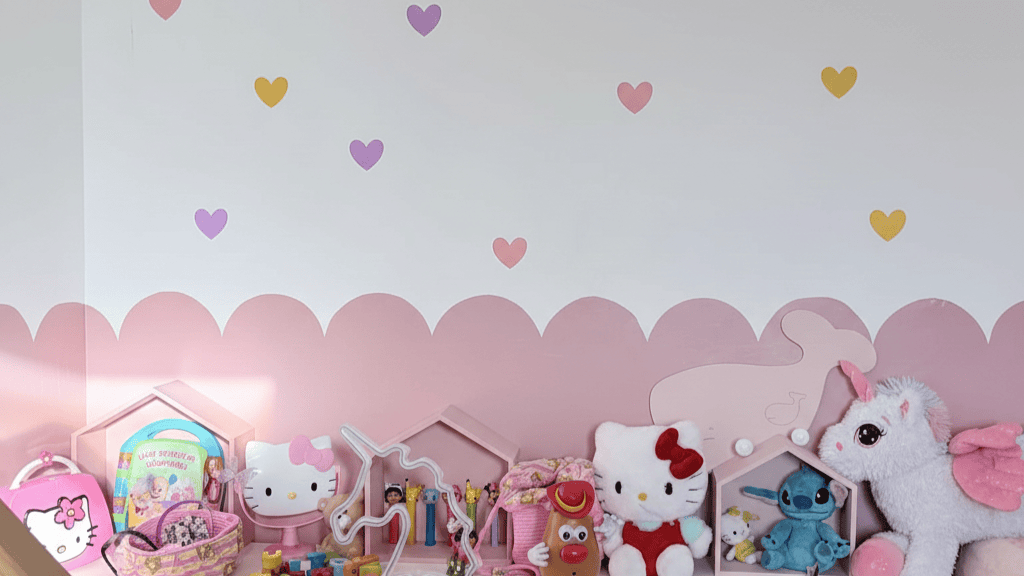
That's how these homemade wall decals came to life, designed especially for their bedroom. Soft shapes, carefully chosen words, DIY wall decor unlike any other... because it came from a simple wish: to make their space even cozier and even more personal.
And you know what?
That's when I realized just how amazing DIY wall decor with adhesive vinyl really is. It's accessible, quick, and endlessly customizable... and best of all, anyone can do it, even if you don't consider yourself a DIY pro.
If you also look at your walls and think they deserve better, and you want to create decor that truly feels like you, then stick around.
I'm going to show you, step by step, how to make your own DIY wall decor with adhesive vinyl, stress-free and with as much fun as possible.
✨
1. Why Choose DIY Wall Decor?
Let's be honest for a second.
When people think of DIY wall decor, many immediately picture a long, complicated project, with tools everywhere and results that are... a bit hit-or-miss. And that's exactly why so many people never dare to get started.
But the reality is very different.
Creating your own handmade wall decor means taking back control of your home. It means no more spending hours in stores searching for the perfect decor, only to end up thinking, "Meh... this'll do."
With DIY, you're not just settling for what's available. You create with intention, and that changes everything!
What I love most about DIY wall decor is that unique sense of pride. Every time you walk into the room, you know that wall didn't turn out that way by chance. You know you dreamed it up, designed it, and put it up yourself. And no ready-made decor from a store can ever give you that.
Another huge advantage: customization.
Colors, shapes, words, sizes... everything can be adjusted. You tailor your wall decor to your room, the vibe you want, and your personality. Whether you love minimalism, unapologetically girly looks, or a softer, cleaner style, you're no longer limited to what stores have to offer.
And let's talk budget.
Wall decor made with adhesive vinyl lets you transform a wall without breaking the bank. No need to repaint an entire room or invest in overpriced frames. A little vinyl, a clear idea, and you're good to go.
But most of all, DIY frees you from the fear of "getting it wrong."
Because there are no set rules here. There's only trial, adjustment, and above all, lots of fun. And trust me, once you start, it's really hard to stop.
Those are exactly the reasons DIY wall decor became a no-brainer for me. And with adhesive vinyl, it's not just accessible, it's downright addictive.
Next, I'll explain why adhesive vinyl is the perfect partner for creating DIY wall decor easily, even if you're a beginner.
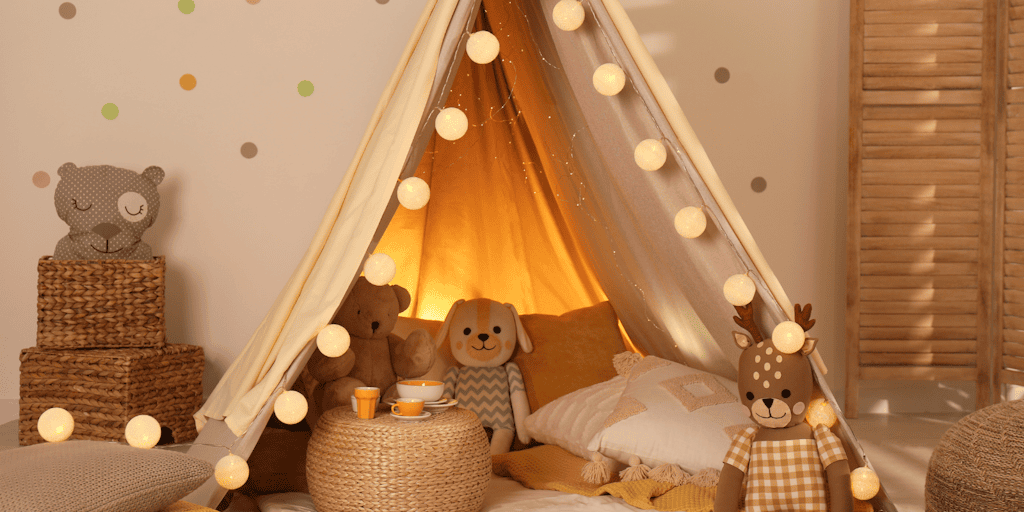
2. Adhesive Vinyl: The Perfect Partner for DIY Wall Decor
If wall decor can sometimes feel intimidating, adhesive vinyl removes almost every obstacle.
It's simple: it's one of the most accessible materials for getting started without stress, without a big budget, and without any special technical skills.
Adhesive vinyl is a thin, flexible, self-adhesive material designed to be cut and then applied to all kinds of surfaces, including walls. Contrary to what you might think, it isn't just for making stickers for objects or windows. On a wall, it becomes a real creative tool.
What makes it ideal for DIY wall decor is, above all, how easy it is to use. No glue, no drilling, no complicated tools. You cut, you stick, you smooth... and you're done. In just a few minutes, your wall looks completely different.
Another key point: adhesive vinyl is incredibly customizable.
You choose the color, the shape, the size, and the message. A sweet phrase in a child's bedroom, an inspiring word in an office, graphic shapes in a living room... anything goes. And best of all, you adapt your DIY wall decor to your space, not the other way around.
Despite what some people think, adhesive vinyl is also very forgiving.
If you make a mistake while applying it, you can often reposition it. And when you want to switch up your decor, it comes off easily without damaging the wall (as long as the surface was clean and in good condition to begin with). That's exactly what you want when you'd like to decorate without a permanent commitment.
Finally, it's a material that works just as well for beginners as it does for more creative types.
Whether you cut it by hand or with a machine like the Cricut, adhesive vinyl gives you a sharp, clean, professional-looking result, even on your very first DIY wall decor project.
That's why I use it so often, especially to make wall decals for my daughters' bedroom. Simple, quick, effective... and above all, incredibly satisfying.
In the next section, I'll show you exactly what you need to get started, with a simple, accessible supply list, even if you're a complete beginner.
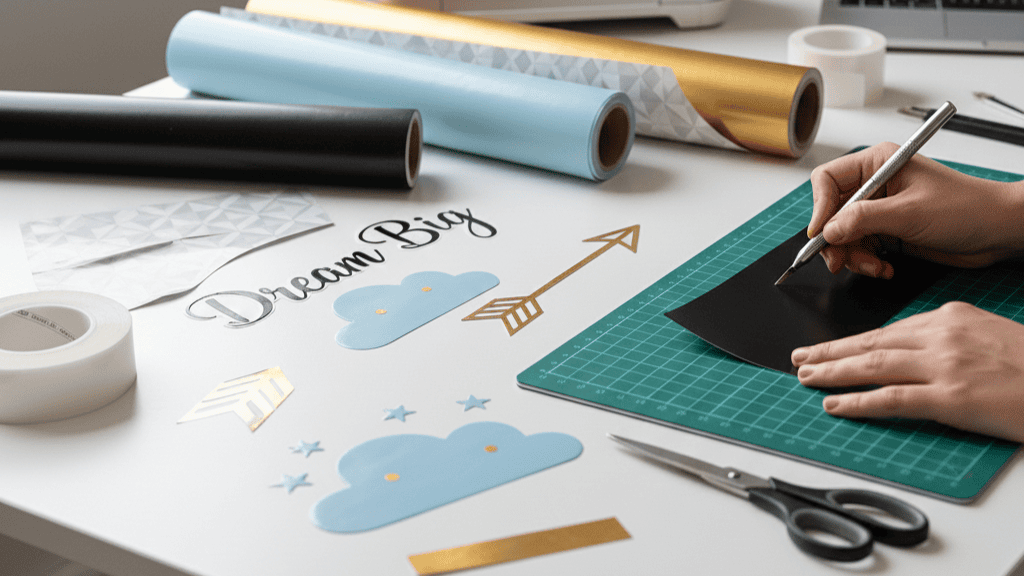
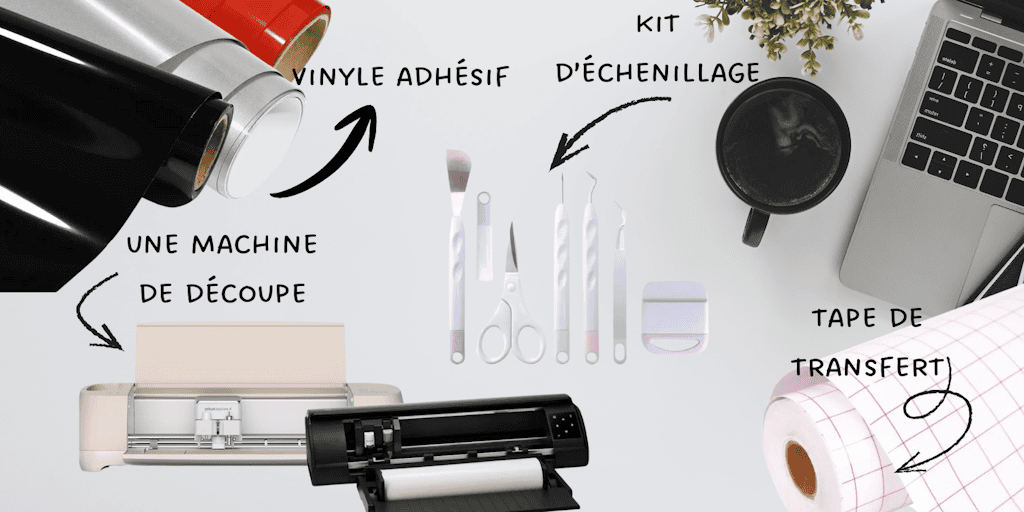
3. The Supplies You Need to Create DIY Wall Decor
Good news: to make DIY wall decor with adhesive vinyl, you don't need a professional workshop or expensive equipment. Quite the opposite. The simpler it is, the more enjoyable the project will be.
Here are the essentials.
First, you'll obviously need some adhesive vinyl.
Choose good-quality vinyl with an adhesive that's suitable for walls. Matte finishes are often ideal for walls because they don't create glare and give a softer, more elegant look, especially in a bedroom or living room.
Next, you'll need a clean, smooth wall surface.
A painted wall, a door, a cabinet, any smooth surface... what matters is that it's clean, dry, and dust-free. A quick wipe with a cloth is usually all it takes to prep the area.
When it comes to cutting, you have two options.
You can cut your vinyl by hand with scissors or a craft knife for simple shapes. Just be sure to still use a template so your shapes come out clean and precise.
Or you can use a smart cutting machine (which is honestly way better!) like a Cricut or a Silhouette Cameo 5, which lets you create more precise designs, text, and fine details. Both work great for DIY wall decor.
You'll also need a smoothing tool, like a vinyl squeegee or just a stiff card. This is what helps you avoid air bubbles and get a nice, clean result when you apply your vinyl.
Depending on your project, you may need transfer tape, especially if you're making text or designs with multiple pieces. It will help you position your wall decal easily and precisely.
Finally, keep a few simple extras on hand:
a pencil for light guide marks, a tape measure or ruler to center your design, and a little patience. Yes, patience counts as a supply too, especially when you're just starting out.
With all that, you're already fully equipped to create your own DIY wall decor. You don't need anything more. No need to overcomplicate things.
In the next section, we get to the heart of it: I'll walk you through every step of creating your DIY wall decor with adhesive vinyl, from start to finish!
4. Step-by-Step Tutorial: Making DIY Wall Decor with Adhesive Vinyl
This is where everything comes together. There's no need to rush or to be perfect. Just follow the steps, one at a time. DIY wall decor is, first and foremost, a creative moment, not a race against the clock.
Step 1: Choose Your Wall and Design
Before you even touch the adhesive vinyl, take some time to really look at your wall.
Notice the available space, the light, and the colors already in the room. The goal is to make your DIY wall decor blend in naturally without overcrowding the space.
Then choose your design: a sweet word, an inspiring phrase, shapes, a first name... The simpler your design, the more elegant the result will be, especially for your first project.
Step 2: Prep the Wall
This step often gets overlooked, but it makes all the difference.
Wipe the surface with a dry or slightly damp cloth to remove dust and residue. The wall needs to be completely clean and dry before you apply the vinyl.
If needed, make light pencil marks so you can see where your design will go. That way, you won't end up placing your vinyl too high, too low, or crooked.
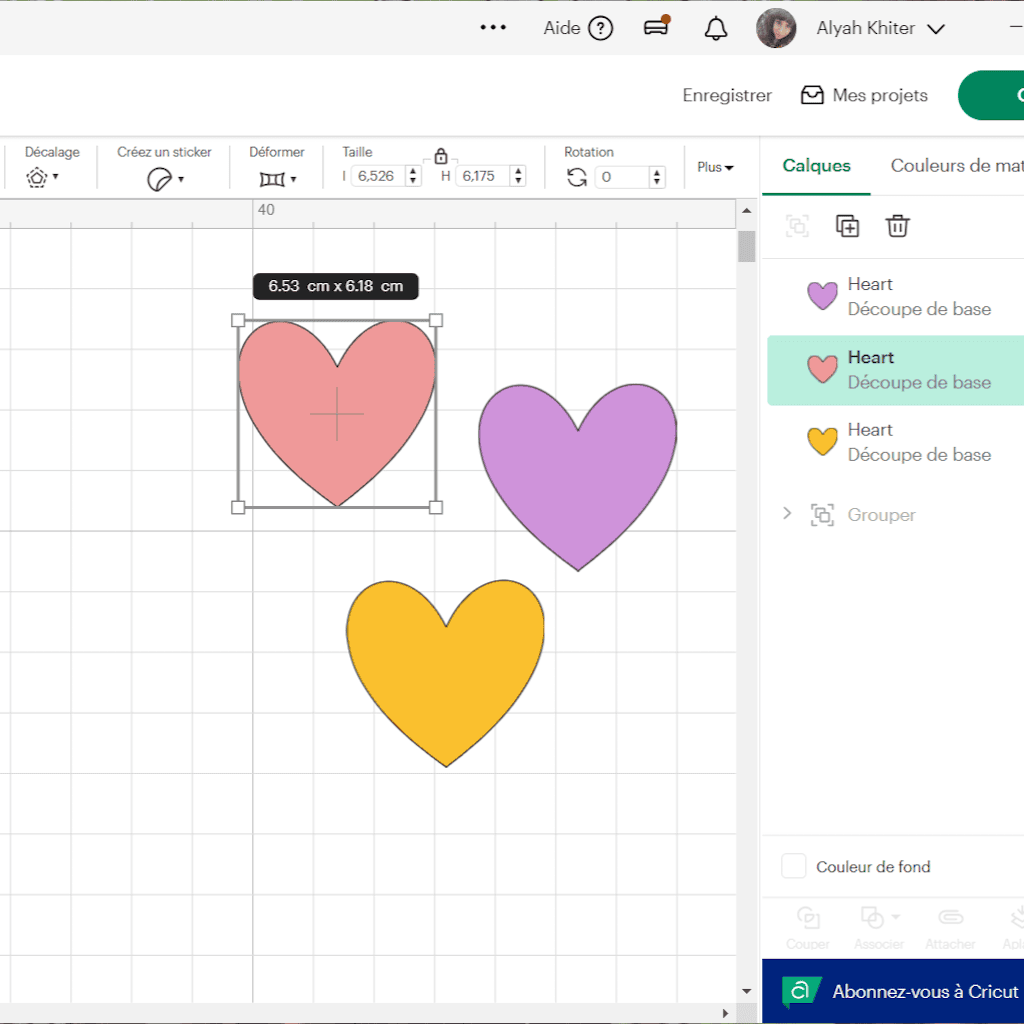
Step 3: Cut the Adhesive Vinyl
Cut your vinyl based on the design you chose.
Cut by hand for simple shapes, or use your cutting machine for a more precise result. Take your time, especially if you're working with text or fine details.
Once the cut is done, carefully weed the vinyl, which means removing the parts you don't want to stick on the wall.
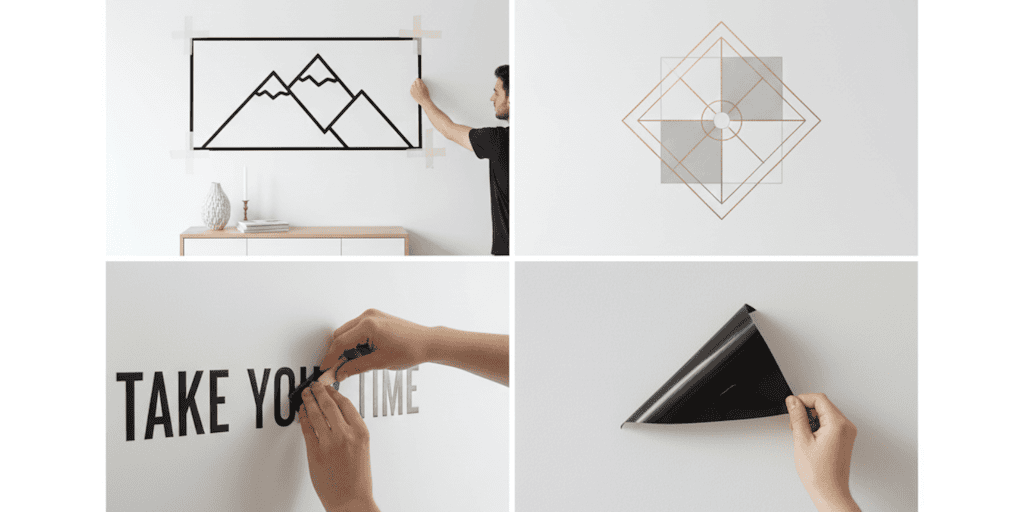
Step 4: Position the Vinyl Stress-Free
If your design is made up of several pieces or letters, apply transfer tape over it.
Then position your wall decal on the wall without pressing it down right away. Take a step back, look at the overall effect, and adjust if needed.
Once everything looks right, lightly secure the top of the design so it doesn't move.
Step 5: Apply and Smooth
Start applying the vinyl from the center outward, smoothing it down gradually with a squeegee or a stiff card.
This helps prevent air bubbles and makes sure the vinyl sticks well to the wall.
Take your time. It's not about pressing hard, it's about keeping your strokes smooth and steady.
Step 6: Remove the Transfer Tape
Once the vinyl is firmly in place, gently peel off the transfer tape, pulling it slowly and keeping it flat.
If part of the vinyl lifts up, lay the tape back down and smooth it again.
And that's it!
Your DIY wall decor is up. Take a moment to admire the result, because that wall now tells a story. Your idea, your choice, your creativity.
In the next section, I'll share my pro tips for getting an even more wow-worthy result and avoiding the most common mistakes beginners make with adhesive vinyl.
5. Pro Tips for a Wow-Worthy Result (and How to Avoid Classic Mistakes)
DIY wall decor can be pretty... or absolutely stunning. The difference often comes down to the details. Here are the tips I always use to get a clean, cohesive result that looks like it was designed by a pro.
Rule number one: don't overcrowd your wall.
The most common mistake, especially when you're starting out, is trying to do too much. Too many words, too many shapes, too many colors. With DIY wall decor, the less you add, the more elegant it looks. A single strong message or a few well-placed elements will always make more of an impact than a cluttered wall.
Second key point: choose your vinyl color carefully.
On a light wall, go for soft tones, or contrasting colors that aren't too harsh. On a dark wall, a light or slightly glossy vinyl will stand out more. Always think about contrast: if you can't see your design from two meters away, it's not the right choice.
Third tip: test it before you stick it.
Before applying your vinyl for good, position it with masking tape or just hold it in place by hand. Step back, take a look, and change the orientation if needed. This step will save you a lot of regret, especially with text.
Fourth tip: keep proportions in mind.
A design that's too small gets lost on a large wall, while one that's too big overwhelms a small room. For successful DIY wall decor, always think in terms of balance. Your design needs room to breathe.
Fifth key point: take your time when applying.
Rushing is adhesive vinyl's number one enemy. Apply it gently, smooth it gradually, and don't hesitate to take breaks. A careful, controlled approach is always better than a quick, sloppy job.
And what if you mess up? Just breathe.
Poorly applied vinyl isn't a disaster. You can often peel it off carefully and start over, especially if the wall is smooth and clean. That's part of DIY wall decor too: it's okay to make mistakes.
And finally, last but not least: trust yourself.
Your decor doesn't need to be perfect to be beautiful. It just needs to feel like you. And that's exactly what will make all the difference.
In the next section, I'll show you where and how to use DIY wall decor to make every room in your home shine, without a single misstep.
6. Where Can You Use DIY Wall Decor?
One of the biggest advantages of DIY wall decor is how versatile it is. Once you get the hang of it, you'll quickly realize it works in almost every room of the house without ever feeling like "too much."
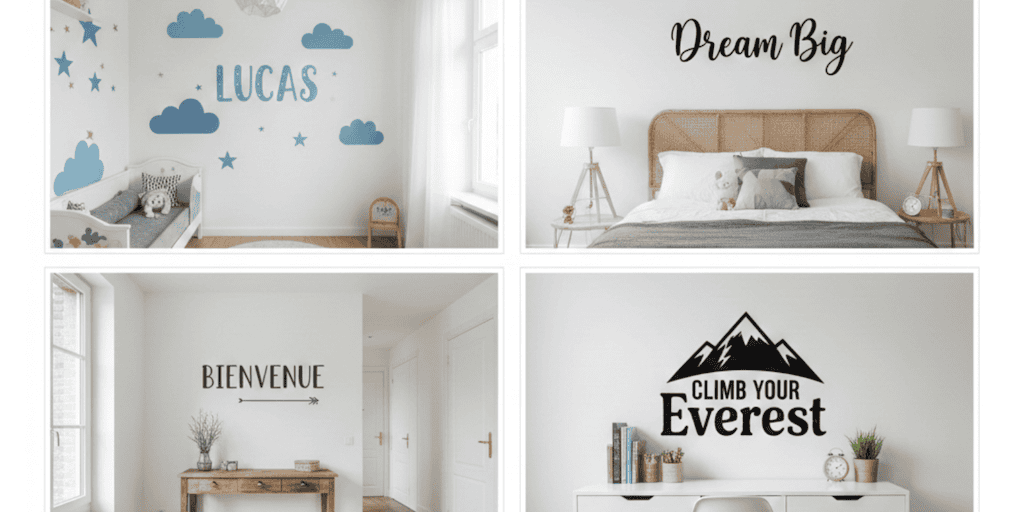
In a child's bedroom, DIY wall decor feels right at home. First names, sweet words, whimsical shapes, animals, stars... Adhesive vinyl lets you create a comforting, personalized little world that can evolve over time. And when tastes change, the decor can change too, without redoing the whole room.
In an adult bedroom, it adds character without making the space feel heavy. An inspiring phrase above the bed, a subtle design behind a headboard, or a few well-placed graphic shapes are all it takes to transform the mood. Here, DIY wall decor becomes a standout detail, but a subtle one.
The entryway is often a forgotten space, even though it sets the tone as soon as you walk through the door. A welcome message, a short quote, or a graphic symbol can instantly make the space feel warmer and more inviting.
In an office, DIY wall decor becomes a source of motivation. A key word, an uplifting phrase, a visual reminder of your goals... Adhesive vinyl lets you create a space that supports your focus and your energy every day.
It also works beautifully in the living room, as long as it stays balanced. Well-planned DIY wall decor can bring structure to a blank wall, dress up the space above a sofa, or frame a piece of furniture without stealing the spotlight from the rest of your decor.
Finally, don't forget that DIY wall decor can also make a unique gift idea. Personalized and made with intention, it holds far more sentimental value than a generic store-bought item.
Whatever the room, the rule stays the same: your DIY wall decor should blend naturally into your home and tell a story. Yours.
In the next and final section, we'll wrap things up together and, most importantly, give you that last little push to take action without hesitating.
7. Why Not Give DIY Wall Decor a Try Too?
In the end, DIY wall decor isn't just about adhesive vinyl or walls to decorate. Above all, it's a different way of looking at your home. A way of reminding yourself that no, not everything has to be bought ready-made to be beautiful.
You don't need to be a born creative or have years of experience. All you need is the desire, an idea, and the courage to get started. Adhesive vinyl does the rest. It keeps things simple, it gives you confidence, and it lets you go for it without pressure or a permanent commitment.
That wall you look at every day can become much more than a simple backdrop. It can tell a story, express an emotion, and set a mood. And most of all, it can showcase DIY wall decor that truly reflects who you are.
If I could turn a plain wall into a one-of-a-kind space while tidying up a bedroom, then you can do it too. Not tomorrow. Not "when you have time." Now.
Grab your vinyl, pick your wall, and get started.
Because the most beautiful decor is the kind you create yourself. ✨
FAQ
Everything You Need to Know About DIY Wall Decor with Adhesive Vinyl
Does Adhesive Vinyl Damage Walls?
In the vast majority of cases, no.
If your wall is smooth, clean, and in good condition, adhesive vinyl comes off without leaving any marks. Just avoid freshly painted walls (less than 2 to 3 weeks old) or very porous surfaces. To be safe, you can always test a small piece in an inconspicuous spot.
Can You Easily Remove DIY Wall Decor?
Yes, and that's actually one of its biggest advantages.
Just peel the vinyl off gently, pulling slowly. If needed, a little heat (from a hair dryer held at a distance) can make removal easier. That way, you can switch up your DIY wall decor without redoing the whole room.
How Long Does DIY Vinyl Wall Decor Last?
Well-applied DIY wall decor can last for several years.
It all depends on the quality of the vinyl, the wall surface, and the environment (humidity, sun exposure). Indoors, on a standard wall, it usually holds up extremely well over time.
Is It Beginner-Friendly?
Absolutely.
DIY wall decor with adhesive vinyl is one of the most accessible projects for beginners. No glue, no drilling, no complicated techniques. If you follow a step-by-step tutorial, you can get a really clean result, even on your very first try.
Do You Need a Cutting Machine Like the Cricut?
No, it's not required.
A cutting machine makes the job easier and gives you more precision, especially for text and details, but you can absolutely make simple DIY wall decor with scissors or a craft knife for basic shapes.
With this FAQ, you now have everything you need.
No more excuses, no more doubts: DIY wall decor with adhesive vinyl is well within your reach. All that's left is to take action.



Comments
No comments yet. Be the first to share your experience.
Leave a comment