

You probably have a favorite T-shirt with a heat transfer vinyl design in your closet. But after lots of wear and washing, the design can start to peel up a little around the edges.
Saving your T-shirt isn't hard, but you need to act fast and work carefully. HTV designs are made to be permanent, but over time, the adhesive may not hold as well as it used to. Fix your HTV design before it's completely ruined and bring your garment back to its former glory! 😀
Re-Stick Your HTV Design Easily in 5 Steps:
Re-sticking an HTV design that has peeled off fabric can seem intimidating. But don't worry: the steps are really simple, and the whole process only takes about ten minutes. 🕐
To re-stick your design neatly, you'll need:
- an iron or a heat press
- a table to lay the garment on
- a sheet of parchment paper or a Teflon sheet
- heat-resistant tape (optional)
Step 1: Lay Your T-Shirt Flat
First, it's important to lay your T-shirt (or other garment) nice and flat on a suitable surface so you can re-stick the design as effectively as possible.
We recommend laying the garment flat on an ironing board. Make sure there's nothing nearby that could melt from the heat, because the design needs high heat to stick back down.
You can also use a pressing pillow or another heat-resistant surface for maximum safety. ✔️
Step 2: Reposition the Peeled Design Correctly
Once your T-shirt is nice and flat, gently put the peeling part of the design back in place.
If you're not sure your design is lined up correctly, or you think it might shift while you press, you can use heat-resistant tape to hold it in place.
Step 3: Parchment Paper, a Must-Have Tool
Once the design is in the right spot, take a sheet of parchment paper or a Teflon sheet and use it to cover your design.
The design must be completely covered by the parchment paper.
Step 4: Press the Garment
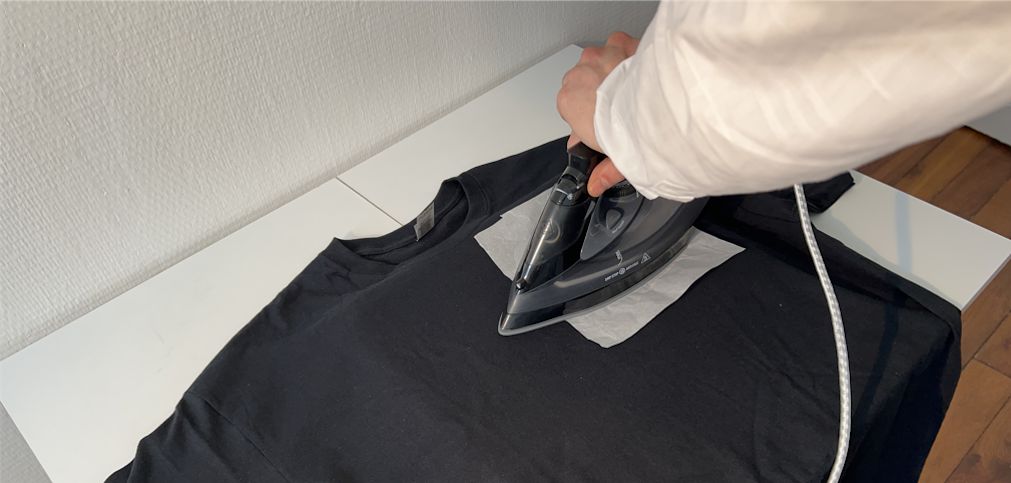
Grab your iron (or heat press) and heat it to 150°C. 🌡️
Wait a few minutes for the iron to reach the right temperature.
Once the iron is nice and hot, press the design (always keep the parchment paper over it to protect the vinyl), moving the iron in a circular motion that covers the whole design and applying medium pressure as you go.
Keep making circular motions with your iron for about 30 seconds. (If you have a heat press, you don't need to move in circles.)
When the 30 seconds are up, turn off the iron and lift it off the garment.
Step 5: Peel
All that's left is to wait just 5 seconds, then remove the parchment paper and admire the result.
Your HTV design is looking great on your garment again! 🤩
How Do You Keep Heat Transfer Vinyl from Peeling Off Clothes?
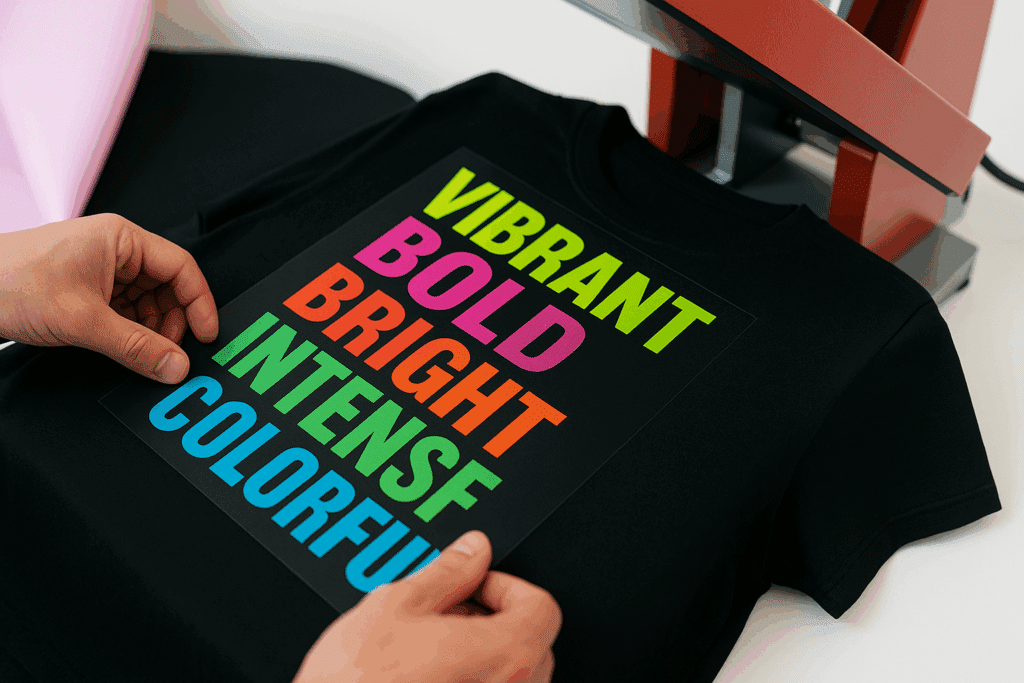
When you make a custom HTV design on fabric, it's frustrating to discover that it didn't hold up and has started to peel.
So here are a few tips to apply HTV to your fabric correctly and keep the heat transfer vinyl from peeling off:
1️⃣ - Make Sure the Heat Transfer Vinyl Works on Your Fabric
Sometimes the fabric you want to customize just isn't compatible with heat transfer vinyl.
That's because to transfer an HTV design, you need to heat it to around 150°C. If the fabric melts when it's exposed to heat, you won't be able to apply vinyl to it. 🤷♀️
Other materials can't be customized with HTV either, because their surface isn't smooth enough. For example, you're unlikely to have much luck applying vinyl to a rug, since its surface is uneven.
Here are the main fabrics you can apply HTV to:
- Cotton
- Polycotton
- Polyester
- Burlap
- Rayon
- Leather
- Nylon
2️⃣ - Not Enough Pressure
It's essential to apply firm pressure to heat transfer vinyl when you transfer it onto a garment. It's best to use a heat press if you can, because it applies the right amount of pressure and makes sure the vinyl sticks properly.
The downside of an iron is that it can be hard to judge how much pressure to use. If there's too little pressure, the vinyl won't stick properly, and if there's too much, the vinyl can get pressed too deeply into the fabric.
Take a close look at your design after pressing it. Can you see the texture of the fabric showing through the vinyl? If not, we recommend pressing it again.
You can also preheat the garment inside out by pressing it for 10 seconds. Then turn it right side out and transfer your design. This way, you can be sure the vinyl's adhesive has properly melted and bonded to the fabric.
3️⃣ - Use Quality Heat Transfer Vinyl
One of the most important things is to always buy quality heat transfer vinyl. After all, since vinyl is the main material in any HTV design, it has to be top quality. 💯
Be sure to read reviews of different heat transfer vinyl shops carefully before you buy.
Buying cheap heat transfer vinyl might feel like you're saving money in the short term, but investing in quality will get you much better results in the long run.
Our company has specialized in heat transfer vinyl since 2019. Our HTV can withstand nearly 100 washes at 30°C! That means your design can stay put on your garment for at least 3 years. ✅
So feel free to browse our heat transfer vinyl shop and check out our different types of vinyl. 😉
4️⃣ - Use a Heat Press That's Larger Than Your Design

If your heat press plate is smaller than your design, that can cause problems, especially if you're using an iron or a handheld press like the Cricut EasyPress Mini.
In that case, if you press the garment several times to cover the whole design, some areas may not get enough heat for the vinyl to stick properly to the fabric. 👕
5️⃣ - Follow the Pressing Instructions You're Given
This one's obvious (but we'll say it anyway): you should always follow the manufacturer's instructions for pressing heat transfer vinyl. Every brand is different, and each type of vinyl (glitter, standard, velvet, and so on) has its own specific heat settings.
For example, our brand's velvet HTV (Transfer Paper) needs to be pressed at 160°C for 25 to 30 seconds with firm pressure, while standard HTV should be pressed at 150°C for just 15 seconds with medium pressure.
6️⃣ - Does the Fabric Have a Coating?
Another issue can come from a coating on the fabric. Some fabrics have a waterproof coating, while others may be treated with a flame-retardant finish.
Vinyl bonds to the fibers of the fabric, so if the fabric has a coating, it will keep the design from sticking properly. That's why it's best to choose plain, uncoated garments.
7️⃣ - Wash Your Custom Garment the Right Way
Washing your HTV garment properly helps keep the heat transfer vinyl from flaking. Here are the care instructions we recommend:
After applying the vinyl, wait at least 24 hours before the first wash.
Wash garments inside out so they last longer.
Machine wash at 30°C.
Don't bleach or dry clean, and avoid liquid fabric softener.
Let the garment air dry (please don't put it in the dryer).
In short, re-sticking a peeling HTV design on fabric can seem like a tough job, but with the right tips, you can do it yourself and bring your favorite jersey back to life.
We hope this article helped you learn more about how to fix heat transfer vinyl that's peeling.
To order heat transfer vinyl in stunning colors at a great value, be sure to check out our heat transfer vinyl shop.



Comments
No comments yet. Be the first to share your experience.
Leave a comment