
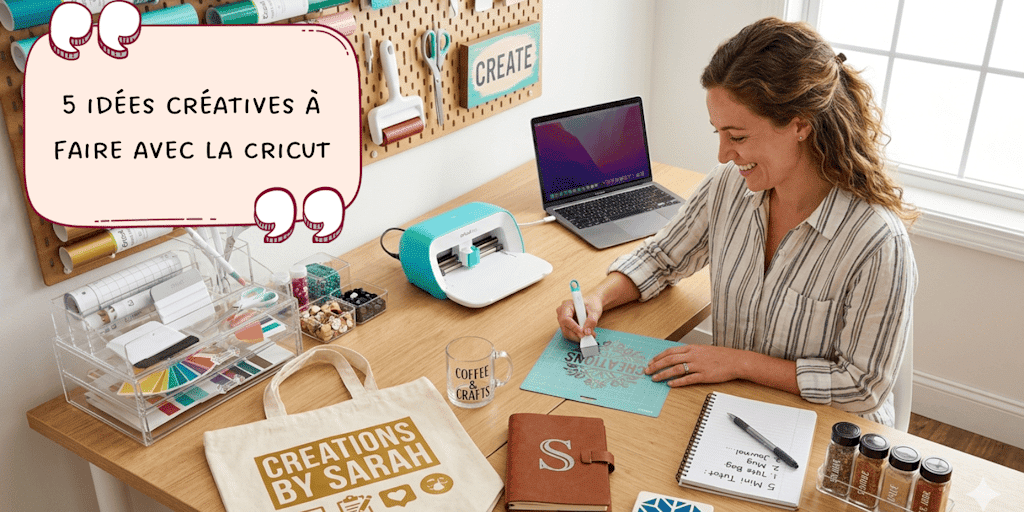
When you're just starting out with a Cricut, you often go through a slightly frustrating phase: the machine sits proudly on your desk, your supplies are ready... but you run out of concrete ideas to get started.
Or worse, you end up copying what you see all over social media without really thinking about how useful the item is or how the final result will look. You end up with "test" projects that get shoved in the back of a drawer. And yet, your Cricut is an amazing tool for making personalized items with great potential, items that are useful in everyday life and, in some cases, perfectly sellable.
In this article, I wanted to share 5 creative ideas to make with the Cricut, mainly using heat transfer vinyl and adhesive vinyl. The goal is simple: to give you accessible projects with a truly "pro" finish that are, above all, easy to recreate at home without spending all night on them.
Alright, let's not waste any more time and jump into Alyah's mini tutorials!
1. Personalize T-Shirts with Heat Transfer Vinyl
The personalized T-shirt is the ultimate Cricut classic. It's often where people start, and for good reason: it's rewarding, and the result looks professional right away. The idea is to create a design that reflects who you are, with a name, an inspiring quote, or a small minimalist logo, and then simply transfer it onto the fabric with heat transfer vinyl.
If it's applied correctly, the design won't budge in the wash and will look just as good as a store-bought T-shirt. Here's how to do it step by step so you don't mess it up:
-
Step 1: Create your design in Design Space. Here's a tip: carefully measure the area on your T-shirt with a ruler before settling on the size of your design. There's nothing worse than a logo that's too small or lost in the middle of the chest! It'll only take you 2 minutes, but at least you'll know exactly what size you need.
-
Step 2: Place your vinyl on the mat shiny side down (yes, yes, we always cut from the back). In the software, whatever you do, don't forget to turn on "Mirror" mode. It's the classic beginner mistake: if you skip it, your text will be backward once it's pressed (grrrr, what's worse than text nobody can read?).
-
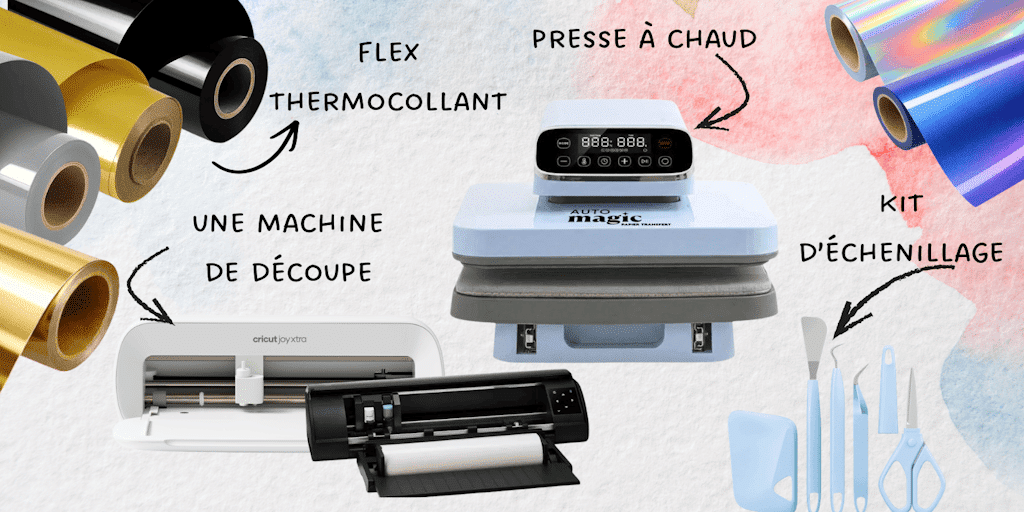
Step 3: Once the cut is finished, use your weeding kit to gently remove the unwanted parts of the heat transfer vinyl (the parts that aren't part of your design). Take your time. It's the most satisfying step, but also the most painstaking!
-
Step 4: Before placing your design, press your T-shirt for 5 seconds with your heat press (or an iron if you don't have one). This removes moisture and wrinkles, which helps the heat transfer vinyl adhere better.
-
Step 5: Position your design using your T-shirt alignment ruler, add a Teflon sheet to protect everything, then apply heat with your heat press. For the exact time and temperature, check the product page for each of our heat transfer vinyls: all the important info is right there! If you're using an iron, apply firm, steady pressure without sliding the iron around.
-
Step 6 Wait until the carrier sheet is warm or completely cool (depending on the instructions for your heat transfer vinyl), then gently peel off the clear carrier sheet.
The little bonus: For results that really last, choose 100% cotton T-shirts and wait 24 hours before the first wash!
2. Make a Personalized Pouch
The personalized pouch is the ultimate "time-saver" project: it's simple, quick, and super handy in everyday life. Whether it's used for makeup, pens, or even as a travel pouch, it always makes a great impression, especially as a gift.
Just like with the T-shirt, we're sticking with heat transfer vinyl here, since most pouches are made of fabric. My advice: keep the design clean and simple. A name, stylized initials, or a short word (like "Thanks" or "Mess") looks much better on a small surface and gives a more professional result.
Here's how to nail your pouch every time:
-
Choosing the blank: Go for a cotton pouch or a canvas pouch, ideally with a nice, smooth surface. Avoid overly synthetic or "peach skin" fabrics, which don't handle high heat well.
-
Preparing the design: Create your design in Design Space (or your cutting machine's software), sizing it to fit your pouch. Once again, don't forget to turn on Mirror mode before you cut your heat transfer vinyl (shiny side down on the mat).
-
Weeding and centering: After removing the excess material with your weeding kit, it's time for the crucial step: positioning. On a pouch, even the slightest misalignment shows right away. Take the time to center your design properly in relation to the zipper.
-
Pressing (watch out for the seams!): This is the one tricky part of this project. If your pouch has thick seams or a zipper, they can keep the press from making full contact with the fabric. Feel free to slip a small riser (or a folded cloth) inside the pouch to raise the area you're pressing.
-
The finish: Apply heat firmly with your heat press. Wait until the carrier sheet has cooled completely before peeling it off (that's the plastic backing on your heat transfer vinyl). If you notice the design lifting, give it another quick press!
The extra tip: For an even more polished look, use "Glitter" or "Metallic" vinyl. On a small pouch, it instantly adds a high-end touch!
3. Personalize Jars with Adhesive Vinyl
Personalized jars are both decorative and practical. They help you organize a kitchen, an office, or even a bathroom while adding a stylish touch.
Unlike fabric projects, this one uses adhesive vinyl, which is perfect for smooth surfaces like glass.
You can make labels (sugar, flour, coffee), add a name, or even a small illustration.
To make this project, start by cleaning your jar thoroughly to remove any trace of grease and/or dust. This step is essential for the vinyl to stick properly.
Next, create your design in your cutting machine's software, then cut the adhesive vinyl with your Silhouette Cameo 5. Weed your design with your weeding kit, then apply transfer tape so you can position it easily.
Place the design on the jar, smooth it down with a squeegee (or a stiff card) to avoid bubbles, then gently peel off the transfer tape.
If the surface was prepped properly, you'll get a clean, long-lasting result!
4. Make Wall Decor with Adhesive Vinyl
Adhesive vinyl also lets you create simple but striking wall decor.
You can make names for a child's bedroom, quotes, or decorative designs to stick directly on a wall, a door, or a piece of furniture.
This type of project makes a real visual impact, even with a minimalist design.
-
Design: Create your text or design in Design Space (or any other software). Measure your wall carefully so you can size the project and each element correctly.
-
Cutting: Start the cut on your cutting machine (and don't forget to check your blade setting).
-
Weeding: Gently remove the unwanted pieces of adhesive vinyl with your weeding kit so only your design is left.
-
Transfer: Apply a strip of transfer tape over your design and burnish it well with the squeegee.
-
Application: Position everything on your surface (wall, door, furniture). Smooth it down gradually with your squeegee or a stiff card to push out any air bubbles, then gently peel off the clear film (transfer tape).
The most important thing here is choosing the right size and color for your design so it blends nicely into the space.
5. Make a Chic Acrylic Bookmark
An acrylic bookmark is the perfect project for moving on to adhesive vinyl. Unlike heat transfer vinyl, there's no heat involved here: you're working with a heavy-duty sticker. The result is modern, see-through, and very elegant. It's the kind of little item that looks like it came from a designer boutique.
For this project, the trick is to play with layering or color contrast. Here are the steps for a bubble-free result:
-
Choosing the vinyl: For acrylic, I recommend permanent adhesive vinyl. It'll hold up better over time with repeated handling.
-
Prepping the surface (crucial!): Acrylic bookmarks often come with an opaque protective film on both sides. Peel it off, then give the bookmark a quick wipe with a cloth and some rubbing alcohol to remove fingerprints and dust. A perfectly clean surface is the key to perfect adhesion.
-
Cutting and weeding: Prepare your design in your cutting software (a name, a little flower, a literary quote), then start cutting with your Silhouette Cameo 5. This time, no need for mirror mode! You cut the vinyl with the colored side facing up. Once it's cut, remove the excess with your weeding kit.
-
The transfer: This is where the transfer tape comes in. Stick a piece of tape over your weeded design, burnish it well (press hard with your scraper), then peel it all up. Your design should now be on the clear sticky tape.
-
Precision application: Carefully position your design on the bookmark. Once it's down, it's down! Using your squeegee, burnish from the center outward to push out any air bubbles. Slowly peel off the transfer tape, keeping it flat against the surface.
-
The finishing touch: For a complete look, add a small silk tassel or a colorful ribbon through the bookmark's hole. It makes all the difference!
The extra tip: If you want a "wow" effect, you can paint the back of the bookmark with a little acrylic paint (for a brushstroke effect) before applying your vinyl to the front. The contrast with the clear acrylic is stunning!
Make Personalized Gifts
You now have 5 creative ideas to make with the Cricut to spark your inspiration! Which tutorial inspired you the most? Let us know in the comments. And if you give one a try, tag us on social media: we always love seeing your beautiful creations! 🎨
The Cricut is especially handy for making personalized gifts.
Instead of buying a generic item, you can turn a simple product into something unique by adding a name, a date, or a message.
Depending on the surface, you can use either heat transfer vinyl (for fabric) or adhesive vinyl (for hard surfaces).
The process is basically the same: you choose your blank, create your design, cut it with your Cricut, then apply the right material.
What makes the difference here isn't how complex the design is, but how meaningful the personalization is and how well it's finished.
The Cricut offers plenty of possibilities, but the real point is to choose projects that are simple, useful, and well made.
With heat transfer vinyl and adhesive vinyl alone, you can already make a wide variety of creations without piling up supplies.
The key is to master the basics, take care with your finishing touches, and make items that are genuinely useful.
That's how you go from a simple hobby to creations that people can truly love, and that might even sell.
FAQ
Are These Projects Beginner-Friendly?
Yes, these are accessible projects, as long as you follow the steps and don't skip prepping your surfaces.
What's the Difference Between Heat Transfer Vinyl and Adhesive Vinyl?
Heat transfer vinyl is used on fabric and needs heat to bond. Adhesive vinyl is already sticky and is used on smooth surfaces like glass, plastic, or walls.
Can I Sell These Creations?
Yes, these kinds of products are commonly sold. You just need to make sure your designs are clean and your application is high quality.
What Equipment Do I Need to Get Started?
A cutting machine like a Cricut or Silhouette Cameo 5, heat transfer vinyl, adhesive vinyl, and a way to apply heat, like a heat press (or an iron), are more than enough to get started.



Comments
No comments yet. Be the first to share your experience.
Leave a comment