
Mi sono chiesta a lungo come pulire il tappetino da taglio Cricut senza renderlo inutilizzabile…
🤔
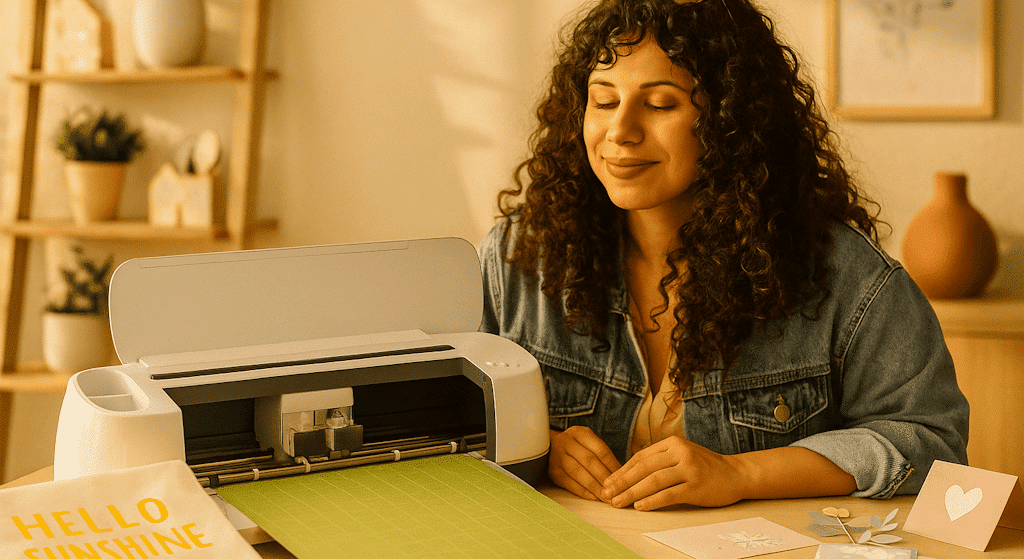
Se usi spesso la tua Cricut (o qualunque altra macchina da taglio del resto), sai bene che il tuo tappetino da taglio è il tuo migliore alleato
✂️
. È lui che tiene ben fermi il tuo foglio, il tuo vinile, il tuo tessuto, il tuo termoadesivo (e molto altro ancora!) durante il taglio.
Ma… diciamoci la verità: è anche lo strumento che si sporca più in fretta
😅
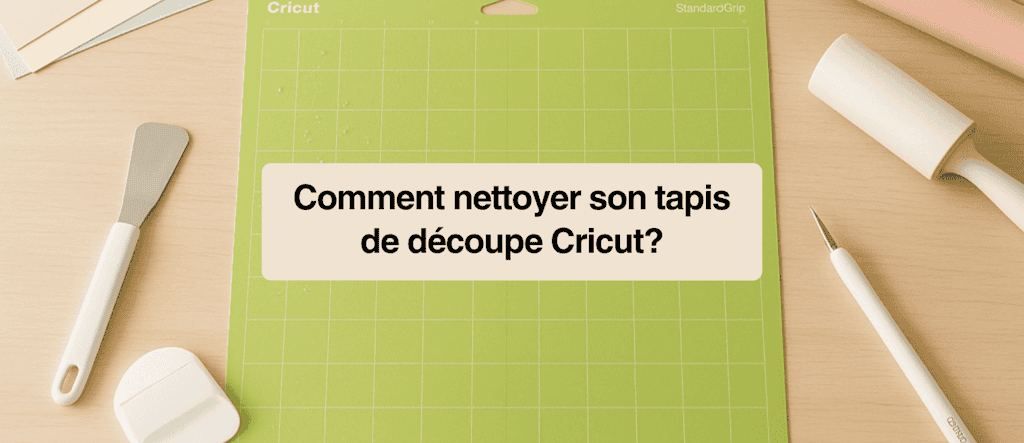
. Ed ecco la domanda dalle mille e una risposta: come pulire il tappetino da taglio Cricut?
Purtroppo, quando ci si mette a pulire un tappetino da taglio Cricut, ci si ritrova subito persi
😅
. Su internet, o non ci sono quasi contenuti chiari e affidabili sull'argomento
📉
, oppure al contrario ci si imbatte in una valanga di trucchetti completamente casuali
🤯
. E inevitabilmente, quando si vuole fare bene, si finisce per provare un po' tutto quello che capita… finché diventa scoraggiante
😔
.
Perché tra i prodotti troppo aggressivi
🧴
, le false buone idee
💡
e i consigli contraddittori
❌
, non si sa più di chi fidarsi. Risultato: si mette il tappetino da parte, si perde la voglia di pulirlo, e a volte addirittura… si finisce per rovinarlo ancora di più di quanto già non lo fosse
😩
.
È esattamente quello che non voglio più che tu viva
✨
, ed è per questo che voglio condividere con te i gesti giusti da adottare per ridare vita al tuo tappetino, senza complicazioni
😉
.
Perché diciamolo, un tappetino sporco è un bel problema → pezzi che non si attaccano più, tagli sbagliati, perdita di tempo, spreco di materiale… Insomma, tutto ciò che si odia quando si vogliono creazioni perfette
💥
.
👉
Ma aspetta, ho comunque una buona notizia! Non serve essere dei professionisti delle pulizie per pulire il tuo tappetino da taglio Cricut (anzi, può addirittura diventare un piccolo momento NoStress tra un progetto e l'altro
🧽
✨
). Allora, invece di ricomprarne uno ogni volta, perché non imparare insieme a pulire il tappetino da taglio Cricut?
So che a tutti piace davvero risparmiare tempo, quindi ecco i miei migliori trucchi semplici, rapidi ed efficaci per:
✅
Pulire il tappetino da taglio Cricut senza rovinarlo
✅
Renderlo di nuovo super adesivo
✅
E soprattutto, prolungare al massimo la sua durata di vita
💡
Allora mettiti comoda, scegli il primo tappetino da taglio Cricut che vuoi pulire, prendi appunti… e preparati a dire addio al tappetino tutto sporco
👋
e ciao ciao ai tagli perfetti
🎉
.
🔎
Perché pulire regolarmente il tappetino da taglio Cricut?
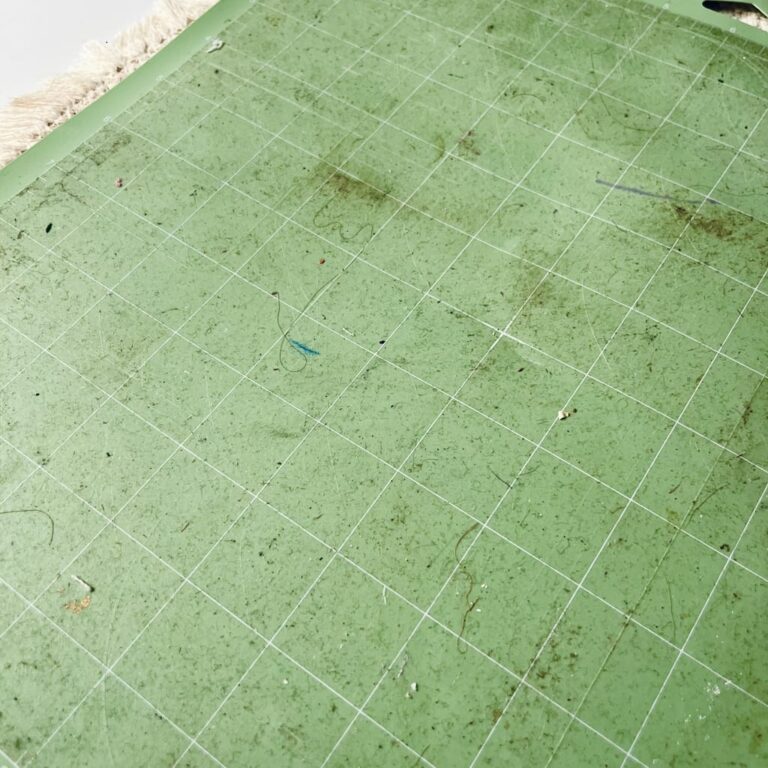
Il tuo tappetino da taglio Cricut è un po' come il tuo piano di lavoro: se non lo pulisci, diventerà presto inutilizzabile. Dopo qualche taglio, noterai che si ricopre di piccoli pezzetti di carta, di fibre di tessuto o persino di polvere o PEGGIO di pezzetti di vinile scartati (è per questo che ti consiglio di avere un raccoglitore di scarti. Ti eviterà di passare ore a staccare questi mini pezzetti uno a uno dal tappetino). Risultato: il tuo tappetino da taglio Cricut perde aderenza e le tue creazioni non tengono più correttamente. E poi diciamolo, non è molto piacevole lavorare con un tappetino da taglio in queste condizioni.
✨
Un tappetino tutto sporco significa:
-
Tagli sbagliati perché il foglio si muove o si stacca.
-
Tempo perso a riposizionare il tuo progetto. Oppure ad attaccare un sacco di pezzetti di scotch per farlo tenere in posizione (sì sì, mi dichiaro colpevole **
😅
**).
-
Materiale sprecato (e quando si è creativi, fa male al cuore
🥲
).
-
Una macchina che sforza più del necessario… e che finisce per usurarsi più in fretta.
-
Un progetto che doveva essere divertente e veloce… e che si trasforma in un vero incubo
😩
.
-
E soprattutto: tanta frustrazione, mentre con un tappetino ben tenuto tutto diventa molto più semplice
✂️
✨
.
Ecco perché devi pulire regolarmente il tuo tappetino da taglio Cricut: ne prolunghi la durata di vita, eviti di tirare fuori il portafoglio troppo spesso per ricomprarne uno, e ti assicuri tagli precisi ogni volta. Insomma, è tutto a vantaggio tuo e dei tuoi progetti
✨
.
Inoltre, un tappetino ben tenuto significa meno stress durante le tue creazioni e più piacere nell'usare la tua macchina. Risparmi tempo, risparmi sui materiali e mantieni la soddisfazione di vedere il tuo progetto riuscito al primo colpo. Credimi, prendersi 5 minuti per pulirlo vale ampiamente le ore di frustrazione che potresti avere a causa di un tappetino non adesivo, sporco o inefficace!
🚫
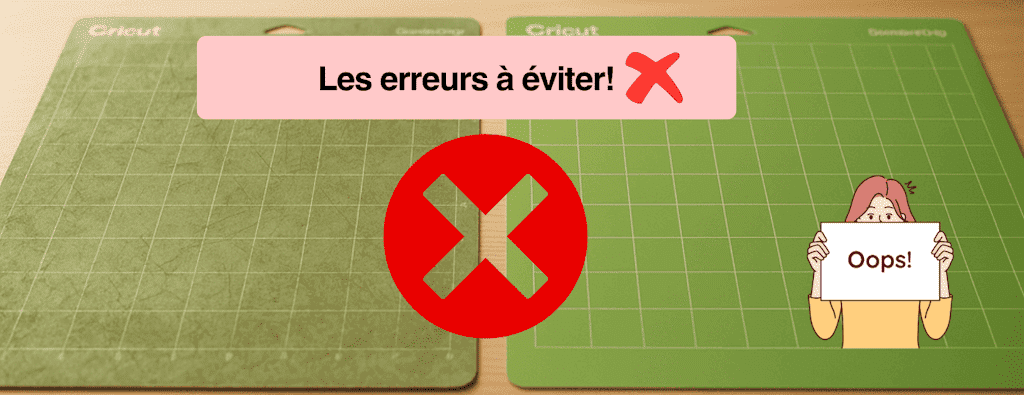
Gli errori da evitare assolutamente quando si pulisce il tappetino da taglio Cricut
Quando si vuole fare bene, si può cadere facilmente nella trappola e rovinare il tappetino da taglio Cricut senza volerlo. Ecco gli errori più frequenti da evitare per pulire il tuo tappetino da taglio per Cricut:
-
Usare prodotti troppo aggressivi
👉
L'alcol, l'acetone, la candeggina o qualsiasi altro prodotto chimico forte possono distruggere la colla del tappetino. Risultato: non si attaccherà più per niente. Meglio restare su prodotti delicati
😉
.
-
Strofinare troppo forte
Le spugne abrasive, le spazzole dure o il lato "ruvido" delle spugne sono da bandire. Possono graffiare il tuo tappetino e ridurne l'efficacia. Preferisci una spugna morbida o un panno in microfibra. -
**Metterlo in lavastoviglie (sì sì, alcuni lo fanno
😅
)**
Anche se l'idea può, eventualmente, sembrare pratica, è il modo migliore per deformarlo, togliere tutta la colla e quindi renderlo totalmente inutilizzabile. Quindi DIMENTICA completamente questa idea per il bene del tuo tappetino😉
.
-
Asciugarlo con il calore
Termosifone, asciugacapelli o sole diretto: da evitare assolutamente. La colla non ama il calore e il tuo tappetino rischia di ondularsi.
In breve: sii paziente, vai piano, e il tuo tappetino ti ringrazierà
🙏
.
🧽
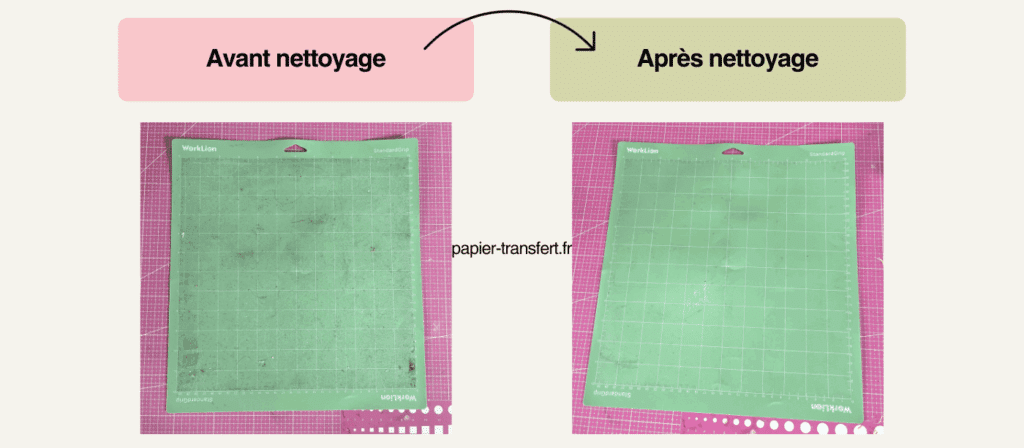
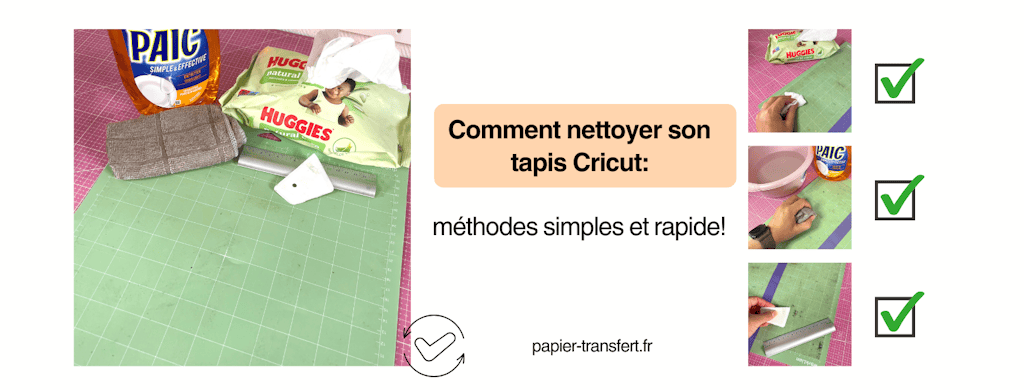
Come pulire il tappetino Cricut: metodi semplici
Come ti ho detto più sopra, non serve essere dei professionisti delle pulizie per pulire il tappetino da taglio Cricut, e dargli una rinfrescata! A seconda delle sue condizioni, puoi scegliere il metodo più adatto per pulire il tuo tappetino da taglio Cricut.
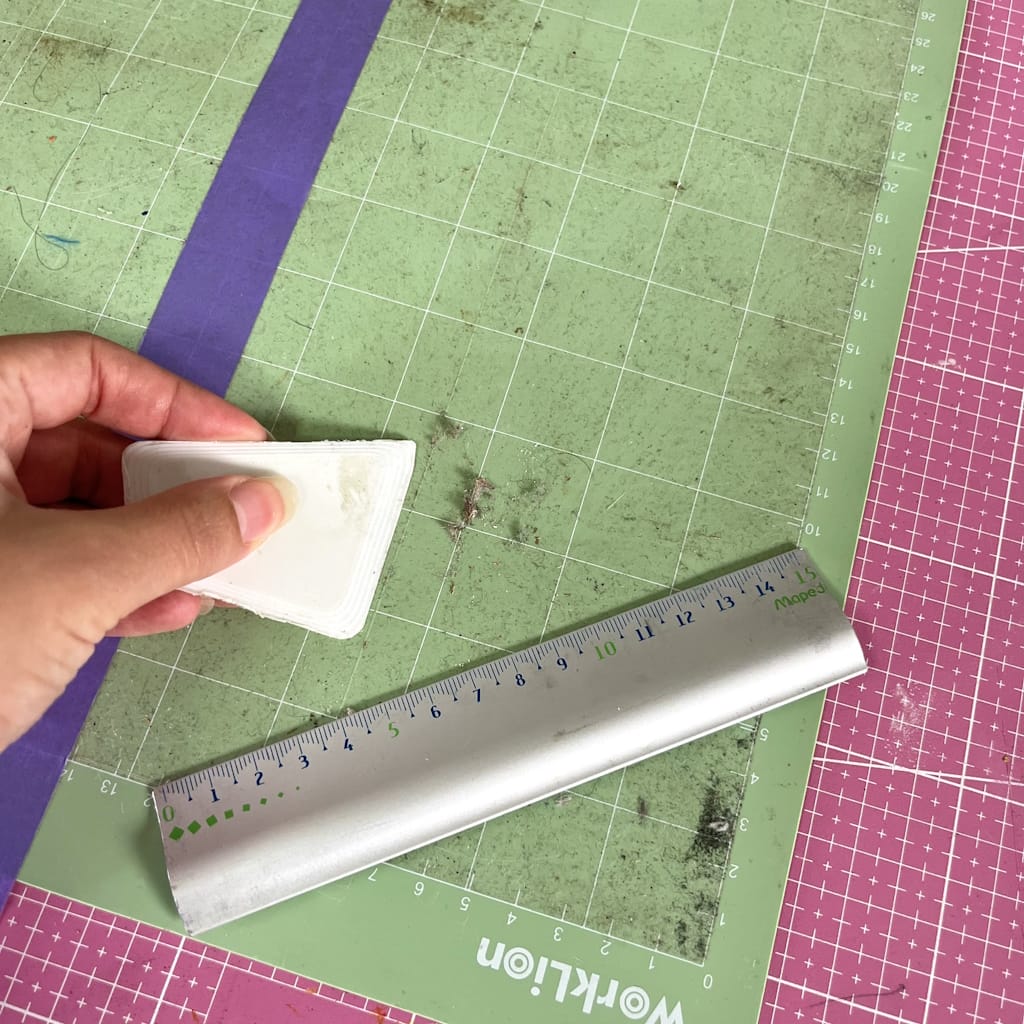
🔹
a) Il metodo delicato, per i piccoli residui
Se il tuo tappetino è solo un po' sporco (qualche pezzetto di carta, polvere, peli…), non c'è bisogno di tirare fuori l'artiglieria pesante.
-
Usa una spatola Cricut o un righello per grattare delicatamente i residui.
-
Passa un rullo levapelucchi (lint roller), è magico per catturare tutto quello che si attacca.
👉
Perfetto per una manutenzione rapida dopo ogni progetto.
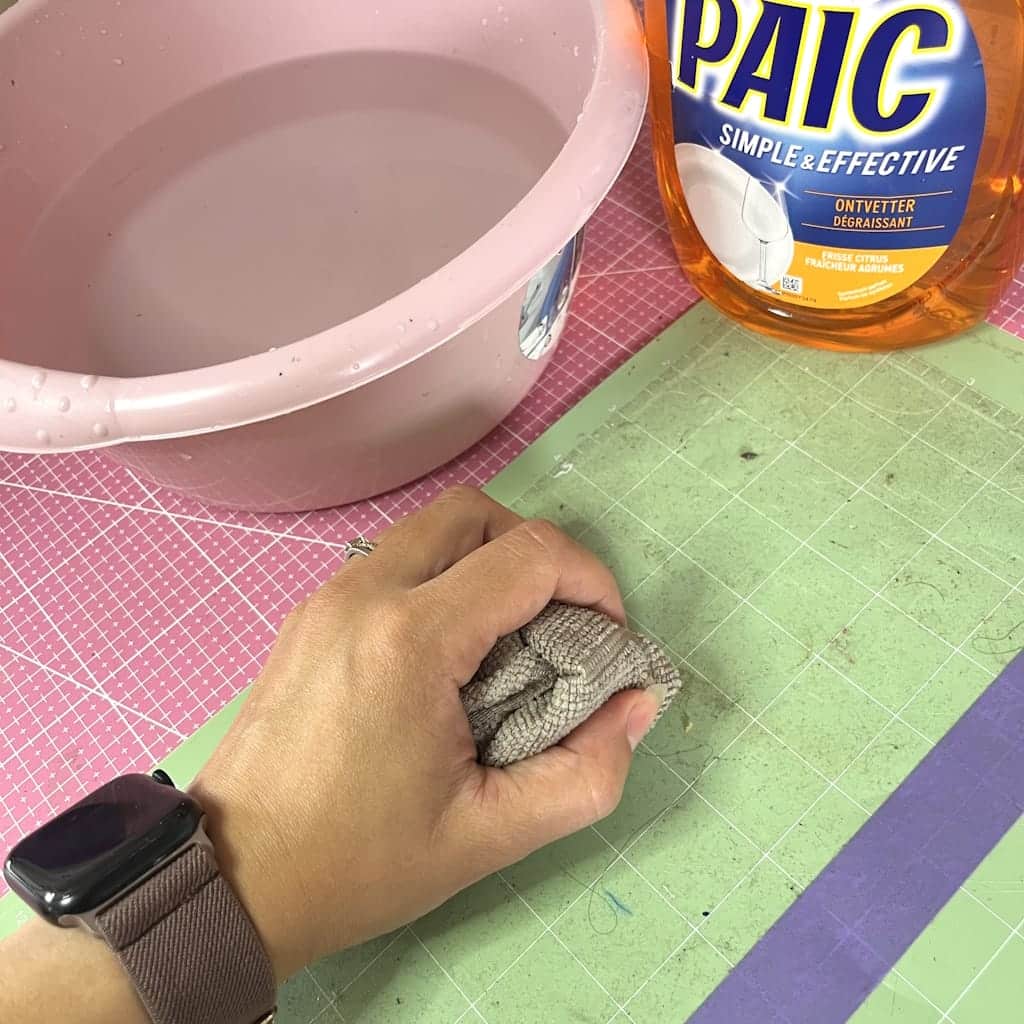
🔹
b) Il metodo con acqua e sapone, per un tappetino molto sporco
Quando il tuo tappetino è davvero ricoperto di residui e niente tiene più:
-
Passalo sotto un filo d'acqua tiepida.
-
Aggiungi un po' di sapone delicato (il detersivo per piatti va benissimo).
-
Pulisci delicatamente con una spugna morbida o un panno in microfibra facendo movimenti circolari.
-
Risciacqua con acqua pulita.
-
Lascia asciugare all'aria, ben disteso, finché non è completamente asciutto.
⚠️
Niente calore diretto (asciugacapelli, termosifone, sole), altrimenti la colla soffre e il tappetino può deformarsi.
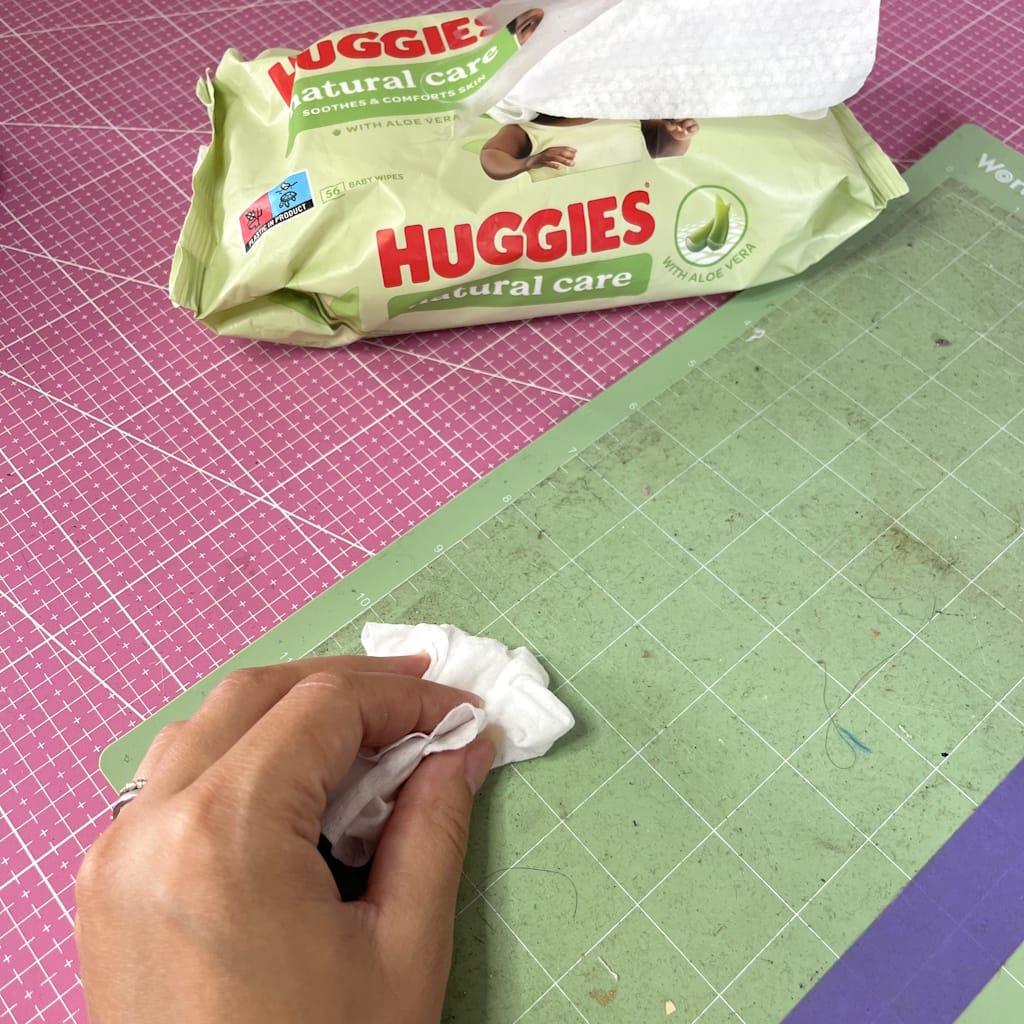
🔹
c) Il metodo con salvietta, per una rinfrescata rapida
Non hai tempo? Usa una salvietta per neonati senza alcol. Insisto: scegli una salvietta SENZA alcol (lascia perdere le salviette per le pulizie domestiche), altrimenti puoi dire addio alla colla del tuo tappetino! Passala delicatamente sul tappetino per togliere le piccole impurità. Sempre facendo movimenti circolari. È una soluzione express, ma pratica tra due grandi pulizie.
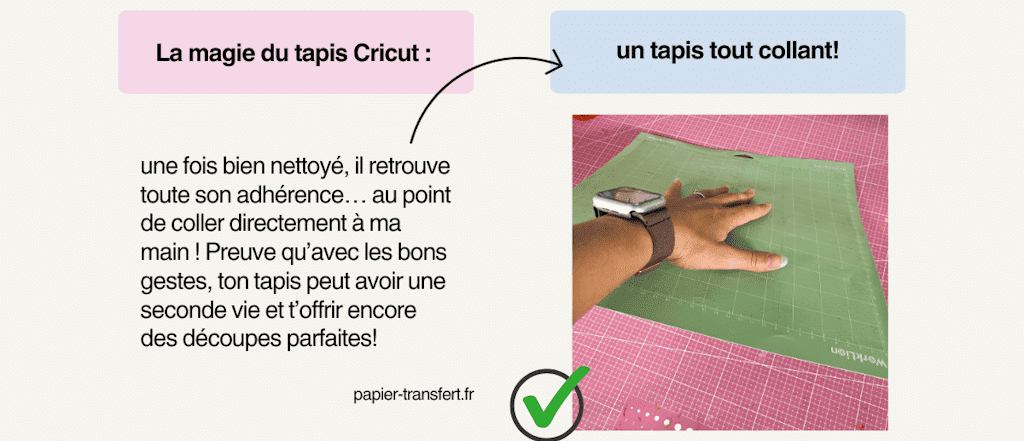
È del resto la mia tecnica preferita, perché mi fa risparmiare tempo, mantenendo allo stesso tempo il mio tappetino pulito e adesivo più a lungo.
👉
Trucco bonus: pulisci il tuo tappetino non appena vedi che perde un po' di aderenza, invece di aspettare che sia completamente ricoperto. Ne prolungherai così la durata di vita.
💡
Trucchi per prolungare la durata di vita del tuo tappetino da taglio Cricut
Un tappetino Cricut non dura in eterno… ma con i giusti riflessi, puoi rimandare ampiamente il momento di doverne ricomprare uno:

Ecco i miei migliori trucchi:
-
**Rimettere sempre la pellicola protettiva dopo l'uso
**La pellicola di plastica che ricopre il tuo tappetino non è lì per fare bella figura: protegge la colla dalla polvere e dalle impurità. Ricordati di rimetterla sistematicamente. Lo so, è un po' una scocciatura da rimettere, ma allo stesso tempo è così importante! -
Usare il tappetino giusto per il progetto giusto
Cricut propone diversi tappetini: LightGrip (carta sottile), StandardGrip (vinile, cartoncino), StrongGrip (materiali più spessi) e FabricGrip (tessuti). Usare il tappetino sbagliato significa usurarlo molto più in fretta. E per stare tranquilla per un bel po' puoi comprare tutti i tappetini da taglio Cricut in una volta sola! Così avrai sempre il tappetino da taglio Cricut giusto per lavorare! -
**Non tagliare mai senza materiale
**Se la tua lama passa direttamente sul tappetino, lo rovinerà e lascerà segni profondi (oppure ci passa attraverso😱
, e lì è la CATASTROFE!)
-
Conservarlo correttamente
Tieni il tuo tappetino disteso, in un luogo pulito e asciutto. Evita di piegarlo o di esporlo alla luce diretta del sole. -
Pulire regolarmente, ma non troppo spesso
Una buona manutenzione è un giusto equilibrio. Pulire troppo spesso può anche ridurre l'efficacia della colla. Fallo solo quando senti che l'aderenza diminuisce. Non serve a niente pulire il tuo tappetino da taglio Cricut dopo ogni utilizzo.
👉
Con queste piccole abitudini, il tuo tappetino Cricut ti accompagnerà molto più a lungo nelle tue creazioni
✨
Pulire il tappetino da taglio Cricut non è solo una questione di risparmio. È anche la chiave per riuscire nei tuoi progetti senza stress. Con qualche gesto semplice e regolare, puoi mantenere il tuo tappetino pulito, prolungarne la durata di vita ed evitare un sacco di frustrazioni (sì sì, è davvero irritante rovinare un progetto a causa del tappetino da taglio)!
Ricorda soprattutto che bisogna:
👉
Pulire con delicatezza
👉
Proteggere il tuo tappetino dopo ogni utilizzo
👉
Accettare che un giorno andrà sostituito.
Il tuo tappetino è il tuo migliore alleato creativo, quindi coccolalo
💚
.
👉
E tu, qual è il TUO trucco per mantenere il tuo tappetino Cricut come nuovo? Condividilo nei commenti, potrà aiutare altri appassionati!
PS: Sappiate che nessun tappetino da taglio Cricut è stato maltrattato per questo articolo!
❓
FAQ: come pulire il tappetino da taglio Cricut?
1. Posso mettere il mio tappetino Cricut direttamente sotto l'acqua?
Sì, ma solo con acqua tiepida e un po' di sapone delicato. Evita l'acqua calda che può rovinare la colla. Non è bello dover ricomprare un tappetino ancora in buone condizioni ma che non si attacca più.
2. Quante volte si può pulire un tappetino Cricut?
Dipende dal tuo utilizzo. In generale, puoi pulirlo diverse volte prima che perda completamente la sua aderenza.
3. Posso riapplicare la colla se il mio tappetino non aderisce più?
Alcuni usano spray di colla riposizionabile per prolungare la vita del tappetino, ma Cricut non lo consiglia ufficialmente. È un trucco "di emergenza".
4. Qual è il metodo migliore per togliere i piccoli pezzetti di carta?
Il rullo levapelucchi (lint roller) o la spatola di plastica sono i più efficaci e rapidi.
5. Devo per forza ricomprare un tappetino quando non è più adesivo?
Sì, prima o poi la sostituzione è inevitabile. Ma con una buona manutenzione, rimandi questo momento e sfrutti al massimo il tuo tappetino attuale.
💡
Un ultimo piccolo segreto: non sei obbligata a ricomprare sempre i tappetini da taglio Cricut ufficiali, che spesso costano piuttosto cari. Esistono alternative di altre marche, molto più accessibili, e onestamente… funzionano altrettanto bene!
🙌
Se vuoi risparmiare senza sacrificare la qualità, puoi dare un'occhiata ai modelli disponibili proprio qui.


