Die Software Silhouette Studio ist ein echtes Kreativ-Juwel und bietet eine ganze Palette an Werkzeugen und Tricks, um deine künstlerischen Kreationen umzusetzen.
Wir tauchen heute in diese Software ein, um dir zu zeigen, was sie alles in Sachen Schriftarten kann!
1 - Die Schriftart in Silhouette ändern
Um in Silhouette Studio mit dem Schreiben anzufangen, klickst du auf das Symbol "A" ganz links auf dem Bildschirm, klickst einmal in den Silhouette-Rahmen und kannst dann die Wörter oder Sätze schreiben, die du möchtest.
Die Software Silhouette Studio verwendet die Standardschriftart deines Computers. Um die Schriftart zu ändern, klickst du auf das Symbol "A", das sich diesmal rechts auf dem Bildschirm befindet und nicht links. Markiere deinen kompletten Text, indem du ihn hervorhebst, und wähle die Schriftart, die dir gefällt.
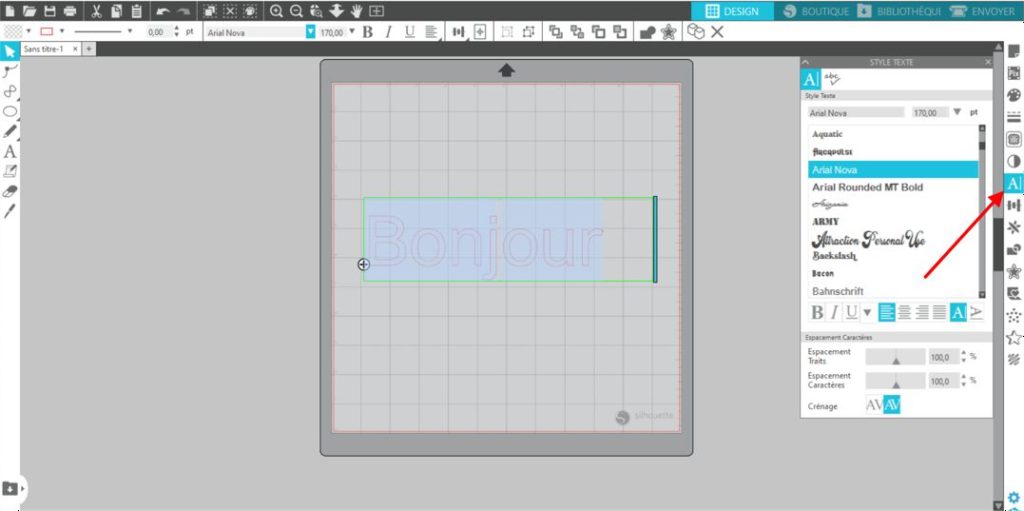
Wenn du in Silhouette die Standardschriftart ändern möchtest, ohne während deiner Sitzung jedes Mal auf das Symbol "A" klicken zu müssen, klicke zunächst im Symbol "A" rechts auf die Schriftart, die du verwenden möchtest. Klicke anschließend auf das Symbol "A" links, und die Software hat diese Schriftart gespeichert. So kannst du durchgehend mit deiner festgelegten Schriftart schreiben, ohne den Vorgang erneut machen zu müssen.
Hinweis: Um mehr Schriftarten zu bekommen, hast du zwei Möglichkeiten. Du kannst Schriftarten im Internet herunterladen. Zum Beispiel bietet die Seite 1001 Fonts tausende von Schriftarten an. Achtung allerdings, die meisten davon sind nur für den privaten Gebrauch kostenlos. Du kannst Schriftarten auch direkt in der Silhouette-Software bestellen, diese sind aber kostenpflichtig und manchmal ziemlich teuer!
2 - Zeichenabstand
Um den Abstand zwischen den Buchstaben zu vergrößern oder zu verkleinern, gibt es nichts Einfacheres:
Klicke auf das Wort, das du ändern möchtest, und markiere es, indem du die linke Maustaste gedrückt hältst. Klicke auf das Symbol "A" rechts auf dem Bildschirm. In dem kleinen Rechteck erscheint ganz unten ein Regler mit dem Titel "Zeichenabstand", mit dem du den Zeichenabstand anpassen kannst, indem du diesen Regler vergrößerst oder verkleinerst. Du kannst den Prozentwert auch über die Tastatur ändern (das Maximum liegt bei 500 %, aber du wirst sehen, dass das mehr als genug ist!)
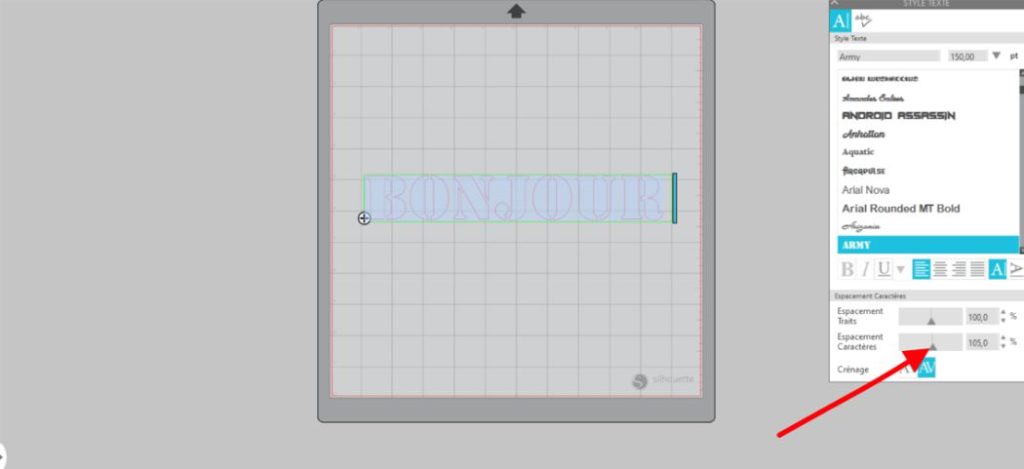
Hinweis: Wenn du mehrere Wörter auf mehreren Zeilen hast, kannst du auch den Abstand zwischen den Zeilen mit dem Regler direkt darüber anpassen 🙂
3 Tutorial Silhouette Studio - Wie macht man eine dünne Schrift dicker?
Manche Schriftarten, wie zum Beispiel Schreibschriften, lassen sich wegen ihrer Strichstärke mit deinem Silhouette Caméo etwas schwer schneiden. Wir schauen uns an, wie du deine Schrift dicker machst, damit sie sich leicht mit der Maschine schneiden lässt.
Schritt 1 - Tippe deinen Text
Tippe deinen Text in den karierten Bereich von Silhouette.
Schritt 2 - Erstelle eine Kontur deiner Schrift:
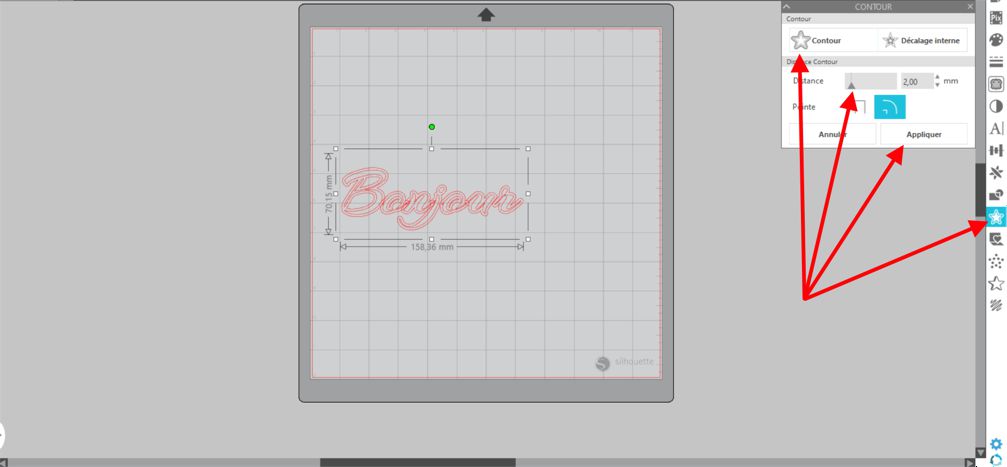
Klicke auf das sternförmige Symbol rechts auf dem Bildschirm und klicke auf den Text, den du getippt hast. Klicke nun auf "KONTUR" in dem kleinen Rechteck, das erschienen ist, und stelle die Strichstärke des Textes mit dem Abstandsregler ein. Sobald du die richtige Stärke hast, klicke auf Anwenden.
Schritt 3 - Den alten Text verschieben oder löschen
Du kannst die linke Maustaste auf deinem alten Text gedrückt halten, um ihn zu verschieben, und schon hast du einen dickeren Text.
4 Silhouette Tutorial - Das Problem überlappender Buchstaben beheben
Es kommt vor, dass manche Schriftarten Buchstaben haben, die sich überlappen, wie zum Beispiel auf diesem Bild, wo der Buchstabe O das N überlappt, das wiederum das J überlappt.
Beim Schneiden deines Textes berücksichtigt die Software diese Überlappung und schneidet die kleinen Teile aus, die sich überlappen. Du siehst dann also Schnittspuren, was auf dem Textil womöglich nicht sehr ästhetisch aussieht.
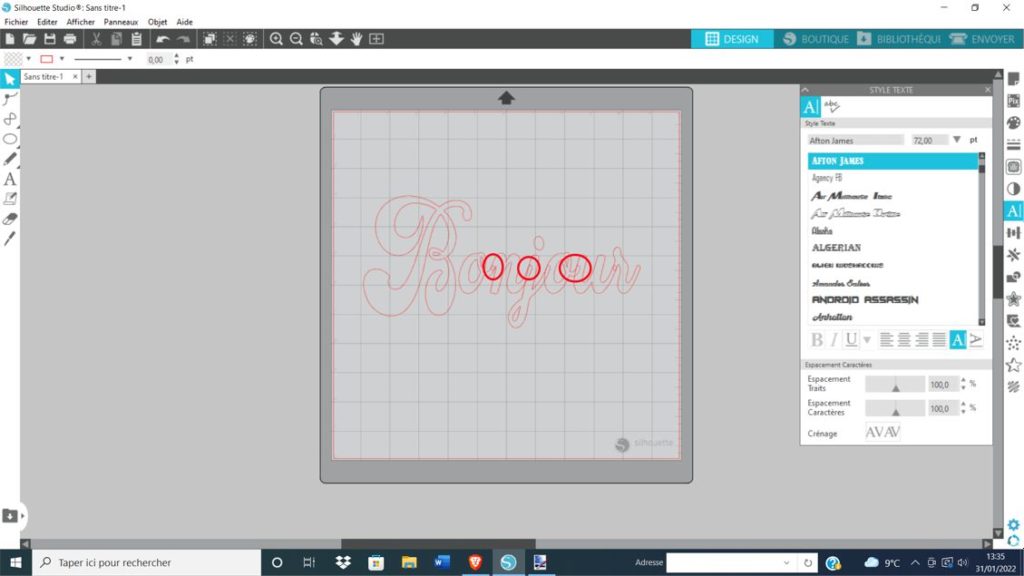
Um das zu ändern, klicke auf das Wort, gehe in das Fenster mit dem Kreis und dem Rechteck mit dem Titel "Ändern" und klicke dann auf "VERSCHWEISSEN". Du wirst sehen, dass die Überlappung wie von Zauberhand verschwindet! 🧙
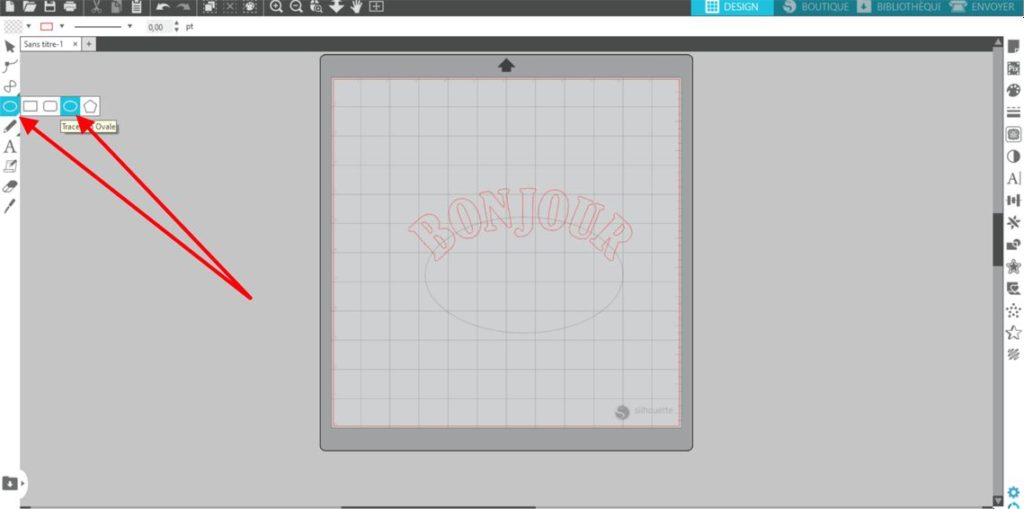
5 - Wie rundet man Text ab?
Viele von uns möchten ihren Text abrunden, wenn wir ein Motiv gestalten, denn das verleiht ihm manchmal einen außergewöhnlichen Effekt und Stil.
Bitte folge diesen Schritten, um deinen Text in der Software Silhouette Studio abzurunden:
Klicke auf das Fenster mit dem Kreis links auf deinem Bildschirm, wähle das kreisförmige Motiv und ziehe mit der linken Maustaste einen Kreis in der Größe, die du möchtest.
Nimm anschließend deinen Text und platziere ihn einfach auf dem Kreis, indem du die linke Maustaste gedrückt hältst.
Hinweis: Wie du sehen kannst, ist der Kreis grau geworden, was bedeutet, dass er beim Schneiden deines Motivs nicht berücksichtigt wird.
Achtung: Ein Text, der zuvor verschweißt wurde, kann nicht abgerundet werden. Bitte runde den Text zuerst ab und verschweiße ihn dann.
6 - Wie macht man eine Rundung in Wellenform?
Du kannst auch einen Text in Wellenform erstellen.
Klicke auf das Werkzeug "Linien" links auf deinem Bildschirm und klicke auf das Symbol, das dem Unendlichkeitszeichen ähnelt.
Klicke in den karierten Bereich der Software und klicke erneut, um die Welle zu erstellen.
Sobald deine Welle vollständig fertig ist, mache einen Rechtsklick, und das Erstellen der Welle wird beendet.
Wie beim Erstellen eines geschwungenen Textes nimmst du den gewünschten Text, indem du die linke Maustaste gedrückt hältst, und lässt ihn auf einer der Kurven der Welle los, die du erstellt hast. So nimmt dein Text die Form der Welle an. 😉
Jetzt, wo du weißt, wie man Text in Silhouette Studio ändert und erstellt, kannst du schöne Kreationen mit vielen verschiedenen Stilen umsetzen!
Das Schneiden von Text in diesem Tutorial zu Silhouette Studio kann zum Beflocken von Textilien mit thermokleber Flex genutzt werden oder um Sticker mit Klebevinyl zu gestalten, und es gibt noch viele weitere Möglichkeiten, mit dieser Software seine Kreativität auszudrücken! 🤩
Für Beflockungen auf Textilien und hochwertige Sticker mit deiner Maschine Silhouette Caméo kannst du auf unserer Website tolle Thermokleber-Flexfolien und Klebevinyle bestellen!