Viele von uns möchten die Gegenstände unseres Alltags personalisieren, um sie schöner zu machen,
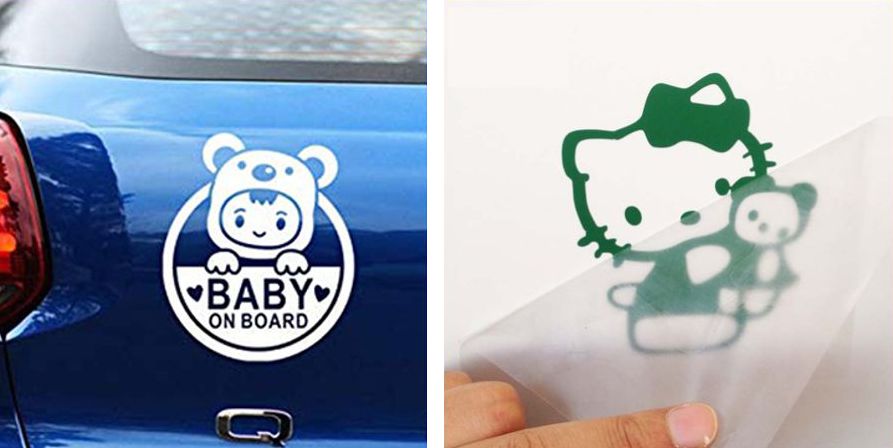
Das Anbringen von Vinyl-Stickern ist eine Personalisierungsmethode, mit der du das gewünschte Motiv auf feste Gegenstände wie Fenster, Trinkflaschen, Bilderrahmen … kleben kannst.
Heute schauen wir uns an, wie du deinen eigenen Sticker erstellen und ihn anschließend auf einem Untergrund anbringen kannst.
1 - Wie man Vinyl-Sticker personalisiert:
Es gibt mehrere Methoden, um seine eigenen Sticker zu personalisieren, hier schauen wir uns 2 verschiedene Methoden an:
a - bereits personalisierte Sticker bestellen
Die erste Methode besteht darin, ein Personalisierungsunternehmen zu bitten, die Sticker für dich zu erstellen. Wenn du leichte Gegenstände wie zum Beispiel Tassen personalisieren möchtest, kannst du sie bitten, den Sticker direkt auf der Tasse anzubringen.
Unternehmen wie flocage Express oder Le bureau des goodies können diese Anfrage perfekt erfüllen.
Wenn du personalisierte Sticker an den Wänden oder Fenstern deines Wohnzimmers anbringen möchtest, kannst du bei einem Unternehmen bereits personalisierte Sticker bestellen, um sie selbst an der Wand anzubringen.
Für die Personalisierung von Stickern können dir die Seiten Hello Print oder auch Sticker en Ligne bei deiner Anfrage weiterhelfen.
b - Seinen Sticker selbst erstellen
Personalisierte Sticker zu bestellen ist gut, aber seine eigenen Sticker selbst zu erstellen macht noch mehr Spaß!
Um Sticker zu erstellen, brauchst du die folgenden passenden Werkzeuge und Maschinen:
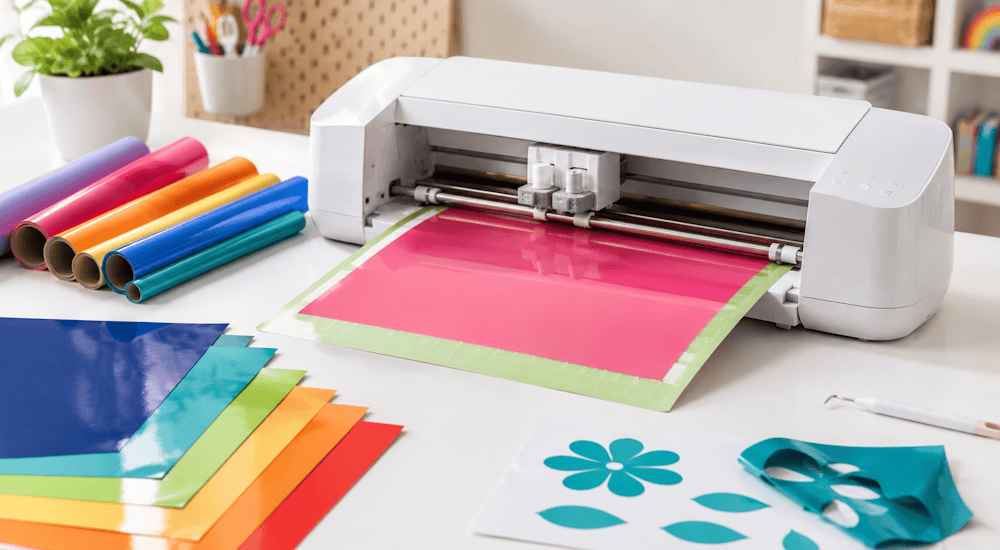
1️⃣ - das Klebevinyl
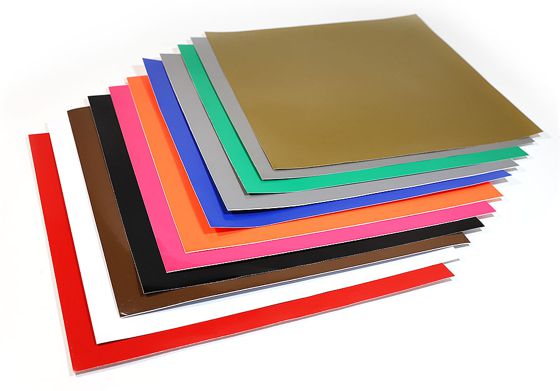
Das erste unverzichtbare Werkzeug, das du brauchst, um deine eigenen Motive zu erstellen, ist das Klebevinyl. Dieses Material ist das Verbrauchsmaterial, das verwendet wird, um dein Motiv zu erstellen, dieses Material muss zugeschnitten werden, um dein Logo zu erstellen.
Das Klebevinyl ist nicht besonders teuer, du musst es jedoch wie jedes Verbrauchsmaterial regelmäßig nachkaufen.
Es gibt zwei Haupttypen von Klebevinyl, das glänzende Vinyl und das matte Vinyl.
2️⃣ - Eine Schneidemaschine
Wie der Name schon sagt, dient eine Schneidemaschine dazu, das Klebevinyl zu schneiden, um am Ende das lang ersehnte Motiv zu erhalten.
Der Preis für eine hochwertige Schneidemaschine beginnt bei etwa 350 Euro. Wir empfehlen in der Regel die Maschine Silhouette Caméo 5, die eine professionelle Maschine und hervorragend für Personen ist, die ihre Tätigkeit der Sticker-Personalisierung beginnen möchten.
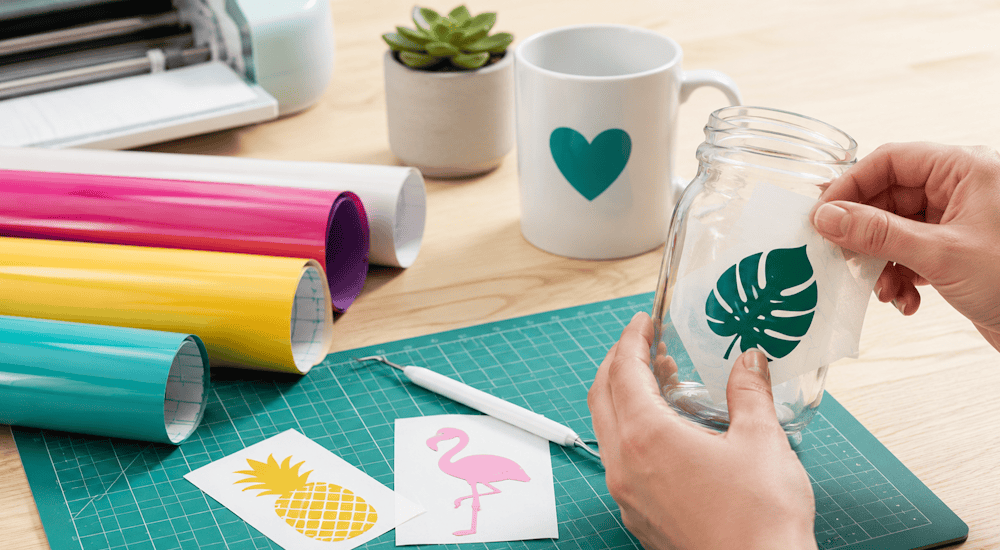
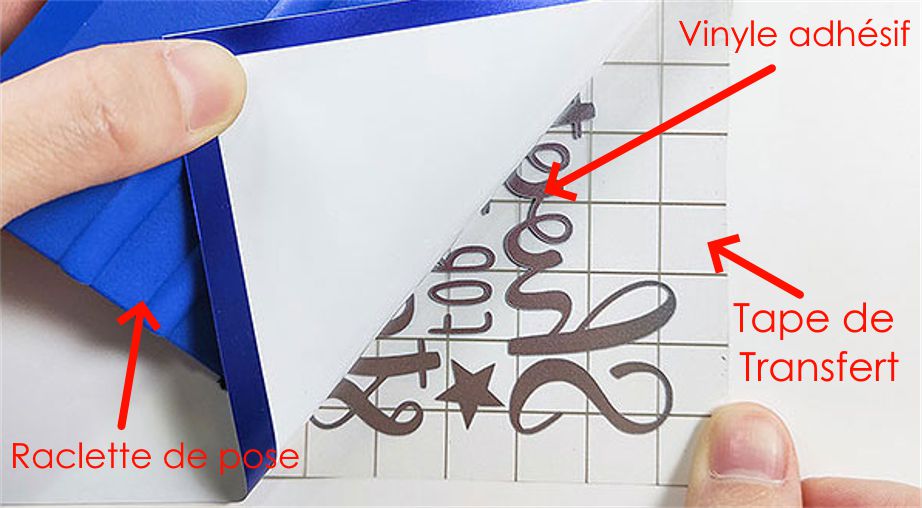
3️⃣ - Transfertape
Das Transfertape dient dazu, das zuvor zugeschnittene Logo zu übertragen, um es anschließend auf einen Gegenstand deiner Wahl zu kleben. Da sich die Klebeseite des Vinyls auf der Rückseite befindet, musst du es zunächst umdrehen, indem du es auf das Tape überträgst, um den Sticker danach anzubringen.
4️⃣ - Andrückrakel
Der Andrückrakel ist ein einfacher Kunststoffrakel mit einer Filzkante, mit dem du den Sticker anbringen und an den Wänden andrücken kannst, damit er korrekt plan aufliegt. Dieses Werkzeug kostet etwa 3 bis 5 Euro.
Es ist wichtig zu wissen, dass dir dieses Zubehör und diese Maschinen ermöglichen, einfarbige Vinyl-Personalisierungen anzufertigen. Wenn du ein Motiv mit einem Farbverlauf erstellen möchtest, ist es notwendig, einen Vinyldrucker sowie bedruckbares Klebevinyl und kein standardmäßiges Klebevinyl zu verwenden.
Jetzt, da du die nötigen Werkzeuge kennst, schauen wir uns an, wie die Erstellung eines Stickers aus Klebevinyl abläuft:
Die Wahl des Motivs und das Schneiden
Wähle zunächst die Datei des Stickers aus, den du erstellen möchtest, und lade sie in die Software der Schneidemaschine hoch. Wenn du die Maschine Silhouette Caméo 4 verwendest, ist ihre Software die Software Silhouette Studio.
Lege anschließend das Klebevinyl in die Schneidemaschine ein und starte den Schnitt in deiner Software.
Die Maschine beginnt, das Logo in das Vinyl zu schneiden.
Das Entgittern

Sobald der Schnitt abgeschlossen ist, musst du die Teile des Klebevinyls entgittern, die von der Maschine geschnitten wurden, aber nicht zu deinem Motiv gehören.
Das Entgittern besteht einfach darin, das überschüssige Vinyl zu entfernen.
Wenn dieser Schritt abgeschlossen ist, ist das Motiv deines Stickers vollständig sichtbar. So hast du dein eigenes Sticker-Motiv erstellt!
Aber das ist noch nicht alles, jetzt musst du den Sticker auf einem Untergrund anbringen. Schauen wir uns also an, wie du das Anbringen des Stickers auf dem Untergrund deiner Wahl durchführst.
2 - Sticker anbringen: Wie bringt man seinen Vinyl-Sticker an?:
a - Der Transfer auf das Tape
Schneide ein Stück Tape zu, das etwas größer als die Größe deines Motivs ist (wenn dein Motiv 30 cm x 30 cm misst, nimm ein Stück von 35 cm x 35 cm).
Bringe das Tape gleichmäßig auf dem Logo an und benutze den Andrückrakel, um die Luftblasen zu vertreiben. Dein Motiv muss perfekt auf dem Tape haften, um es anschließend zu übertragen.
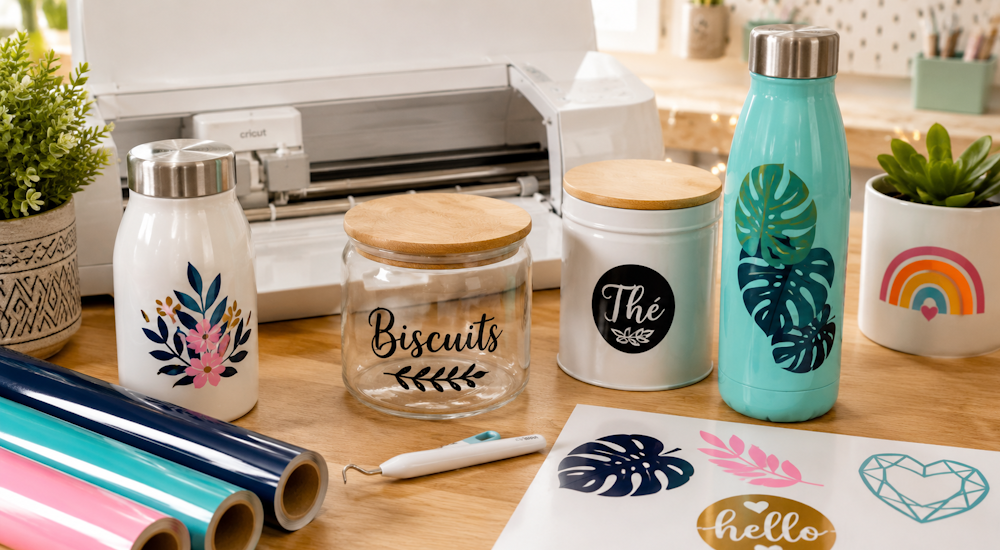
b - Das Auftragen und Anbringen des Stickers
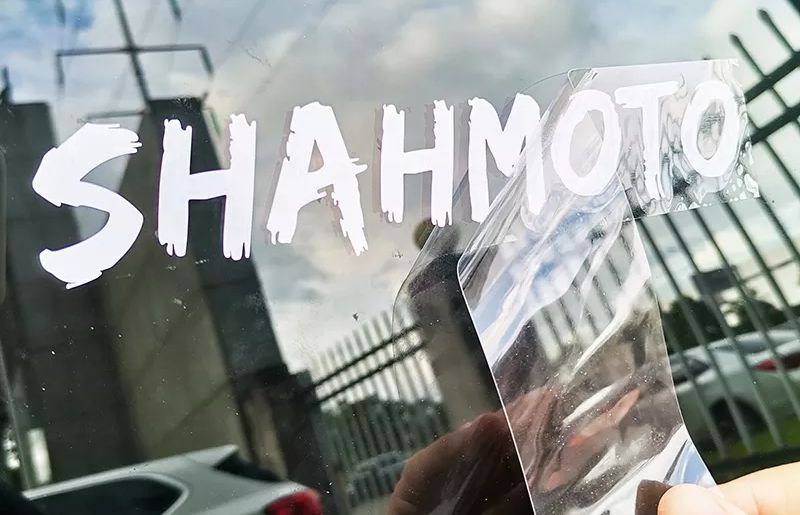
Der Schritt des Auftragens ähnelt dem Schritt des Transfers auf das Tape. Nehmen wir an, du möchtest dein Motiv auf das Fenster deines Wohnzimmers auftragen: Nimm dein Motiv, das auf das Tape übertragen wurde, und trage es vorsichtig auf dein Fenster auf. Benutze den Andrückrakel und gehe über dein Logo, damit es gut an deinem Fenster kleben bleibt. Führe diesen Vorgang etwa fünfzehn Sekunden lang durch.
Wenn alles fertig ist, ziehe das Transfertape langsam ab und dein Motiv bleibt perfekt an deinem Fenster kleben!
Das Anbringen des Stickers ist damit abgeschlossen. 😉
Um deine eigenen Vinyl-Sticker zu erstellen und all deine Alltagsgegenstände zu personalisieren, brauchst du hochwertiges Klebevinyl mit einer langen Haltbarkeit. Zögere also nicht, einen Blick auf die Klebevinyle zu werfen, die wir im Shop anbieten!: