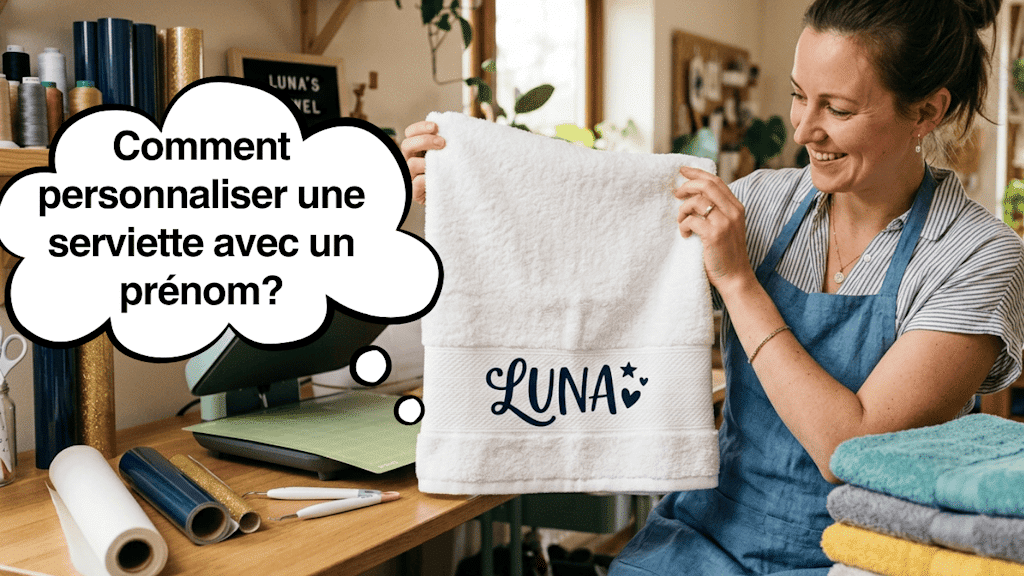
Wir alle kennen diesen Moment, wenn nach der Dusche oder am Beckenrand am Ende alle Handtücher gleich aussehen. Zwischen der Sporttasche der Kinder und dem Wäschestapel zu Hause fragt man sich am Ende immer: „Moment, ist das meins oder deins?“
Genau hier sorgt eine ganz einfache Idee für den Unterschied: Was, wenn auf jedem Handtuch der passende Name stünde?
Über den praktischen Aspekt hinaus, sie nicht mehr zu vertauschen, verleiht das personalisierte Handtuch eine kleine, einzigartige Note. Es ist ein sofortiger Anhaltspunkt für ein Kind, ein netter Hingucker im Badezimmer und, geben wir es zu, eine super Geschenkidee, die immer Freude macht.
Die gute Nachricht ist, dass man dafür nicht auf einer spezialisierten Website bestellen muss. Heute kann man sein personalisiertes Handtuch ganz einfach selbst gestalten, mit einem sauberen Ergebnis, das auch hält.
Mit ein bisschen Flexfolie zum Aufbügeln genügen wenige Minuten, um einen Namen oder ein kleines Motiv aufzubringen. Selbst wenn du beim DIY noch am Anfang stehst, ist das super zugänglich. In diesem Artikel zeige ich dir wie du deine Handtücher ganz einfach zu Hause personalisierst, Schritt für Schritt!
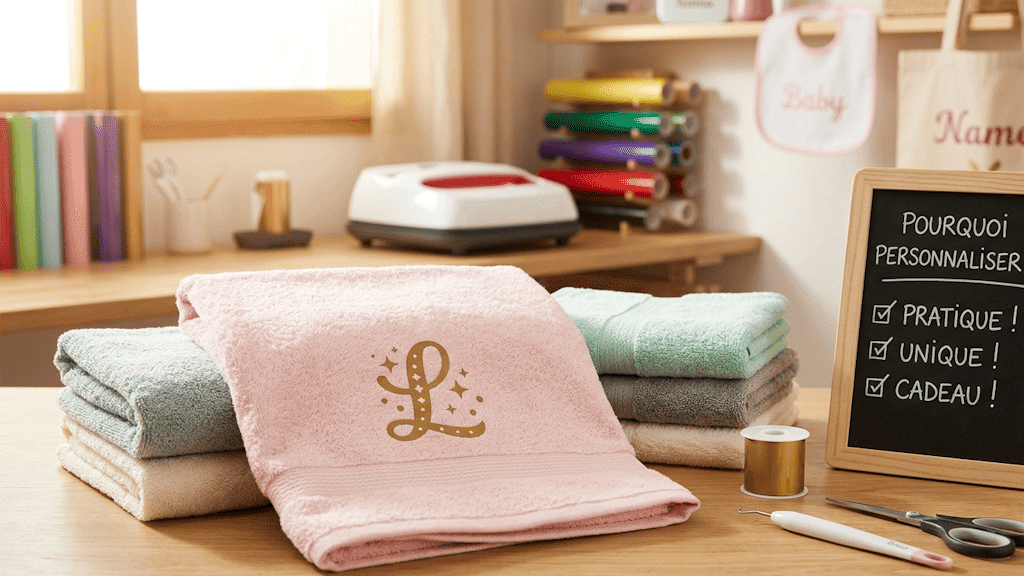
1. Warum ein personalisiertes Handtuch mit einem Namen gestalten?
Die Idee, ein personalisiertes Handtuch mit einem Namen zu gestalten, mag ganz einfach erscheinen, aber sobald man darüber nachdenkt, sind die Vorteile zahlreich.
Zunächst einmal ist es eine im Alltag sehr praktische Lösung. In vielen Familien landen die Handtücher oft durcheinander. Nach der Dusche, im Schwimmbad oder in der Sporttasche fällt es manchmal schwer zu wissen, wem was gehört. Indem man einfach einen Namen auf das Handtuch setzt, erkennt jeder sofort seines.
Besonders nützlich ist das auch für Kinder. In der Schule, in der Kita, im Ferienlager oder bei sportlichen Aktivitäten sehen die Sachen oft gleich aus. Ein personalisiertes Handtuch mit einem Namen hilft, Verwechslungen und Verluste zu vermeiden.
Aber über den praktischen Aspekt hinaus gibt es auch die persönliche Seite. Ein Handtuch mit einem Namen vermittelt sofort den Eindruck eines einzigartigen Gegenstands. Es ist ein kleines Detail, das im Badezimmer oder in der Strandtasche alles verändert.
Es ist außerdem eine einfache und wirkungsvolle Geschenkidee. Zur Geburt, zum Geburtstag oder auch zur Vorbereitung auf den Schulanfang macht ein personalisiertes Handtuch mit einem Namen immer Eindruck. Es zeigt, dass man sich die Zeit genommen hat, etwas speziell für die Person zu gestalten.
Und anders als man vielleicht denken könnte, muss man kein DIY-Profi sein, um diese Art der Personalisierung hinzubekommen. Mit den richtigen Materialien, wie etwa Flexfolie zum Aufbügeln, ist es durchaus möglich, ein sauberes und langlebiges personalisiertes Handtuch direkt zu Hause zu gestalten.
Schauen wir uns jetzt an, welches Material nötig ist, um diese Art der Personalisierung einfach umzusetzen.
2. Das nötige Material, um ein Handtuch zu personalisieren
Bevor wir zum Tutorial für das personalisierte Handtuch mit einem Namen kommen, muss man einfach ein paar Dinge zusammentragen. Nichts Kompliziertes: Das meiste Material ist leicht zu finden und manche Werkzeuge hast du vielleicht schon zu Hause.
Die Basis bleibt natürlich das Handtuch. Ein Handtuch aus Baumwolle ist in der Regel die beste Wahl, denn es verträgt Hitze gut und ermöglicht es der Flexfolie zum Aufbügeln, richtig am Stoff zu haften.
Anschließend muss man das Material auswählen, mit dem der Name gestaltet wird. In den meisten Fällen verwendet man Flexfolie zum Aufbügeln, die speziell für Textilien gemacht ist. Einmal heiß gepresst, fixiert sie sich direkt in den Fasern des Stoffes, was ein sauberes und langlebiges Ergebnis ergibt.
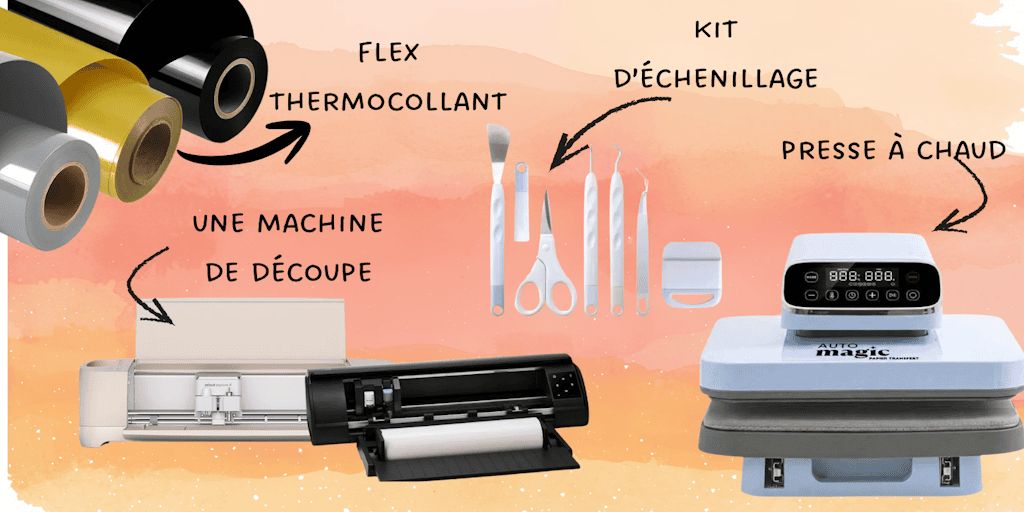
Hier ist das in der Regel nötige Material:
- ein Badetuch oder**Handtuch**
- Flexfolie zum Aufbügeln für Textilien
- eine Schneidemaschine (wie eine Cricut oder eine Silhouette) oder eine Schere für den manuellen Zuschnitt
- eine Hitzepresse (oder ersatzweise ein Bügeleisen)
Bevor du loslegst, ein einfacher, aber wichtiger Tipp: Es ist immer besser, das Handtuch vor der Personalisierung zu waschen. So entfernst du die Appreturen des Stoffes und erzielst eine bessere Haftung der Flexfolie zum Aufbügeln.
Sobald das Material bereitliegt, bleibt nur noch der spannendste Teil: die Gestaltung des Namens auf dem Handtuch. Los, hol deine beste Flexfolie zum Aufbügeln raus und ab geht es mit diesem Handtuch-DIY, mit dem Tutorial von Alyah!
3. Ein Handtuch mit Flexfolie zum Aufbügeln personalisieren
Wenn du ein personalisiertes Handtuch mit einem Namen gestalten möchtest, das den Wäschen und der täglichen Nutzung standhält, bleibt die Flexfolie zum Aufbügeln die zuverlässigste Lösung (aber vor allem die zugänglichste für ein professionelles Ergebnis!). Dieses Material ist speziell für Textilien gemacht: Einmal mit Hitze aufgebracht, fixiert es sich direkt in den Fasern des Stoffes.
Das Ergebnis ist sauber, langlebig und vermittelt den Eindruck, dass der Name fast zum Handtuch dazugehört.
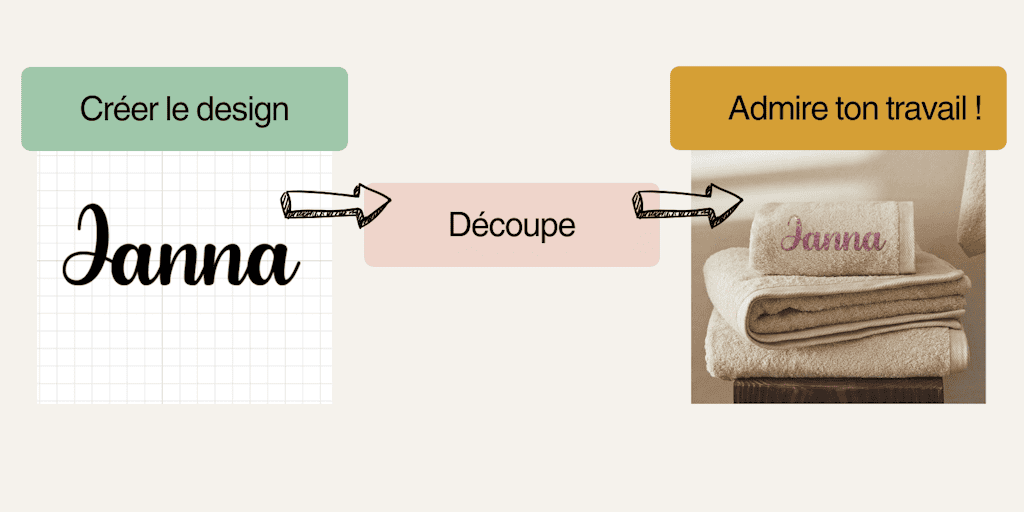
So gehst du zu Hause ganz einfach vor.
1. Den Namen erstellen
Beginne damit, den Namen in der Software deiner Schneidemaschine zu schreiben. Ich selbst nutze eine Cricut, aber eine Silhouette Cameo 5 oder jede andere Schneidemaschine eignet sich genauso gut! Wähle eine recht gut lesbare Schrift, vor allem wenn das Handtuch für ein Kind bestimmt ist. Zu dünne Buchstaben können sich schwerer schneiden und aufbringen lassen (und nach der ersten Wäsche sieht das Motiv dann nicht mehr nach viel aus).
Vergiss nicht, den Text zu spiegeln, bevor du schneidest, denn Flexfolie wird seitenverkehrt geschnitten. Das ist typischerweise so eine Sache, die man die ersten Male vergisst, haha!
2. Die Flexfolie schneiden
Lege deine Flexfolie zum Aufbügeln in die Schneidemaschine, mit der glänzenden Seite nach unten auf die Matte. Starte anschließend den Schnitt des Namens. Was die Schneideeinstellungen angeht, findest du bei Paper Transfer alle nützlichen Infos auf der Produktseite!
Wenn du ohne Maschine arbeitest, kannst du die Buchstaben auch von Hand mit einer Schere ausschneiden, auch wenn das ein bisschen mehr Präzision (und vor allem Geduld!) erfordert.
3. Das Motiv entgittern
Sobald der Schnitt fertig ist, entferne das überschüssige Material rund um den Namen. Dieser Schritt nennt sich Entgittern. Es sollten nur noch die Buchstaben des Namens auf der durchsichtigen Folie übrig bleiben. Am einfachsten ist es dafür, dein Entgitter-Kit zur Hand zu nehmen und die Werkzeuge zu verwenden, die dir am besten gefallen!
4. Den Namen auf dem Handtuch positionieren
Platziere den Namen anschließend direkt auf dem Handtuch, an der gewünschten Stelle. Die durchsichtige Folie sorgt dafür, dass die Buchstaben während des Aufbringens schön ausgerichtet bleiben.
Nimm dir ein paar Sekunden, um die Platzierung zu prüfen, bevor du zum Pressen übergehst. Das bleibt ein super wichtiger Schritt, denn ein Handtuch mit einem schlecht platzierten Namen lässt das Ergebnis gleich ein bisschen unsauber wirken. Also lass dir Zeit, damit er genau so wird, wie du es dir wünschst!
5. Die Hitze aufbringen
Bedecke die glitzernde Flexfolie zum Aufbügeln mit einem Teflonblatt (das als Schutz dient) oder mit Backpapier und bringe dann mit deiner Hitzepresse für einen kurzen Moment die Hitze auf. Der große Vorteil unserer Presse ist, dass du nicht selbst pressen musst, mit der AutoMagic-Presse läuft alles automatisch!
Die Hitze aktiviert den Kleber der Flexfolie zum Aufbügeln und fixiert den Namen auf dem Stoff.
Sobald das Aufbringen fertig ist, lass es etwas abkühlen, bevor du die durchsichtige Folie abziehst. Dann siehst du, wie der Name direkt auf dem Handtuch erscheint.
Das Ergebnis ist in der Regel sehr sauber und hält der Wäsche sehr gut stand, was die Flexfolie zum Aufbügeln zur idealen Methode macht, um ein personalisiertes Handtuch mit einem Namen für den täglichen Gebrauch zu gestalten!
Aber warte! Lauf noch nicht gleich los mit deinem tollen Handtuch! Im nächsten Teil schauen wir uns alle Fehler an, die du vermeiden solltest, damit dein personalisiertes Handtuch mit einem Namen garantiert jedes Mal gelingt!
4. Die Fehler, die du für ein gelungenes personalisiertes Handtuch vermeiden solltest
Ein personalisiertes Handtuch mit Namen zu gestalten ist eine ziemlich einfache Beschäftigung, aber ein paar kleine Fehler können das Ergebnis schnell verderben. Zum Glück lassen sie sich leicht vermeiden, sobald man sie kennt.
Hier sind die häufigsten.
Das Handtuch nicht vor der Personalisierung waschen
Viele neue Handtücher enthalten Textilappreturen, die verhindern können, dass die Flexfolie richtig haftet. Eine erste Wäsche bereitet den Stoff vor und sorgt für eine bessere Fixierung.
Eine zu dünne Schrift wählen
Manche Schriften sehen auf dem Bildschirm sehr hübsch aus, werden aber kompliziert zu schneiden und auf dem Textil aufzubringen. Zu dünne Buchstaben können sich mit den Wäschen auch schneller ablösen. Für ein personalisiertes Handtuch mit einem Namen ist es oft besser, sich für eine einfache und leicht dicke Schrift zu entscheiden.
Eine zu niedrige Temperatur verwenden
Die Flexfolie zum Aufbügeln braucht Hitze, um sich richtig zu aktivieren. Wenn die Temperatur zu niedrig ist oder der Druck nicht ausreicht, haftet der Name womöglich schlecht am Handtuch.
Es ist besser, ein paar Sekunden lang festen Druck auszuüben, als viele schnelle Durchgänge zu machen.
Den Namen schlecht positionieren
Sobald die Flexfolie gepresst ist, lässt sich die Platzierung nur schwer korrigieren. Nimm dir vor dem Aufbringen der Hitze immer ein paar Sekunden, um die Ausrichtung und die Position des Namens auf dem Handtuch zu prüfen.
Ein kleiner optischer Anhaltspunkt kann manchmal helfen, das Motiv zu zentrieren.
Vor dem Abziehen der Folie nicht abkühlen lassen
Die Schutzfolie zu früh abzuziehen, kann die Buchstaben verschieben oder das Motiv beschädigen. Es ist oft besser, ein paar Sekunden zu warten, bis die Flexfolie etwas abkühlt, bevor man sie entfernt.
Indem du diese paar Fehler vermeidest, erhöhst du erheblich die Chancen, ein sauberes, langlebiges und im Alltag angenehm zu nutzendes personalisiertes Handtuch mit Namen zu erhalten.
Schauen wir uns jetzt noch einen letzten wichtigen Punkt an, bevor wir abschließen: warum diese Art der Personalisierung eine ausgezeichnete Idee ist, um sie zu Hause umzusetzen.

Das ist schon das Ende des Tutorials...
Ein personalisiertes Handtuch mit Namen zu Hause zu gestalten ist letztlich viel einfacher, als man sich vorstellt. Mit etwas Material und ein paar Minuten Vorbereitung lässt sich ein klassisches Handtuch in einen einzigartigen und persönlichen Gegenstand verwandeln.
Ob es darum geht, zu verhindern, dass sich die Handtücher zu Hause vermischen, die Sachen der Kinder für die Schule oder das Schwimmbad vorzubereiten oder einfach ein personalisiertes Geschenk zu machen, dieser kleine Touch macht immer den Unterschied.
Der Vorteil ist, dass die Technik zugänglich bleibt, selbst wenn man beim DIY noch am Anfang steht. Mit Flexfolie zum Aufbügeln, einem Bügeleisen und einem Baumwollhandtuch kann das Ergebnis sauber und langlebig sein und den Wäschen standhalten.
Letztlich ermöglicht es das Personalisieren eines Handtuchs mit einem Namen vor allem, etwas Einfaches zu schaffen, das aber Sinn ergibt. Ein Alltagsgegenstand wird so zu einem kleinen kreativen Projekt, das direkt zu Hause umgesetzt wird.
Und hat man einmal damit angefangen, ein Handtuch zu personalisieren... stehen die Chancen gut, dass man Lust bekommt, viele weitere Textilien zu personalisieren.
FAQ: Häufig gestellte Fragen
Wie macht man ein personalisiertes Handtuch mit einem Namen?
Die einfachste Methode besteht darin, Flexfolie zum Aufbügeln zu verwenden. Es genügt, den Namen auszuschneiden, ihn auf dem Handtuch zu positionieren und die Hitze mit einer Hitzepresse aufzubringen.
Was ist die beste Technik, um ein Handtuch zu personalisieren?
Für Textilien bleibt die Flexfolie zum Aufbügeln die langlebigste Lösung, denn sie fixiert sich direkt in den Fasern des Stoffes.
Kann man ein personalisiertes Handtuch waschen?
Ja. Wenn die Flexfolie zum Aufbügeln gut aufgebracht ist, kann das Handtuch problemlos in der Maschine gewaschen werden. Es wird in der Regel empfohlen, vor der ersten Wäsche 24 Stunden zu warten.
Kann man ein Handtuch ohne Schneidemaschine personalisieren?
Ja, das ist möglich. Die Buchstaben können von Hand aus der Flexfolie zum Aufbügeln geschnitten werden, auch wenn eine Schneidemaschine ein präziseres Ergebnis ermöglicht.
Welche Art von Handtuch sollte man für die Personalisierung wählen?
Handtücher aus Baumwolle sind oft am besten geeignet, denn sie vertragen Hitze gut und ermöglichen eine gute Haftung der Flexfolie zum Aufbügeln.
Und du, welchen Namen wirst du aufbringen?
Ich hoffe, dieses Tutorial hat dir Lust gemacht, alle Handtücher im Haus zu personalisieren! Ob es darum geht, Verwechslungen im Schwimmbad zu vermeiden oder ein einzigartiges Geschenk zur Geburt zu machen, DIY ist die beste Lösung. Sag es mir in den Kommentaren: Welche Flexfolien-Farbe verwendest du am liebsten? Wenn du eine Frage zu einem Schritt hast oder einen Tipp teilen möchtest, zögere nicht, ich antworte dir mit Freude!