Es liegt etwas Magisches in den ersten Lebensmonaten eines Babys. Jeder kleine Body, jeder Schlafanzug wird zu einer wertvollen Erinnerung, die man aufbewahrt und sorgfältig in einer Schatzkiste zusammenfaltet.
Und dann, eines Tages, keimt eine Idee auf: „Was wäre, wenn ich selbst ein einzigartiges Kleidungsstück nur für ihn gestalten würde?“
So fängt oft alles an. Der Wunsch, eine persönliche Note hinzuzufügen, eine Emotion, einen Namen oder einen kleinen Satz voller Zärtlichkeit. Denn Babykleidung zu personalisieren ist viel mehr als nur eine kreative Geste: Es ist eine Art, ein bisschen Liebe in jede Faser zu drucken, mit Textil und Herz eine Geschichte zu erzählen.
Und die gute Nachricht ist, dass du keine Modedesignerin sein musst, um das zu tun! Dank Flex-Folie kannst du einen einfachen Body in ein unvergessliches Geschenk zur Geburt verwandeln oder einen schlichten Schlafanzug in ein Stück voller Charme, und das alles in wenigen Minuten, ganz bequem von zu Hause aus.
In diesem Artikel erkläre ich dir Schritt für Schritt, wie du Babykleidung ganz einfach personalisierst, mit Ideen, Tipps und Inspirationen, damit jede Kreation so zart wird wie eine Umarmung.
🌙
1. Warum sollte man Babykleidung personalisieren?
💕
Schon vor der Geburt stellt man sich seine kleine Welt vor: zarte Farben, kuschelige Decken, ganz weiche Kleidung. Und wenn das Baby da ist, zählt jedes Detail. Seine Kleidung zu personalisieren wird dann zu einer Möglichkeit, ein bisschen von dir in seine Welt zu bringen.
🎁
Etwas Bedeutungsvolles schenken, nicht nur ein Kleidungsstück. Ein Name in goldener Flex-Folie, ein zart aufgebrachtes Geburtsdatum, ein Satz, der zum Lächeln bringt… Das sind keine einfachen Motive: Das sind Erinnerungen, die entstehen. Babykleidung zu personalisieren heißt, einzigartige Stücke zu schaffen, die eine Geschichte erzählen, die einer unendlichen Liebe und einer aufrichtigen Fürsorge.
💡
Sich von standardisierter Kleidung abheben. In den Regalen sieht alles ein bisschen gleich aus: dieselben Pastellfarben, dieselben Drucke. Wenn du einen Body oder einen Schlafanzug selbst personalisierst, schenkst du deinem Baby einen Stil, der zu ihm passt. Einzigartig, zärtlich, authentisch. Und wenn du jemandem eine Freude machen möchtest, ist es auch eine Geschenkidee zur Geburt voller Emotion, die den ganzen Unterschied macht.
🌱
Ein sanfterer und verantwortungsvollerer Ansatz. Selbst zu gestalten, statt zu kaufen, ist auch eine ethische Geste. Du verlängerst das Leben einfacher Kleidungsstücke, indem du sie einzigartig machst, statt sinnlos zu konsumieren. Eine gut durchdachte Personalisierung ist schön, langlebig und respektvoll zugleich.
Denn im Grunde ist es viel mehr, als nur Stoff zu verzieren, Babykleidung zu personalisieren: Du legst ein bisschen deiner Geschichte hinein, ein bisschen deines Herzens.
💖
(und ganz unter uns, es ist einfach VIEL ZU SÜSS)!
Und wenn du ein personalisiertes Geschenk verschenken möchtest, ohne es selbst zu machen, kannst du die Seite Mlle K. Boutique besuchen, die wunderschöne Dekoobjekte und personalisierte Kreationen für Babys anbietet, alle in Frankreich von Hand gefertigt. 😊
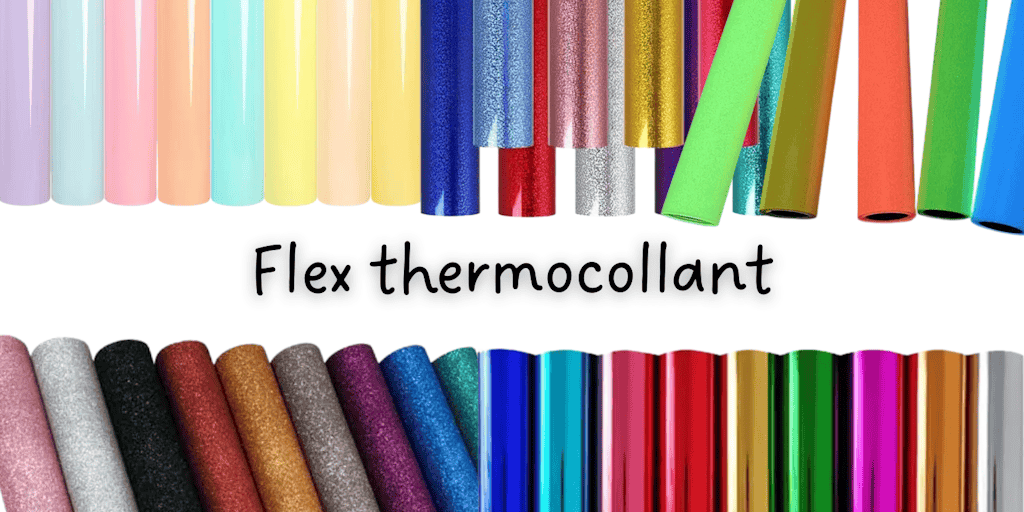
2. Die Flex-Folie, der Verbündete für zarte und langlebige Kreationen
🌈
Wenn du einfache, saubere und hübsche Dinge magst, wird die Flex-Folie schnell zu deinem besten kreativen Freund. Sie ist so etwas wie der Zauberstab der bastelnden Mamas (und auch Papas): ein dünnes, farbenfrohes Material, das man mit einer Heißpresse auf das Textil klebt, um perfekte Motive zu schaffen, ohne aufwendiges Nähen oder Sticken.
Stell dir vor: Du schneidest den Namen deines Babys aus einer goldenen oder pastellfarbenen Flex-Folie, presst ihn ein paar Sekunden lang auf… und dein weißer Body wird zu einem kleinen personalisierten Schmuckstück.
✨
🌸
Was ist Flex-Folie?
Es ist ein geschmeidiges Material, das mithilfe eines Bügeleisens, oder professioneller mithilfe einer Heißpresse, heiß auf den Stoff aufgebracht wird. Es gibt eine Vielzahl von Oberflächen, Samt, Glitzer, metallisiert, lichtempfindlich, und sogar nachleuchtend für die Kreativsten!
Jede Art von Flex-Folie ergibt ein anderes Ergebnis: von ganz dezent bis ganz leuchtend, von ganz zart bis ganz ausgefallen.
🌼
Warum ist sie perfekt für Babykleidung?
Weil sie weich anzufühlen und waschbeständig ist. Außerdem ermöglicht sie ein sauberes, präzises und sehr professionelles Ergebnis, selbst wenn du beim Personalisieren Anfängerin bist (glaub mir, wenn du es einmal ausprobiert hast, willst du nicht mehr aufhören!)
🧡
Ein professionelles Ergebnis, sogar zu Hause
Die Flex-Folie ist die ideale Lösung, um zu Hause Kleidungsstücke zu gestalten, die alles von einem Boutique-Artikel haben. Mit ein bisschen Geduld und den richtigen Handgriffen erzielst du ein Ergebnis, das eines Designers würdig ist, ohne dass du eine komplizierte Ausrüstung brauchst.
Bei Paper Transfer sind die Flex-Folien speziell dafür gedacht, perfekt auf weichen Stoffen wie der Baumwolle von Bodys, Schlafanzügen oder Schlafsäcken zu haften. Du musst nur noch deine Lieblingsfarbe auswählen, dein Motiv vorbereiten und deiner Kreativität den Rest überlassen.
🌙
3. Schritt für Schritt: Wie du Babykleidung mit Flex-Folie personalisierst
🧷
Du hast den perfekten Body gefunden, dein Lieblingsmotiv ausgewählt, deine Schneidemaschine herausgeholt und deine Flex-Folie ist bereit? Das ist der magische Moment, in dem deine Idee zum Leben erwacht
💫
Du musst kein Profi sein, du musst nur diesen wenigen einfachen Schritten folgen und dich von deiner Kreativität tragen lassen. Los geht's, jetzt personalisieren wir deine ersten Babykleidungsstücke!
🧺
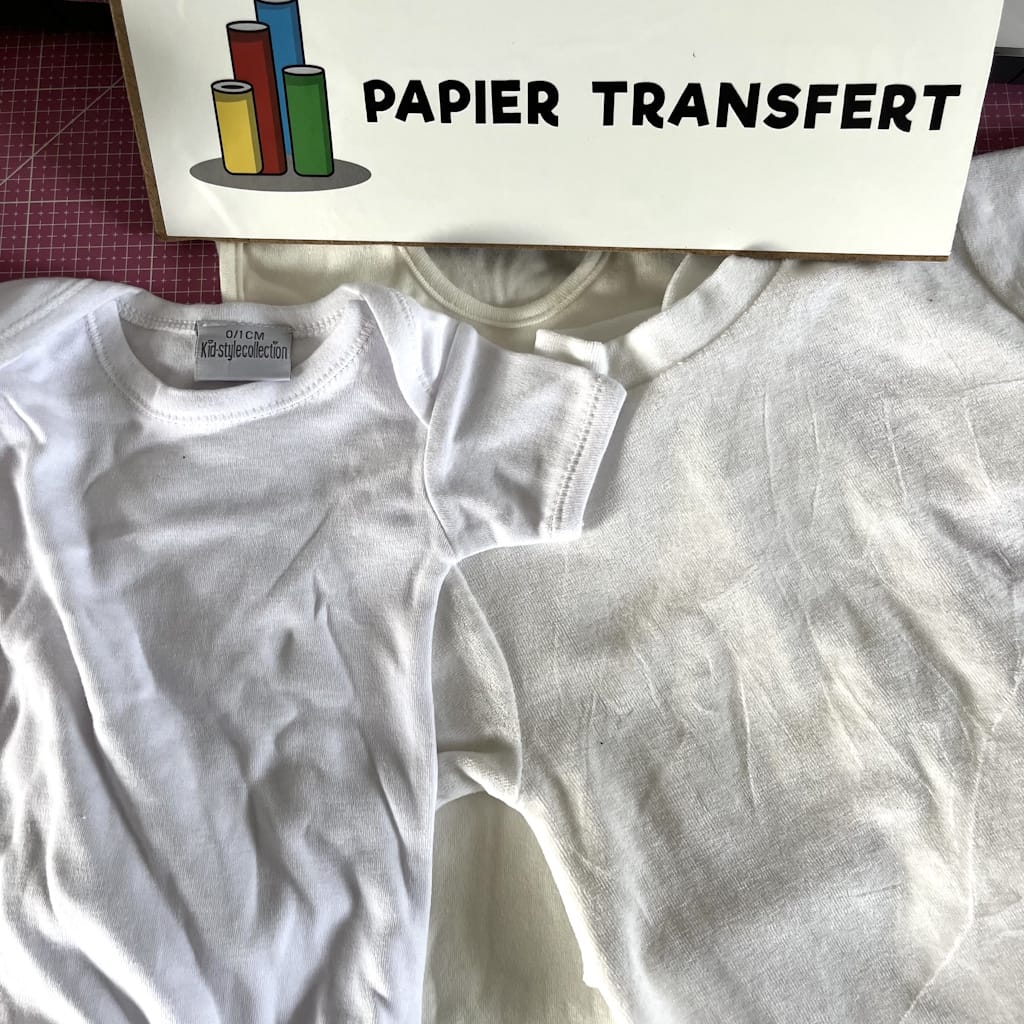
Schritt 1: Das Kleidungsstück auswählen, das du personalisieren möchtest
Bevorzuge Naturstoffe wie Baumwolle.
Bodys, Schlafanzüge und kleine T-Shirts sind perfekt für den Anfang. Stell einfach sicher, dass die Oberfläche glatt und sauber ist, ohne Erhebungen oder störende Nähte.
Ein einfarbiges Kleidungsstück ist meiner Meinung nach am besten zum Personalisieren, denn bei zu dominanten Mustern auf dem Kleidungsstück kommen dein Text oder dein Motiv möglicherweise nicht genug zur Geltung
🔥
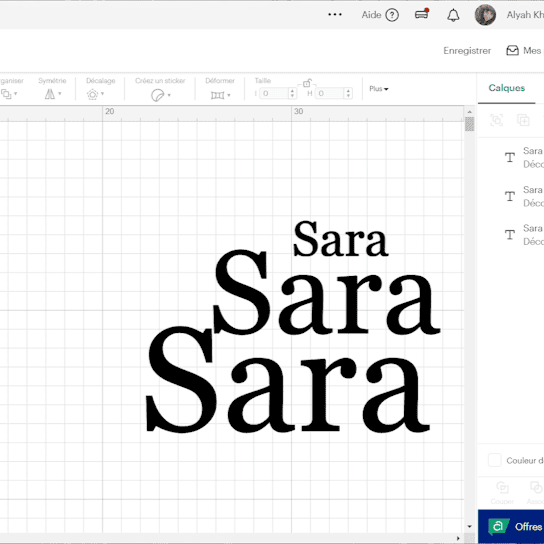
Schritt 2: Dein Motiv auf dem Textil ausmessen
Bevor du überhaupt etwas zuschneidest, nimm dir die Zeit, mit einem Lineal oder einem Maßband den idealen Bereich auf dem Kleidungsstück auszumessen, an dem dein Motiv platziert wird.
Jedes Kleidungsstück ist anders: Ein Body, ein Schlafanzug oder ein Schlafsack haben nicht dieselben Proportionen!
Das ist der entscheidende Schritt, um ein zu kleines oder zu großes Motiv zu vermeiden!
💫
Für die Maße habe ich mich entschieden, 5 cm Breite für den Body, 12 cm für den Schlafanzug und 15 cm Breite für den Schlafsack zu nehmen. Natürlich steht es dir frei, deine eigenen Maße zu wählen (was die Höhe angeht, habe ich sie im gleichen Verhältnis gelassen)!

**🎨
Schritt 3: Dein Design erstellen oder auswählen**
Ein Name, ein Geburtsdatum, ein kleines liebes Wort oder eine minimalistische Zeichnung (oder auch nicht)… alles ist möglich
💕
Du kannst dein Motiv mit einer Schneidesoftware wie Cricut Design Space oder Silhouette Studio erstellen oder ein fertiges Design auf der Seite von Paper Transfer herunterladen (klicke hier und lade kostenlos Designs herunter!).
(Kleiner Tipp: Wähle für deine ersten Versuche einfache Linien, das Ergebnis wird sauberer und leichter zu entgittern und aufzubringen.)
Ich für meinen Teil habe mich entschieden, es einfach zu halten und einfach den Namen des kommenden Babys zu schreiben!
✂️
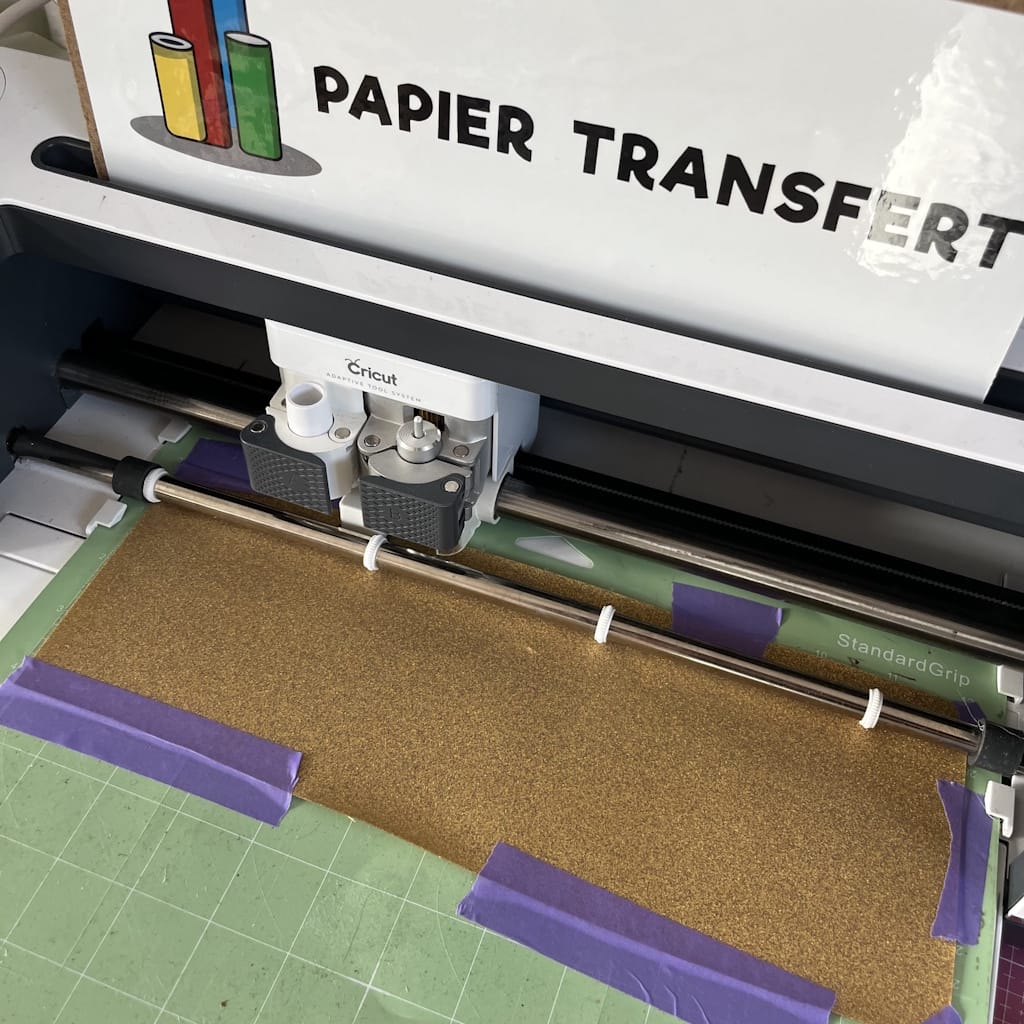
Schritt 4: Die Flex-Folie zuschneiden
Lege deine Flex-Folie in deine Schneidemaschine (entdecke unsere Silhouette Cameo 5 gleich hier) oder schneide sie von Hand aus, wenn das Motiv einfach ist und du keine Schneidemaschine zur Verfügung hast.
Vergiss nicht: Die Flex-Folie wird verkehrt herum zugeschnitten (glänzende Seite zur Schneidematte) und vergiss nicht, den Spiegelmodus zu aktivieren, bevor du den Schnitt startest!
Sobald das Motiv zugeschnitten ist, entferne den Überschuss vorsichtig mithilfe eines Entgitterwerkzeugs.
Ich habe mich für diese Garnitur für die goldene Glitzer-Folie entschieden (die einfach WUN-DER-SCHÖN ist). Sag mir übrigens in den Kommentaren, was du von dieser Farbe hältst!
💧
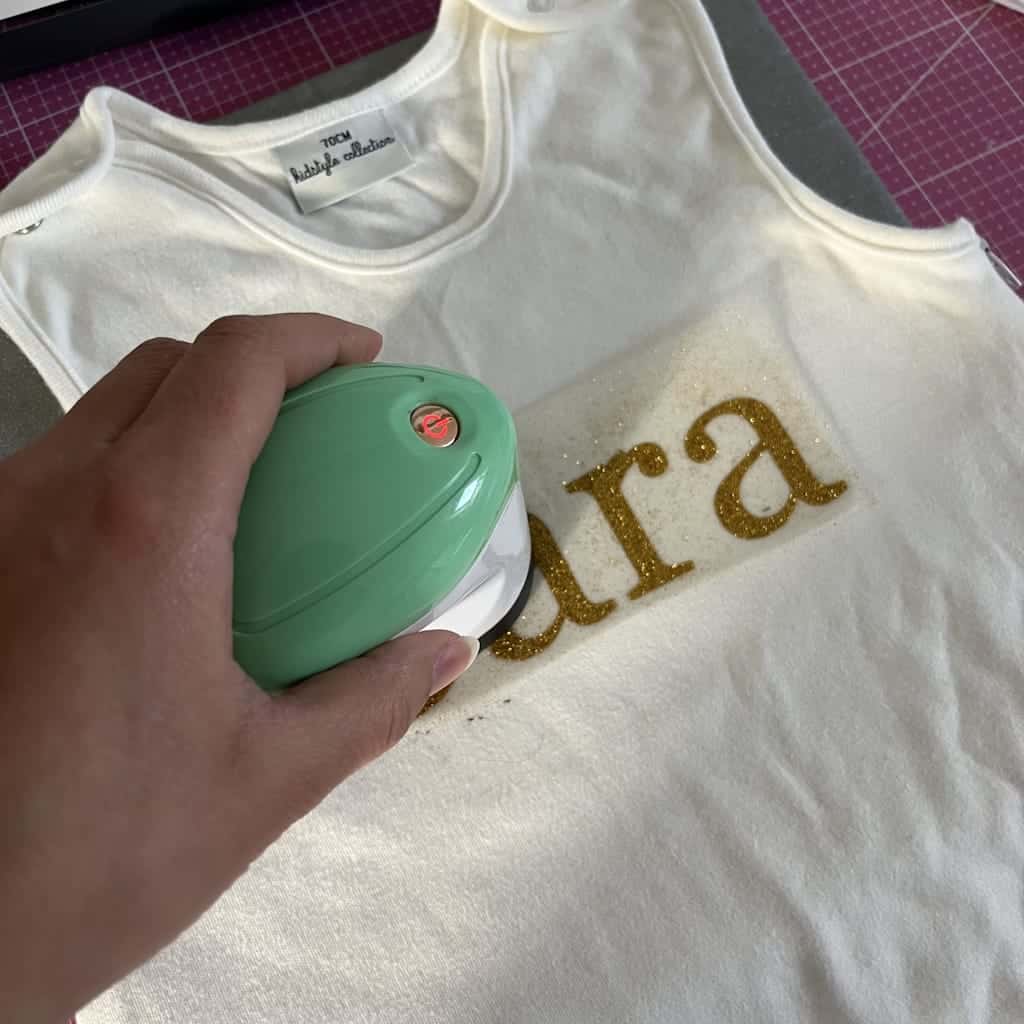
Schritt 5: Das Motiv pressen
Lege dein Motiv auf das Kleidungsstück, transparente Seite nach oben. Und wenn alles schön zentriert ist, wirst du sehen: Du beginnst schon, dir das Endergebnis vorzustellen, und das ist super motivierend!
Lege darunter eine Pressmatte und decke deine Flex-Folie mit Backpapier oder einem Teflontuch ab, dann presse bei 150 bis 160 °C für 15 bis 20 Sekunden (je nach Art der Flex-Folie, die Informationen findest du auf den Produktseiten jeder Flex-Folie).
Wenn du ein Bügeleisen verwendest, stelle es auf „Baumwolle“ ohne Dampf ein und drücke kräftig, ohne es zu bewegen.
Lass es ein paar Sekunden abkühlen, bevor du die Folie abziehst: und dann kommt der magische Moment, in dem das Motiv erscheint!
✨
🌟
Schritt 6: Bewundere dein Werk
Dein Kleidungsstück ist fertig!
Einzigartig, weich, voller Charme, bereit zum Verschenken, Tragen oder Aufbewahren als Erinnerung!
Und das Schönste an der ganzen Sache? Du hast es selbst gemacht, mit Liebe. Also, ein Fan deines DIY?
❤️
👉
Und wenn ihr noch einen Schritt weiter gehen und eure personalisierte Babykleidung verkaufen möchtet, ist es wichtig zu wissen, wie ihr eure Preise richtig festlegt.
Atelier By B hat ein kleines praktisches Heft erstellt, um euch zu helfen, den Selbstkostenpreis und den Verkaufspreis eurer Produkte genau zu berechnen.
Wenn ihr auf den Link klickt, erhaltet ihr 15 % Rabatt auf das Heft mit dem Code PAPIERTRANSFERT, der bereits angewendet ist.
4. Personalisierungs-Inspirationen für Babys 🌼
Du hast jetzt alle Grundlagen, um deine ersten Babykleidungsstücke zu personalisieren… aber vielleicht fragst du dich: „Womit fange ich an?“
Du musst weder Grafikerin noch professionelle Designerin sein, es braucht nur ein bisschen Fantasie (und ganz viel Zärtlichkeit 💛).
Hier sind ein paar entzückende und leicht umzusetzende Ideen, um einen Body oder ein kleines T-Shirt in ein einzigartiges Stück voller Liebe zu verwandeln.
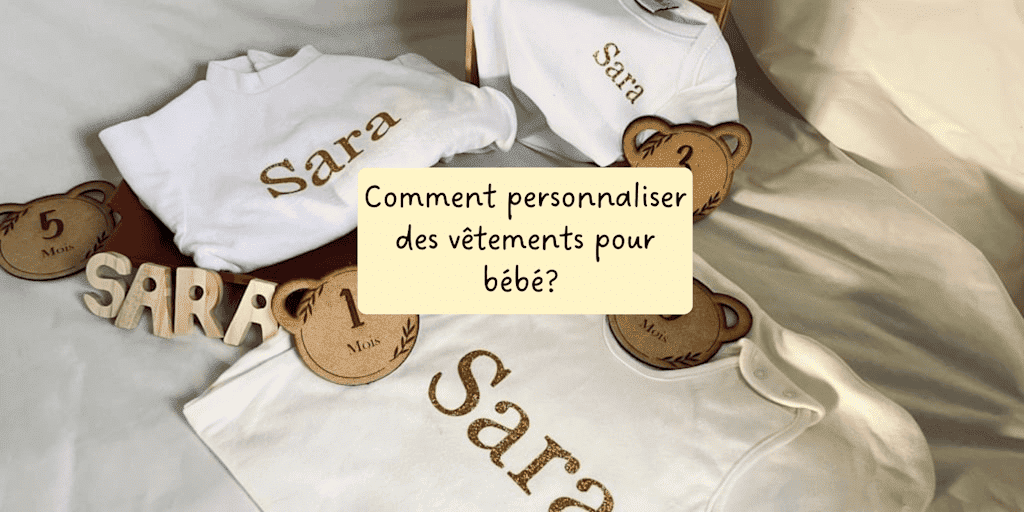
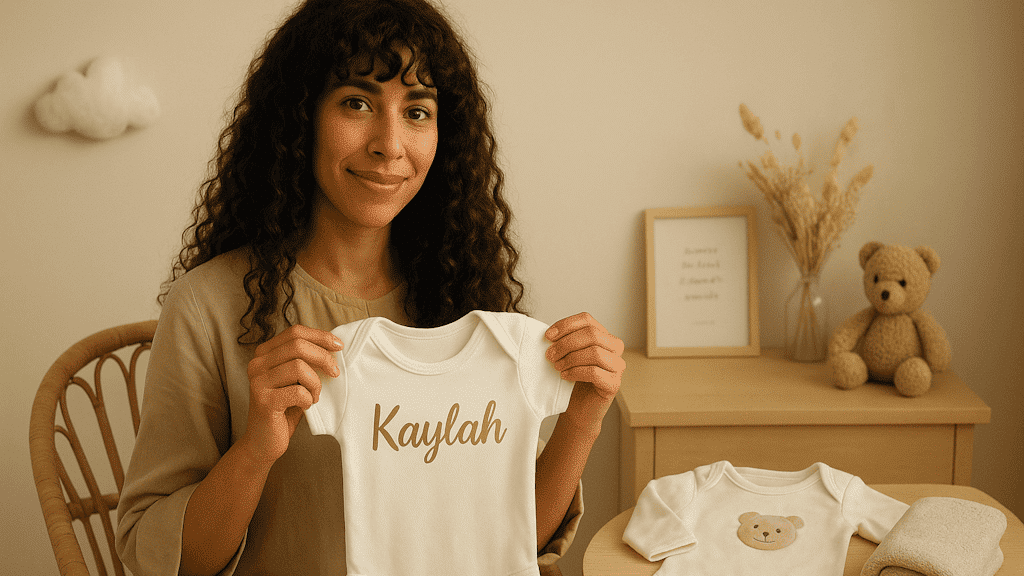
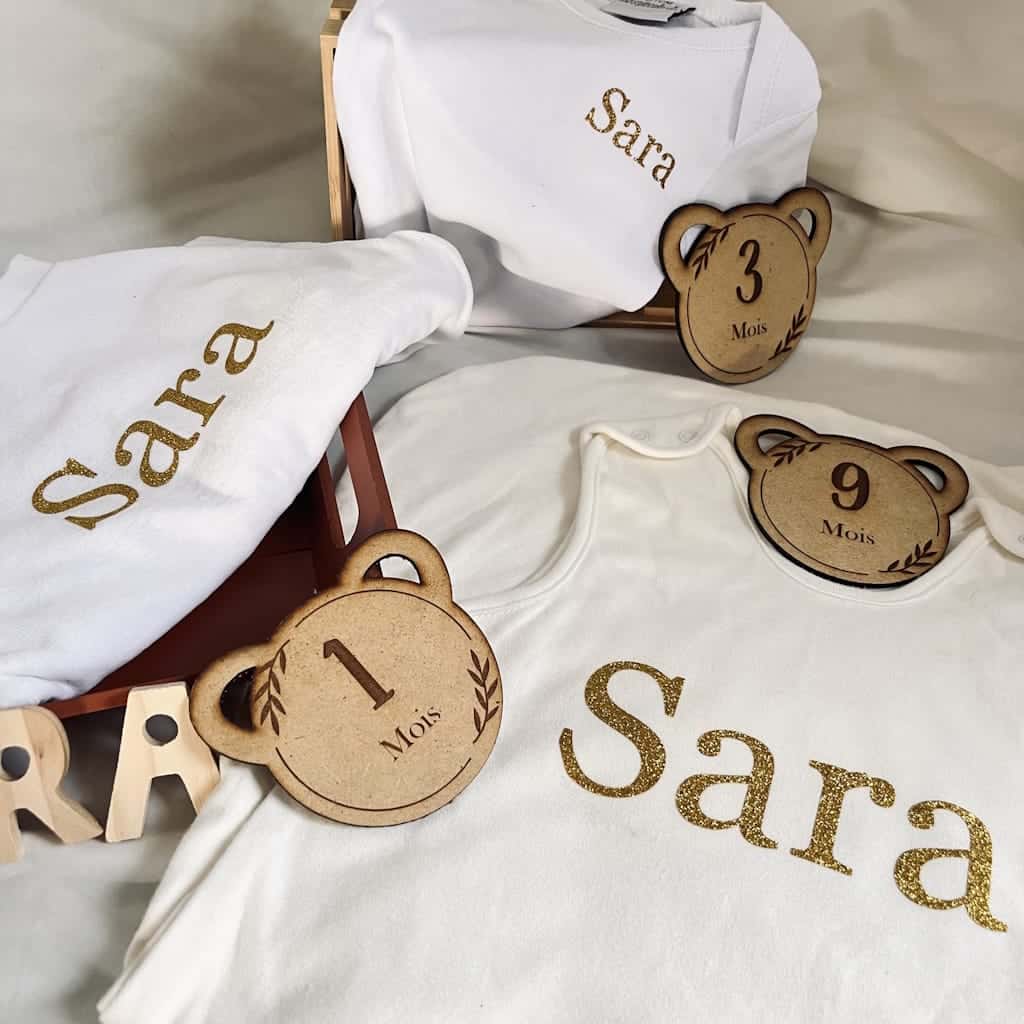
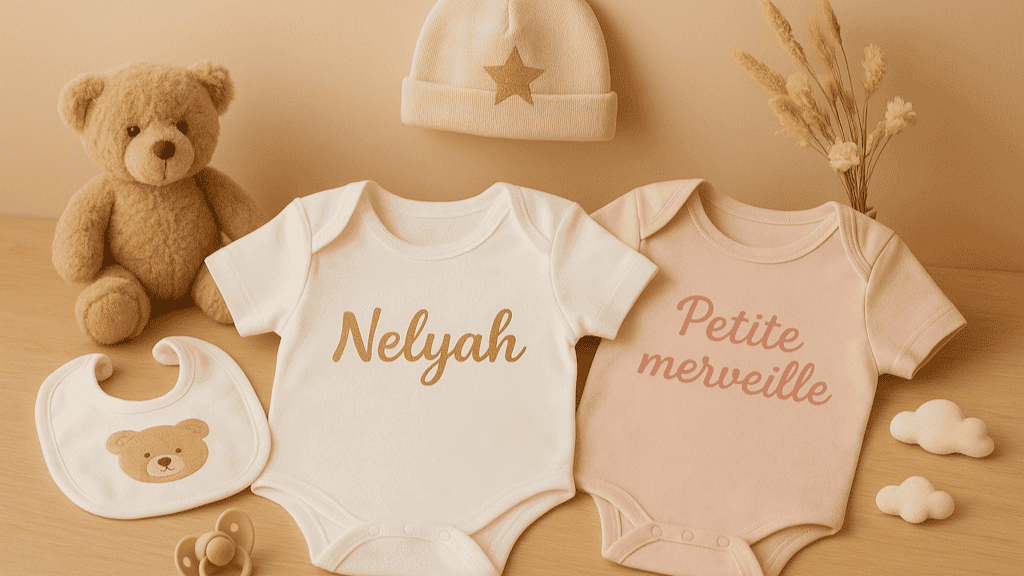
🌙 Der zeitlose Klassiker: der Name des Babys
Schlicht, zart und immer berührend.
Ein weißer Body mit dem Namen des Babys in goldener, silberner oder zartrosa Folie: das ist DER sichere Wert.
Du kannst mit der Typografie spielen (zarte Kalligrafie, feine Großbuchstaben oder handschriftlicher Stil) für ein elegantes und feines Ergebnis.
🐻 Die zarten kleinen Motive
Babys lieben einfache Formen und niedliche Tiere:
ein kleiner Bär, eine Wolke, ein Stern, ein Regenbogen oder sogar ein kleines Herz auf der Brust.
Du kannst auch mehrere Motive kombinieren, um eine aufeinander abgestimmte Mini-Kollektion zu schaffen:
👉 Body + Lätzchen + passendes Mützchen = perfektes Geschenk zur Geburt.
🌸 Die entzückenden Sprüche
Manchmal genügen ein paar Worte, um die Herzen schmelzen zu lassen 💕
-
„Mini-ich“
-
„Kleines Wunder“
-
„Mein Sonnenschein“
-
„100 % Liebe“
-
„Mit Liebe gemacht (und ein bisschen Kaffee ☕)“
Diese kleinen Sprüche fügen eine Prise Humor oder Zärtlichkeit hinzu und bleiben dabei leicht und poetisch.
🎨 Die Themen-Designs
Hab Spaß daran, Kollektionen rund um ein Thema zu gestalten:
-
Natur & Boho: Blätterwerk, Trockenblumen, Waldtiere.
-
Maritim & Urlaub: Wale, Muscheln, kleine Boote.
-
Himmlisch & verträumt: Mond, Sterne, Wolken, Sternbilder.
Jedes Motiv erzählt eine kleine Geschichte und macht dein Kleidungsstück noch einzigartiger.
💕 Die Bonus-Idee: die aufeinander abgestimmten Sets
Und wenn du noch einen Schritt weiter gehst?
Personalisiere nicht nur einen Body, sondern auch das Lätzchen, das Mützchen oder den Schlafsack im selben grafischen Stil.
Das Ergebnis ist harmonisch, elegant und perfekt für ein Neugeborenen-Fotoshooting oder eine hübsche Geschenkidee zum Verschenken.
Weil jedes Baby es verdient, einzigartige und mit Liebe gefüllte Kreationen zu tragen, lass dein Herz sprechen, das ist das wahre Geheimnis einer schönen Personalisierung. 🌈
5. Die Fehler, die man beim Personalisieren von Babykleidung vermeiden sollte
🚫
Babykleidung zu personalisieren ist eine sanfte, kreative und liebevolle Tätigkeit.
Aber wie bei jeder Kreation gibt es ein paar kleine Fehler, die man oft macht… besonders am Anfang. Keine Panik, wir haben sie alle gemacht (sogar die Profis
😉
).
Hier sind also die Fallen, die du vermeiden solltest, damit dein Projekt schon beim ersten Versuch ein echter Erfolg wird.
❌
Fehler Nr. 1: nicht testen, bevor man aufbringt
Du kannst es kaum erwarten, das Ergebnis zu sehen, wir verstehen dich
😍
Aber bevor du deine Folie auf das endgültige Kleidungsstück presst, mach immer einen Test auf einem ähnlichen Stoffrest.
So kannst du die Temperatur, die Aufheizzeit und das Ergebnis überprüfen.
Glaub mir, dieser kleine Test kann dir so manche Enttäuschung ersparen (und ein paar Tränen auf einem brandneuen Body).
❌
Fehler Nr. 2: die richtige Temperatur vergessen
Jede Art von Folie hat ihre eigene Temperatur und ihre eigene Presszeit.
Zu heiß → dein Motiv schmilzt oder wirft Wellen.
Nicht heiß genug → es klebt nicht richtig und löst sich beim Waschen.
Lies immer die Anweisungen des Herstellers, bevor du dein Bügeleisen oder deine Presse verwendest. *(Und wenn du Folie von Paper Transfer verwendest, ist alles auf dem Produktdatenblatt angegeben
🩵
).*
❌
Fehler Nr. 3: einen ungeeigneten Stoff wählen
Die Folie liebt Baumwolle, Leinen, Polyester oder Baumwoll-Poly-Mischungen.
Aber sie hasst dehnbare, strukturierte Stoffe oder solche mit wasserabweisendem Effekt.
Bevor du anfängst, überprüfe immer die Zusammensetzung des Kleidungsstücks und bevorzuge eine glatte und ebene Oberfläche.
❌
Fehler Nr. 4: pressen, ohne dein Motiv zu schützen
Die Flex-Folie mag den direkten Kontakt mit der Bügelsohle nicht!
Verwende immer ein Backpapier oder ein Teflontuch, um dein Motiv während des Pressens zu schützen.
Das ist ein ganz einfacher Trick, aber unverzichtbar, um ein makelloses und fleckenfreies Ergebnis zu bewahren.
❌
Fehler Nr. 5: das Motiv hinterher direkt bügeln
Sobald die Flex-Folie aufgebracht ist, bügelt man sie nicht mehr direkt!
Die Hitze könnte die Oberfläche beschädigen oder sogar das Motiv ablösen.
Wenn du das Kleidungsstück glätten möchtest, bügle es auf links oder schiebe ein dünnes Handtuch zwischen den Stoff und dein Bügeleisen.

Zusammengefasst: Nimm dir Zeit, mach einen Test, und vor allem hab Spaß.
Die Perfektion kommt ganz natürlich mit der Übung, und jede Kreation wird ein bisschen besser gelingen als die vorherige.
🌟
6. Gestalte, liebe und teile deine kleinen Schmuckstücke ✨
Du hast es verstanden: Babykleidung zu personalisieren ist viel mehr als nur eine Bastelarbeit.
Es ist ein Moment der Zärtlichkeit, eine Blase der Kreativität, eine Art, jeder Naht ein bisschen Zärtlichkeit hinzuzufügen.
Hinter jedem Namen in Folie, hinter jedem kleinen Motiv steckt eine Geschichte von Liebe, Geduld und Stolz.
Und das Schönste? Du musst weder Schneiderin noch Grafikerin sein. Du brauchst nur ein bisschen Zeit, ein Bügeleisen und deine Fantasie.
Ein paar Sekunden Pressen, ein sicherer Handgriff, eine Folie, die sich langsam ablöst… und die Magie geschieht. 🌙
Also, leg los. Ob für dein Baby, das einer Freundin oder einfach aus Freude am Gestalten, lass dein Herz sprechen.
Schaffe einzigartige, zarte und bedeutungsvolle Stücke, Kleidungsstücke, die heute zum Lächeln bringen und die man morgen sorgfältig aufbewahren wird.
Bei Paper Transfer glauben wir, dass jede Kreation eine Geschichte erzählt.
Jetzt bist du dran, deine zu schreiben, eine Folie nach der anderen. 💕
7. FAQ: Alles über das Personalisieren von Babykleidung mit Flex-Folie
❓
F1: Wie wäscht man ein Babykleidungsstück mit Flex-Folie?
Wasche es immer auf links, bei 30 bis 40 °C, mit einem Schonprogramm. Vermeide den Trockner, um die Lebensdauer des Motivs zu verlängern und deine Folie länger wie neu zu erhalten.
F2: Welche Art von Stoff sollte man zum Personalisieren wählen?
Bevorzuge Baumwolle, Leinen oder Baumwoll-Polyester-Mischungen. Vermeide dehnbare, strukturierte oder wasserabweisende Stoffe, auf denen die Flex-Folie nicht richtig haften kann.
F3: Kann man ein bereits gewaschenes Kleidungsstück personalisieren?
Ja! Stell sicher, dass der Stoff sauber, trocken und frei von Waschmittelrückständen ist. Dann kannst du deine Flex-Folie wie auf einem neuen Kleidungsstück aufbringen.
F4: Hält die Flex-Folie wiederholtem Waschen stand?
Ja, eine hochwertige Flex-Folie (wie die von Paper Transfer), die richtig aufgebracht wurde, bleibt selbst nach zahlreichen Wäschen intakt. Denk einfach daran, die Kleidungsstücke auf links zu waschen und den Trockner zu vermeiden, um die Lebensdauer des Motivs zu verlängern.
F5: Kann man alle Arten von Babykleidung personalisieren?
Nein, manche Stoffe wie dehnbarer Jersey, Samt oder wasserdichte Materialien sind nicht für Folie geeignet. Für ein perfektes Ergebnis wähle glatte und natürliche Stoffe.
F6: Welche Schneidemaschine sollte man für meine Motive verwenden?
Für präzise Schnitte kannst du eine Cricut, eine Silhouette Cameo, eine ScanNCut verwenden oder bei einfachen Motiven von Hand schneiden. Die Wahl hängt von der Komplexität des Designs und deinem Wohlbefinden ab.
F7: Kann man mehrere Farben oder Motive auf ein und demselben Kleidungsstück kombinieren?
Ja! Du kannst verschiedene Folien übereinanderlegen, mit den Texturen spielen (Glitzer, matt, Samt) und einzigartige und originelle Designs schaffen. Denk einfach daran, die Temperatur jeder Folie zu beachten, damit sie sich nicht verformen.
F8: Braucht man ein spezielles Bügeleisen, um die Folie aufzubringen?
Ein klassisches Bügeleisen funktioniert sehr gut, vorausgesetzt, du kontrollierst die Temperatur und übst einen gleichmäßigen Druck aus. Für ein professionelles Ergebnis bleibt eine Heißpresse die zuverlässigste Option.