
Du kennst bestimmt diese kleine Frustration: Du stellst deine Trinkflasche im Fitnessstudio, auf deinem Schreibtisch oder sogar im Klassenzimmer ab, und dann merkst du, dass sie genau so aussieht wie die von deinem Nachbarn oder deiner Nachbarin. Nicht besonders originell, oder?
Auch ich kenne diesen Moment: dieses Gefühl, dass alle dasselbe haben wie du, dass dein Stil in der Masse verschwindet. Genau das hat mir Lust gemacht, meine eigene personalisierte Trinkflasche zu gestalten. Denn so ist es anders: Es ist dein ganz persönliches, einzigartiges Stück. Ob du allein oder im Team bist, ob du deinen Stil unterstreichen oder deinen Alltag einfach ein bisschen schöner machen willst, eine personalisierte Trinkflasche verändert das Erlebnis komplett. Und glaub mir, sobald du eine hast, schaust du deine alte Flasche nie wieder mit denselben Augen an.
Ich glaube wirklich daran, dass jeder Alltagsgegenstand einzigartig, elegant und fun werden kann. Und ganz ehrlich, was gibt es Besseres als eine personalisierte Trinkflasche, um deinen Stil zu zeigen, eine kleine umweltbewusste Geste zu machen und dein Wasser überallhin mitzunehmen? Heute zeige ich dir Schritt für Schritt, wie du deine eigene gestaltest, ganz einfach und ohne Stress.
Also schnapp dir dein Material und los geht's mit deiner ersten personalisierten Trinkflasche!
1. Warum eine Trinkflasche personalisieren?
Eine personalisierte Trinkflasche ist nicht einfach nur eine Flasche zum Trinken: Sie ist ein praktisches, einzigartiges Accessoire, das wirklich deine Persönlichkeit widerspiegelt. Sobald du deine eigene hast, willst du nie wieder zurück! Du bist von der Idee noch nicht überzeugt? Dann lass mich dir ein paar gute Gründe für eine personalisierte Trinkflasche nennen.
-
Originalität garantiert: Mit einer personalisierten Trinkflasche sind die immer gleichen Flaschen, die jeder besitzt, endlich Geschichte. Deine wird einzigartig sein, auf den ersten Blick erkennbar und vor allem: Sie erzählt etwas über dich. Ob du allein oder in einer Gruppe bist, du hebst dich ganz leicht ab.
-
Ökologisch und verantwortungsbewusst: Eine personalisierte Trinkflasche zu wählen bedeutet auch, eine kleine Geste für den Planeten zu machen
🌍
. Schluss mit Einwegplastik! Jedes Mal, wenn du deine Flasche auffüllst, weißt du, dass du dazu beiträgst, Abfall zu reduzieren. Das ist einfach, macht aber wirklich einen Unterschied.
-
Ein perfektes Geschenk: Wenn du eine originelle und praktische Geschenkidee suchst, ist die personalisierte Trinkflasche top. Ob zum Geburtstag, zu Weihnachten oder sogar für eine Kollegin, einen Kollegen oder eine Freundin oder einen Freund, es ist ein nützliches, stilvolles Objekt, das immer Freude macht.
-
Motivation im Alltag: Eine personalisierte Trinkflasche mit deinem Namen, einer Illustration, die du magst, oder einem inspirierenden Zitat macht dir Lust, sie überallhin mitzunehmen. Ob für Sport, Arbeit oder Schule, sie wird zu einem kleinen Energieschub in deinem Tag.
Kurz gesagt: Eine personalisierte Trinkflasche ist das perfekte Accessoire: praktisch, ästhetisch und zu 100 % dein Abbild. Sie verbindet Stil, Nutzen und Persönlichkeit, und genau das macht sie unwiderstehlich.
2. Das nötige Material
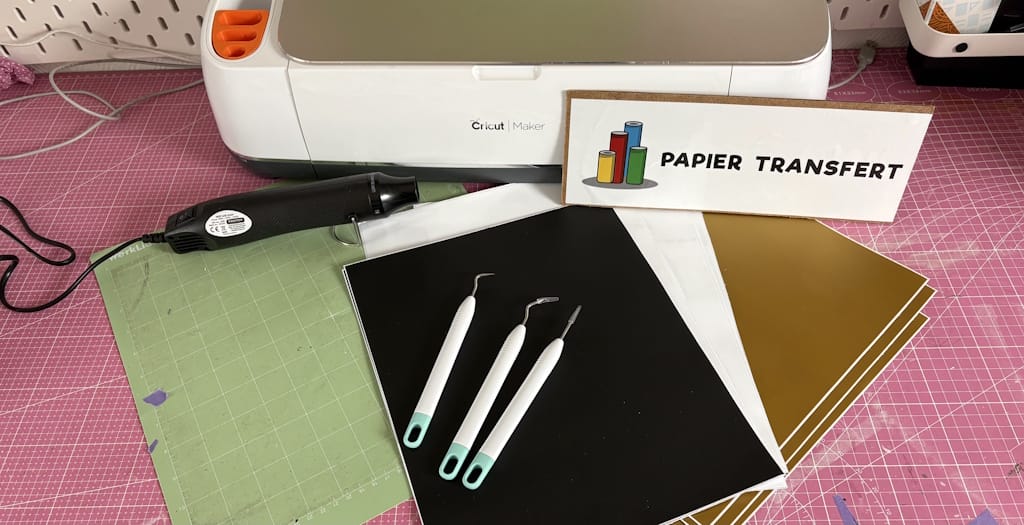
Die gute Nachricht? Du brauchst keine komplette Werkstatt, um deine personalisierte Trinkflasche hinzubekommen. Hier ist, was du brauchst:
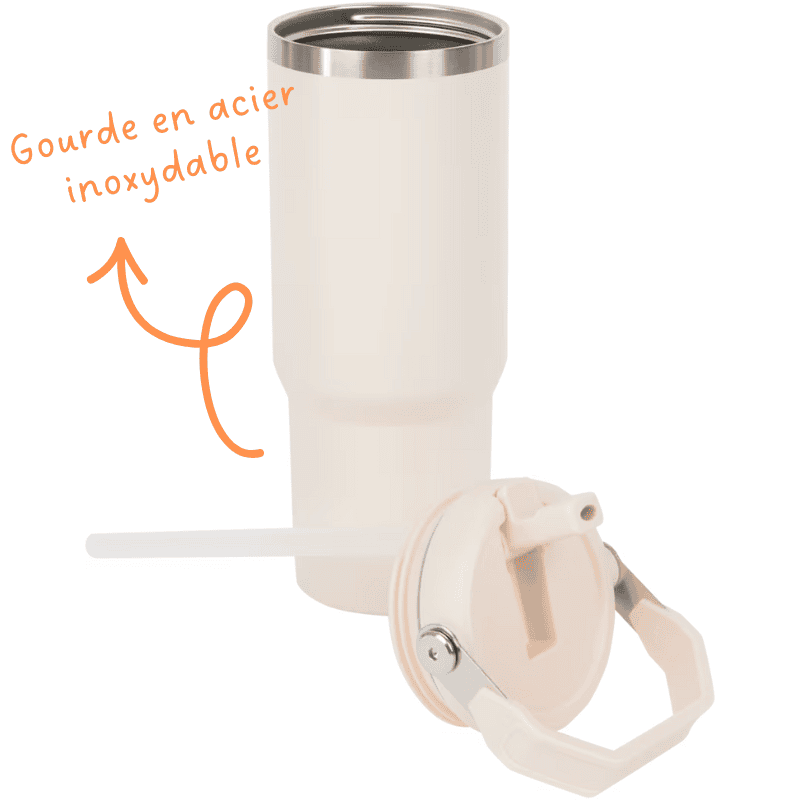
Eine Trinkflasche aus Edelstahl oder wiederverwendbarem Plastik
Das ist die Basis deines Projekts! Für eine personalisierte Trinkflasche, die lange hält, empfehle ich dir Edelstahl: robust, langlebig und in der Lage, deine Getränke stundenlang kühl zu halten. Wenn du wiederverwendbares Plastik bevorzugst, funktioniert das auch, aber achte darauf, ein Modell von guter Qualität zu wählen (und vor allem: Stell sie nicht in die Spülmaschine, sonst kannst du deiner tollen personalisierten Trinkflasche Lebewohl sagen). Eine gut gewählte Flasche sorgt dafür, dass deine Personalisierung perfekt über die Zeit hält! Und glaub mir, eine personalisierte Trinkflasche zu haben, die sich nicht schnell abnutzt, verändert das Erlebnis komplett!
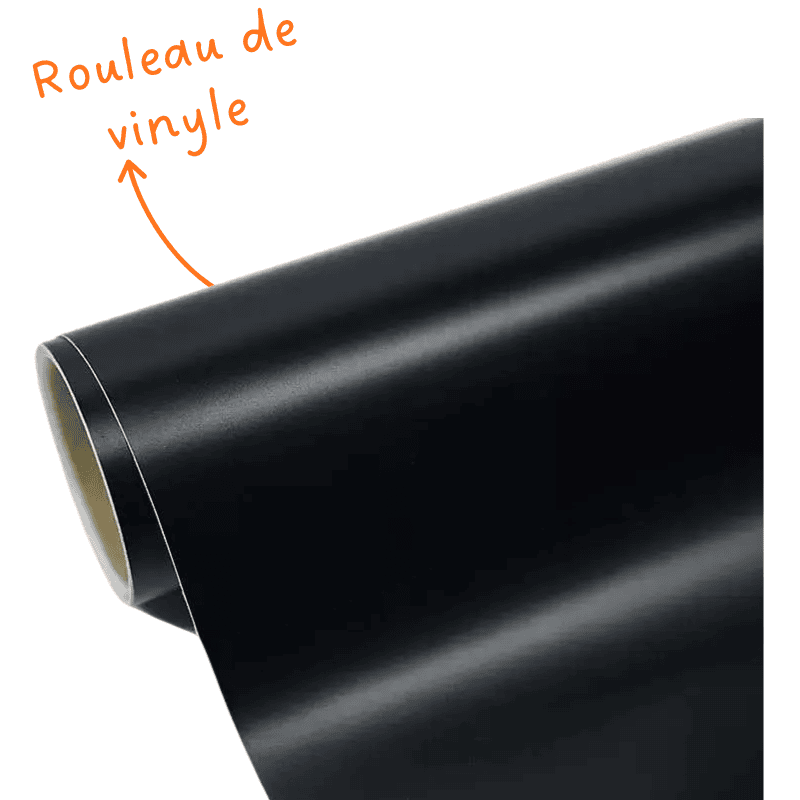
Klebevinyl
Klebevinyl ist perfekt, um deine personalisierte Trinkflasche zu gestalten! Es lässt sich leicht schneiden, wird ohne Hitze aufgebracht und liefert sofort ein sauberes Ergebnis. Du kannst deinen Namen in mattem Chromvinyl schreiben, ein motivierendes Zitat in Glittervinyl aufkleben oder kleine geometrische Motive in glänzendem Vinyl hinzufügen, um deiner personalisierten Trinkflasche eine fun Note zu geben. Klebevinyl macht die Personalisierung einfach und schnell und sorgt gleichzeitig für ein Ergebnis, das wirklich Freude beim Anschauen macht. Also lass deiner Fantasie freien Lauf!
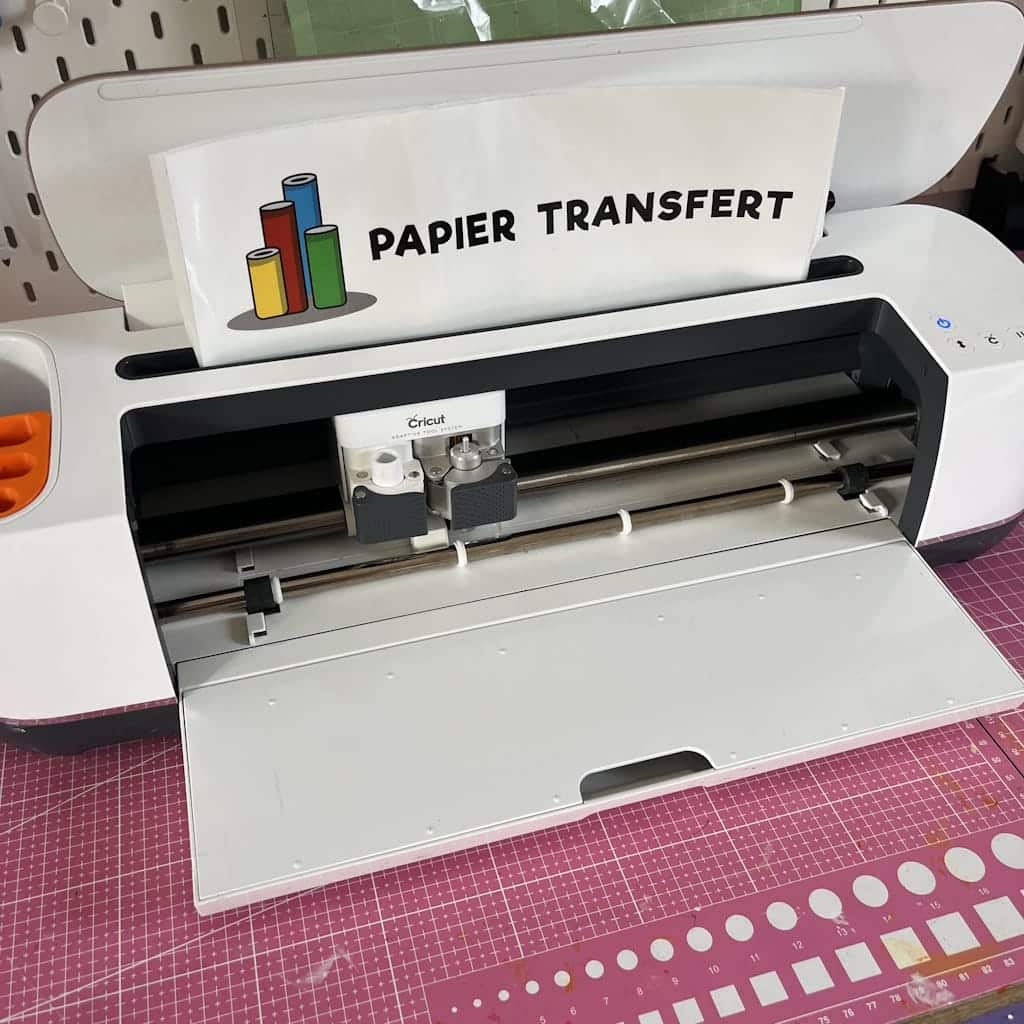
Transferpapier, um dein Design ganz einfach aufzubringen
Das Transferpapier (Tape) wird dein bester Verbündeter, um dein Motiv aufzubringen, ohne es zu verziehen. Du platzierst dein geschnittenes Vinyl darauf, überträgst das Ganze auf deine personalisierte Trinkflasche, und schwupps: ein sauberes Aufbringen (um Luftblasen zu vermeiden, denk daran, einen Rakel zu benutzen!)
![]()
Eine Cricut oder Silhouette Caméo 5
Wenn du präzise Schnitte willst, wie feine Buchstaben, komplexe Zeichnungen oder detaillierte Formen, dann ist eine Cricut oder eine Silhouette Caméo 5 ideal. Natürlich kannst du dein Vinyl auch von Hand schneiden, aber für ein wirklich professionelles Ergebnis auf deiner personalisierten Trinkflasche macht eine Schneidemaschine den entscheidenden Unterschied.
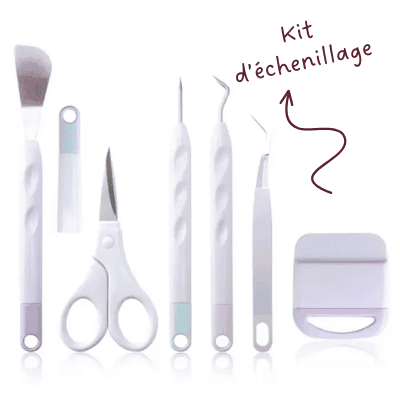
Ein Entgitter-Set
Das ist das magische Werkzeug, das dir das Leben erleichtert, wenn du mit Vinyl arbeitest. Damit kannst du alle kleinen überflüssigen Teile deines Motivs entfernen (die Reste im Inneren der Buchstaben, die überflüssigen Details, die feinen Konturen usw.). Ohne dieses Set kann das Entgittern schnell zur echten Qual werden! Mit seinen präzisen Spitzen und seinem passenden Zubehör hilft es dir, Zeit zu sparen, präziser zu sein und ein sauberes, klares Ergebnis zu erzielen.
Also ein Tipp: Verzichte nicht auf dieses Entgitter-Set!
3. Schritte zur Personalisierung, Schritt für Schritt zu deiner personalisierten Trinkflasche
Ich erinnere mich an die erste personalisierte Trinkflasche, die ich gemacht habe: Ich war aufgeregt und ein bisschen gestresst. Seitdem habe ich meine Methode verfeinert. Hier ist also mein Schritt-für-Schritt-Rezept, damit deine personalisierte Trinkflasche gleich beim ersten Versuch gelingt, mit einem sauberen und professionellen Ergebnis.
1) Die Oberfläche vorbereiten
-
Reinigung: Reinige deine Flasche zuerst mit ein wenig Spülmittel, spüle sie dann ab und trockne sie sorgfältig. Eine saubere Flasche garantiert eine maximale Haftung für deine personalisierte Trinkflasche.
-
Etiketten und Kleberückstände entfernen: Verwende bei Bedarf einen passenden Löser, damit die Oberfläche vor dem Aufbringen des Vinyls perfekt glatt ist.
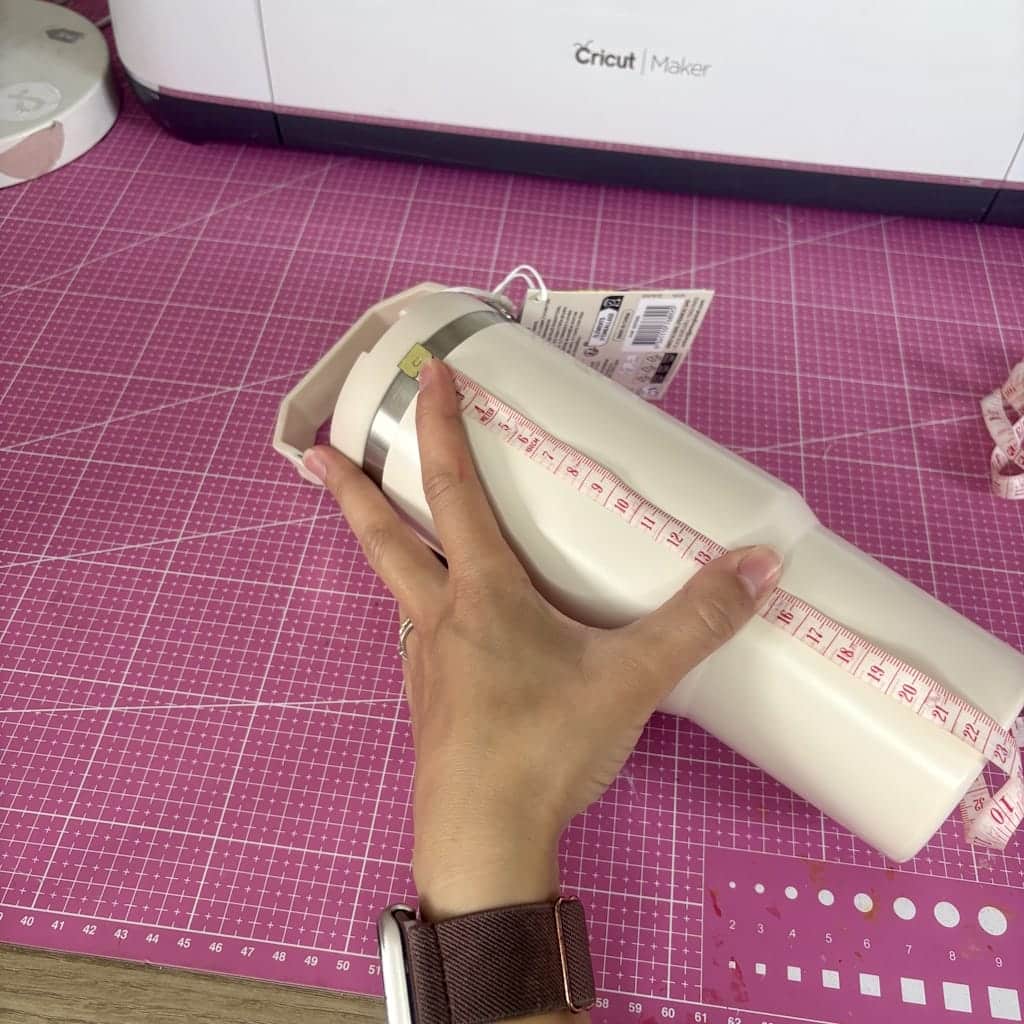
- Die Flasche ausmessen: Nimm zuerst den nutzbaren Umfang (ohne Griffe oder Wölbungen) und die Höhe des Bereichs, den du dekorieren möchtest. Notiere dir diese Maße gut, bevor du dein Design erstellst, das erleichtert dir die Arbeit und vermeidet böse Überraschungen.
-
Tipp: Verwende ein Maßband für Schneiderinnen, das erleichtert dir das Abmessen bei dieser Art von Objekt, das du personalisieren willst.
2) Dein Design erstellen und vorbereiten
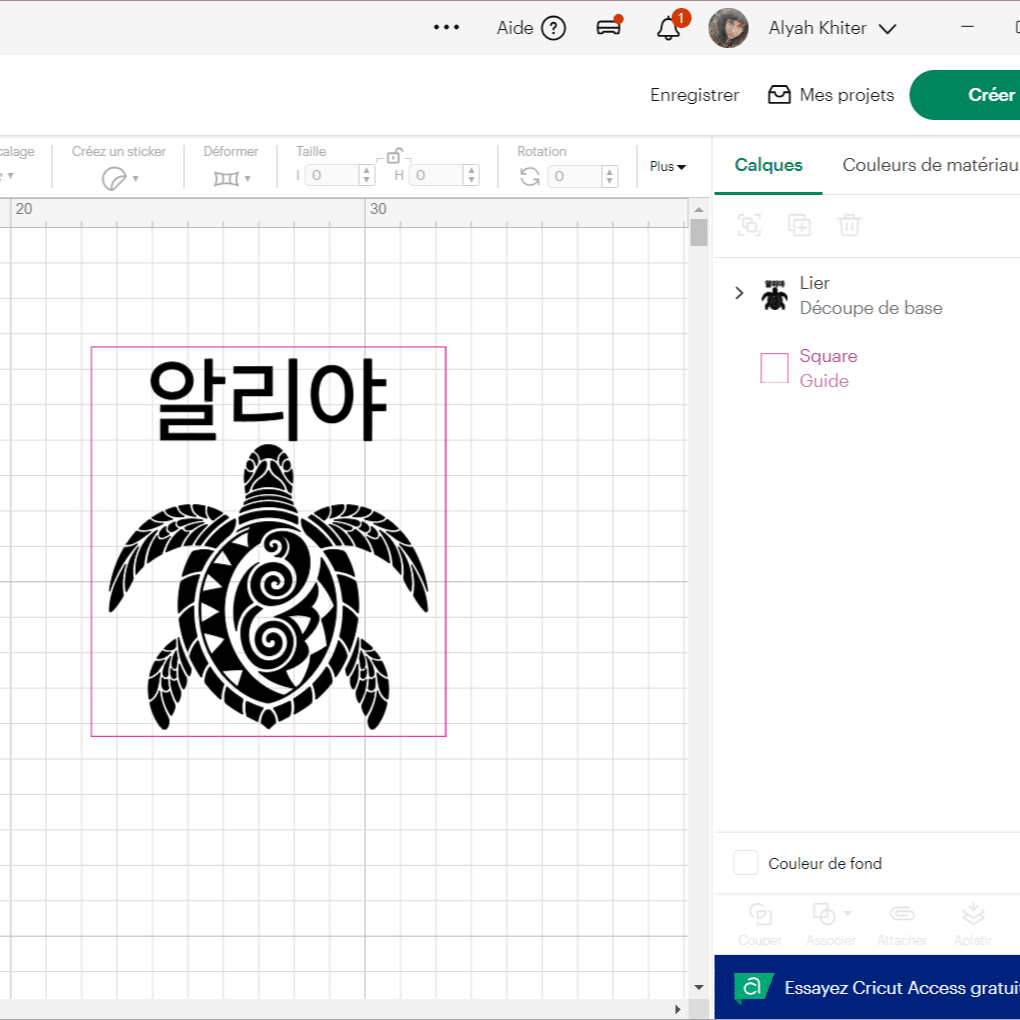
Die Größe anpassen: Lass an den Seiten immer 5 bis 10 mm Rand, damit dein Motiv die Kanten nicht berührt, vor allem wenn deine personalisierte Trinkflasche leicht gebogen ist.
- Typo & Details: Bevorzuge gut lesbare Schriften und vermeide zu feine Linien (weniger als 1,5 bis 2 mm), damit der Schnitt sauber bleibt und dein Design perfekt zur Geltung kommt.
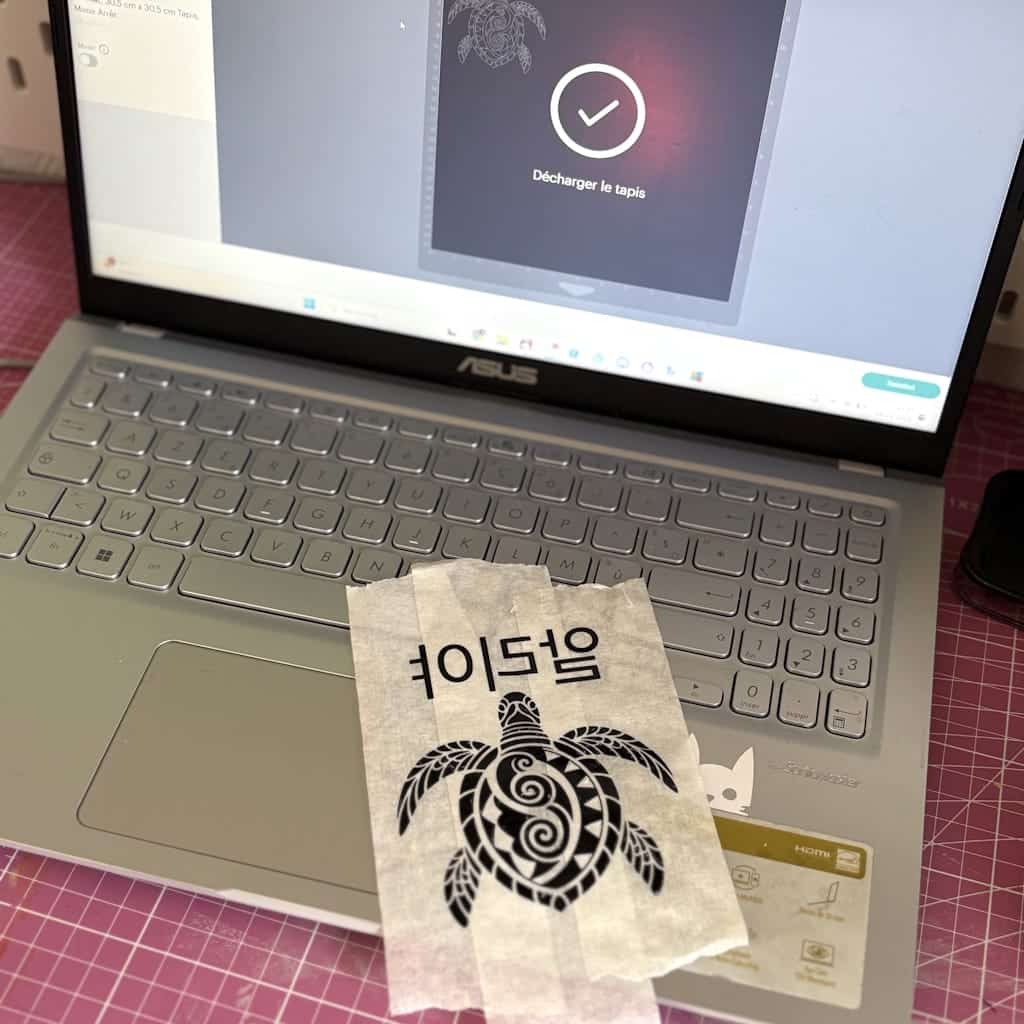
Ich für meinen Teil habe eine wunderschöne Schildkröte sowie meinen Vornamen auf Koreanisch geschrieben gewählt! Jetzt steht es dir frei, das zu wählen, was du am liebsten auf deine Flasche bringen möchtest.
3) Schneiden und entgittern
-
Schneiden: Verwende die für dein Vinyl empfohlenen Einstellungen (Kraft, Geschwindigkeit, verfügbar auf jeder Produktseite unserer Vinyle), um saubere und präzise Formen zu erhalten. Wenn du dich fürs Schneiden von Hand entscheidest, nimm dir Zeit und benutze eine Präzisionsschere, damit das Ergebnis deiner personalisierten Trinkflasche perfekt wird.
-
Entgittern: Entferne die überflüssigen Teile des Vinyls vorsichtig mit einer Entgitterpinzette und einem Abfallsammler (damit du das Zeug nicht überall hast!). Dieser Schritt sorgt dafür, dass dein Design sauber und präzise bleibt und bereit ist, auf deine personalisierte Trinkflasche aufgebracht zu werden.
Tipp: Wenn du wie ich sehr kleine Schnitte hast, zögere nicht, auf dem Transfer-Tape zu entgittern. Das erleichtert dir das Leben!
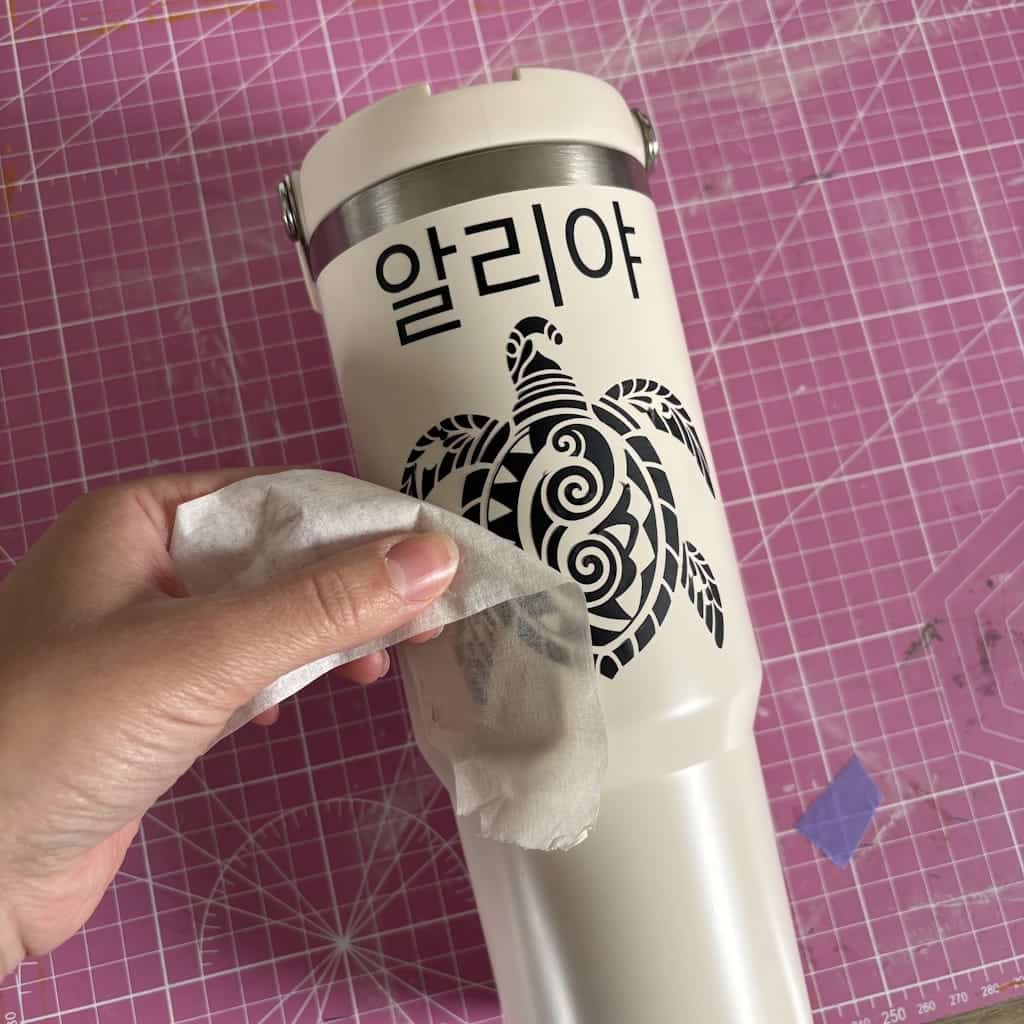
4) Das Vinyl mit Transferpapier aufbringen
-
Auf der Flasche positionieren: Stelle deine Flasche auf eine stabile Unterlage und richte das Motiv aus, bevor du es aufklebst. Beginne in der Mitte und rolle zu den Rändern hin ab, für ein präzises Ergebnis.
-
Tipp für Rundungen: Wenn deine personalisierte Trinkflasche sehr stark gebogen ist, mache kleine senkrechte Einschnitte in das Tape (ohne das Motiv zu berühren), um ihm zu helfen, sich an die Oberfläche anzuschmiegen, oder bringe das Motiv in mehreren Streifen auf.
-
Rakeln: Fahre mit dem Rakel über die gesamte Oberfläche und drücke besonders an den Rändern, damit das Vinyl perfekt haftet und dein Design einwandfrei bleibt.
5) Endgültige Fixierung und Anpassen
-
Sanfte Hitze (optional): Ein kleiner Hauch Föhn oder Heißluftpistole (oft fürs Scrapbooking verwendet) aus mäßigem Abstand kann dem Vinyl helfen, sich gut an die Rundungen deiner personalisierten Trinkflasche anzupassen. Pass auf, dass du die Flasche nicht überhitzt, um jegliche Verformung oder Beschädigung der Beschichtung zu vermeiden.
-
Abziehen der Transferfolie: Ziehe die Folie langsam und flach in einem niedrigen Winkel ab und halte bei Bedarf den Rakel auf dem Motiv. So bleibt dein Design perfekt an seinem Platz und ohne Blasen.
4. Kreative Ideen für deine personalisierte Trinkflasche
Du hast dein Material, du kennst die Schritte, aber vielleicht fragst du dich noch, welches Design du für deine personalisierte Trinkflasche wählen sollst? Keine Panik, hier sind ein paar Ideen, um deine Inspiration anzukurbeln
👇
-
Dein Vorname oder deine Initialen
Einfach, aber immer wirkungsvoll. Indem du deinen Vornamen in farbigem oder goldenem Vinyl hinzufügst, machst du deine personalisierte Trinkflasche sofort erkennbar. Du kannst auch mit den Schriftarten spielen: handschriftlich, modern oder sogar im Graffiti-Stil, um deinen persönlichen Stil widerzuspiegeln. -
Blumige oder tropische Motive
Wenn du eine personalisierte Trinkflasche willst, die Sommer und gute Laune ausstrahlt, dann entscheide dich für Blumen, Monstera-Blätter oder Ananas. Perfekt, um deinem Alltag eine Boho- oder Sommernote zu verleihen. -
Ein motivierendes Zitat
Ein Satz wie "Stay Hydrated", "Toujours de bonne humeur!" oder "Never Give Up" gibt deiner personalisierten Trinkflasche Pep und motiviert dich, den ganzen Tag über mehr Wasser zu trinken. -
Ein Design für Kinder
Die Kleinen lieben es, ihre eigene Flasche in der Schule zu haben. Eine personalisierte Trinkflasche mit ihrem Vornamen, einem Superhelden, einem Einhorn oder Dinosauriern ist die perfekte Kombination, um ihnen Lust zu machen, sich regelmäßig zu hydrieren. -
Ein minimalistischer Stil
Du bevorzugst Zurückhaltung? Ein kleines Logo, eine stilisierte Initiale oder ein geometrisches Motiv in Schwarz oder Weiß genügt für eine schicke und elegante personalisierte Trinkflasche. -
Eine saisonale oder festliche Note
Weihnachten naht? Gestalte eine personalisierte Trinkflasche mit Schneeflocken oder einem kleinen Rentier. Für den Sommer entscheide dich für einen Sonnenuntergang oder Wellen. Die Idee ist, eine Flasche zu haben, die deine Stimmung widerspiegelt oder sich dem Anlass anpasst. -
Designs für ein Team oder eine Gruppe
Stell dir eine Reihe identischer personalisierter Trinkflaschen vor, aber jede mit einem anderen Vornamen: perfekt für ein Sportteam, eine Familie oder sogar als Firmen-Goodies.
👉
Kurz gesagt: Ob du eher fun, schick, minimalistisch oder bunt bist, deine personalisierte Trinkflasche kann sich deinem Stil anpassen und zu deinem Lieblingsaccessoire werden.

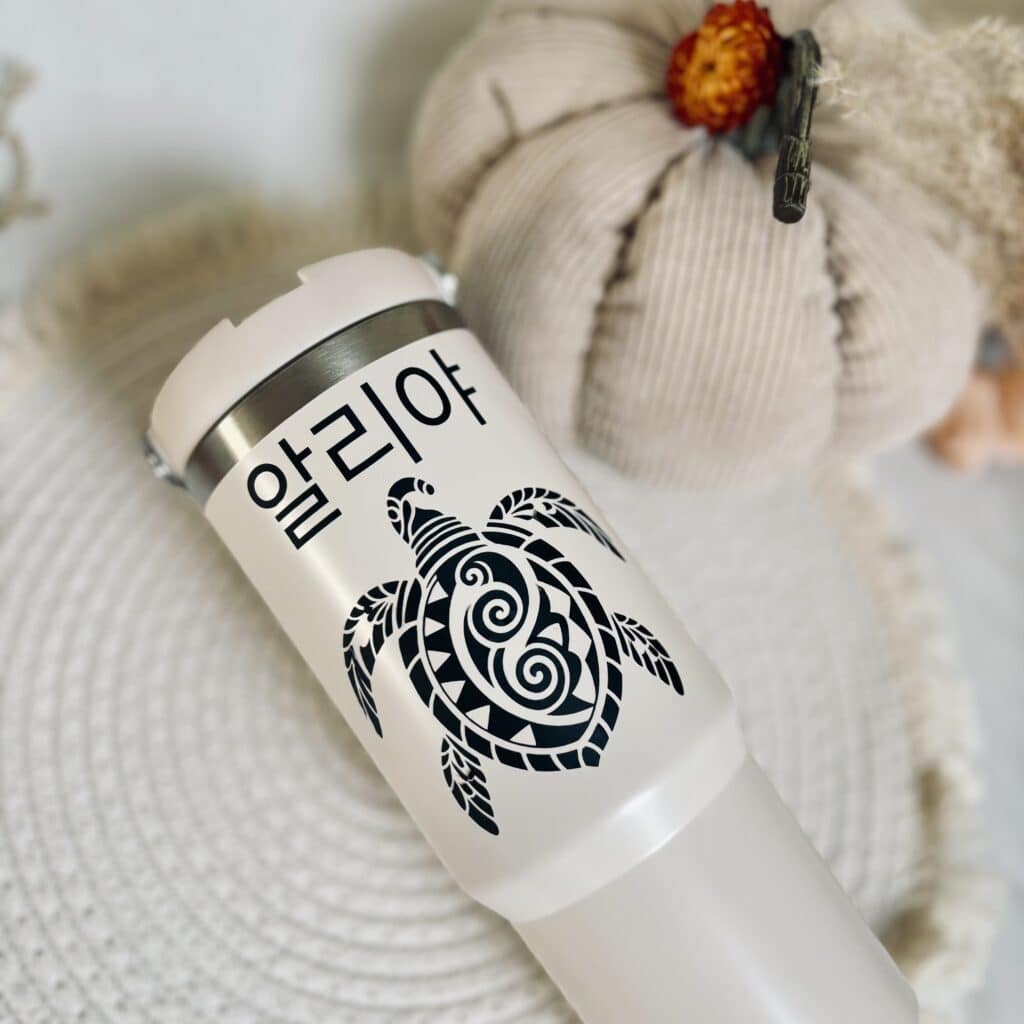
Und voilà 🎉! Jetzt weißt du, wie man eine personalisierte Trinkflasche Schritt für Schritt gestaltet, mit einfachem Material und einer guten Portion Kreativität. Was ich an einer personalisierten Trinkflasche liebe, ist, dass sie gleichzeitig praktisch, trendig und einzigartig ist: Dein Stil kommt zur Geltung, dein Vorname glänzt, und deine persönliche Note macht den ganzen Unterschied.
Also, warum weiterhin eine gewöhnliche Flasche benutzen, wenn du deine eigene, komplett personalisierte haben kannst? Glaub mir, sobald du deine eigene gestaltet hast, kannst du nicht mehr darauf verzichten.
👉 Damit dein Projekt gelingt, bietet Paper Transfer alles, was du brauchst:
-
Klebevinyle für schnelle und leicht aufzubringende Designs,
-
Transferpapiere für saubere Motive ohne Blasen.
Du hast keine Ausrede mehr 😉: Leg los, gestalte deine personalisierte Trinkflasche, hab Spaß und mach dir eine Freude! Und wenn du dieses DIY ausprobierst, komm und teile deine Kreation mit uns: Wir lieben es, eure Projekte zum Leben erwachen zu sehen.
FAQ: Personalisierte Trinkflasche
1. Welche Art von Trinkflasche sollte man für die Personalisierung wählen?
Für eine langlebige personalisierte Trinkflasche ist Edelstahl ideal: robust, widerstandsfähig und in der Lage, deine Getränke kühl zu halten. Wiederverwendbares Plastik funktioniert auch, aber bevorzuge ein Modell von guter Qualität, damit dein Design über die Zeit hält.
2. Kann ich eine Trinkflasche mit Vinyl von Hand personalisieren?
Ja! Du kannst dein Vinyl von Hand mit einer Schere oder einem präzisen Cutter schneiden, aber für ein wirklich sauberes und professionelles Ergebnis ist eine Schneidemaschine wie die Cricut oder die Silhouette Caméo 5 empfehlenswert.
3. Wie vermeidet man Luftblasen beim Aufbringen?
Das Geheimnis ist der Rakel (oder eine alte Bankkarte). Bringe dein Vinyl von der Mitte nach außen auf und drücke gut an, und schon ist es geschafft! Das Transferpapier hilft dir auch, dein Motiv während des Aufbringens an seinem Platz zu halten.
4. Wie lange sollte man warten, bevor man seine personalisierte Trinkflasche wäscht?
Damit der Kleber gut hält, lass deine Flasche mindestens 24 Stunden stehen, bevor du sie zum ersten Mal von Hand wäschst. Zur Sicherheit sind 48 Stunden ideal. Vermeide die Spülmaschine, außer du verwendest eine Trinkflasche aus Edelstahl und das Vinyl von Paper Transfer, das für diese Art des Waschens geeignet ist.
5. Kann ich eine personalisierte Trinkflasche zum Verschenken gestalten?
Absolut! Eine personalisierte Trinkflasche ist ein praktisches, originelles und trendiges Geschenk. Du kannst einen Vornamen, ein motivierendes Zitat oder ein Motiv anbringen, das zur Person passt. Perfekt für einen Geburtstag, Weihnachten oder ein Firmengeschenk.
6. Hält das Vinyl der Zeit und den Waschgängen stand?
Ja, vorausgesetzt, du verwendest ein Vinyl von guter Qualität und hältst die Trockenzeit vor dem Waschen ein. Für maximale Haltbarkeit kannst du einen transparenten Lack auftragen, der für lebensmittelechte Oberflächen geeignet ist (ohne den Trinkrand zu berühren).
7. Welche Designideen sind leicht umzusetzen?
-
Dein Vorname oder deine Initialen
-
Blumige, tropische oder geometrische Motive
-
Ein motivierendes Zitat
-
Illustrationen für Kinder (Superhelden, Einhörner, Dinosaurier)
-
Minimalistische oder saisonale Designs
8. Kann ich mehrere identische Trinkflaschen für ein Team oder eine Familie machen?
Ja! Du kannst mehrere identische personalisierte Trinkflaschen gestalten, indem du einfach die Vornamen oder Details änderst. Das ist perfekt für ein Sportteam, eine Familie oder als Firmen-Goodies.
9. Wo findet man das Material, um seine Trinkflasche zu personalisieren?
Bei Paper Transfer findest du alles Nötige:
-
Klebevinyle für einfache oder detaillierte Motive
-
Transferpapiere (Tape) für ein sauberes Aufbringen
-
Eine Silhouette Caméo 5, die dir präzise Schnitte bietet
-
Ein Entgitter-Set, um dir das Leben zu erleichtern
10. Und wenn ich mich vertue oder meine erste Flasche misslingt?
Keine Panik! Beim DIY geht es vor allem darum, Spaß zu haben und zu lernen. Wenn sich ein Motiv ablöst oder ein Schnitt misslingt, kannst du von vorne anfangen. Mit ein bisschen Übung werden deine personalisierten Trinkflaschen jedes Mal perfekt.


