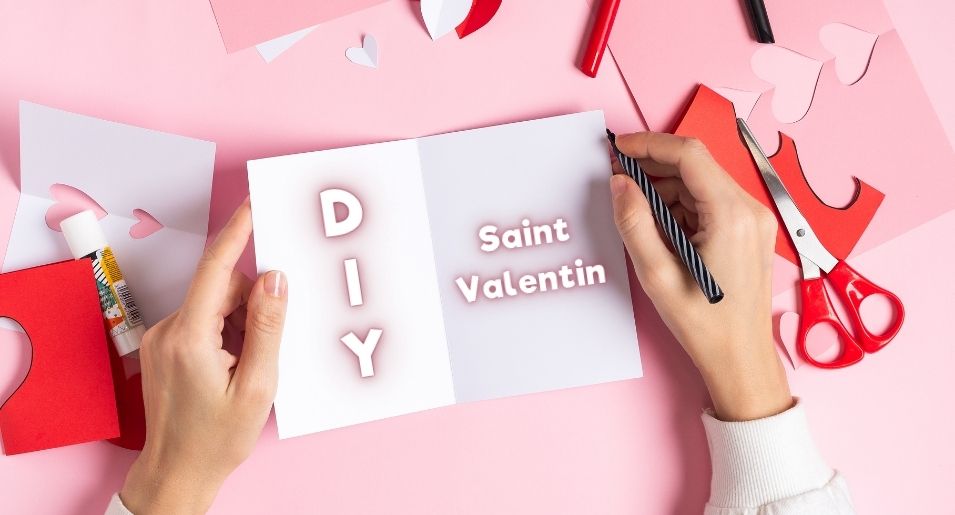
Auf der Suche nach Ideen, um deiner besseren Hälfte zum Tag der Verliebten ein einzigartiges und unvergessliches Geschenk zu machen? Hier ist eine Auswahl an DIY-Geschenken zum Valentinstag, die genau für dich gemacht ist!
Mit DIY-Geschenken (Do It Yourself) zeigst du deiner besseren Hälfte, wie viel sie dir bedeutet, und lässt gleichzeitig deine künstlerische Ader sprechen. Anders als gekaufte Geschenke aus dem Laden bringen sie eine persönliche Note und einen starken emotionalen Wert mit 💖
Wusstest du, dass laut einer aktuellen Studie über 70 % der Menschen selbst gemachte Geschenke als wertvoller einstufen als ein klassisches Produkt?
Wir haben für dich 9 Ideen für spezielle DIY-Kreationen zum Valentinstag ausgewählt, die du zu Hause umsetzen kannst, für ein einzigartiges Ergebnis! Es ist die perfekte Gelegenheit, kreativ zu werden und deinem Partner in Crime deine Liebe zu zeigen 🥰
Jedes Projekt ist für alle zugänglich. Ob du Einsteiger bei Bastelaktivitäten oder ein Profi im Home Made bist, du kannst unsere Ideen ganz nach deinem Kreativlevel anpassen.
Im folgenden Artikel findest du die ausgewählten Inspirationen, damit dir nie die Projekte ausgehen. Entdecke verschiedene Personalisierungstechniken auf den unterschiedlichsten Untergründen. ❤️🔥 Ob auf Papier, Textil oder Dekoobjekten, hier ist für jeden Geschmack etwas dabei.
📜 DAS PAPIER 📜
Wusstest du, dass du Papier selbst aus alten Zeitungen oder recyceltem Papier herstellen kannst? Mit einem Mixer, etwas Wasser und einem Holzrahmen erhältst du einzigartiges, handgemachtes Papier, ideal für personalisierte Karten oder umweltfreundliche künstlerische Kreationen. Eine spielerische Art, zu recyceln und gleichzeitig deine Kreativität freien Lauf zu lassen! 🌱
💡 Tipp:
Für DIY-Projekte, die ein professionelles Ergebnis brauchen, denk an Tonkarton oder strukturiertes Papier. Es verleiht deinen Kreationen Relief und Eleganz.
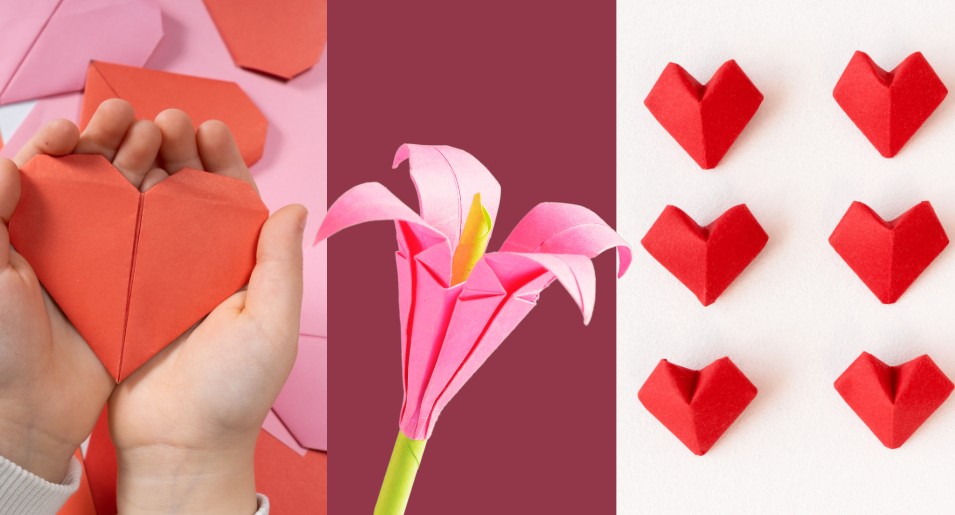
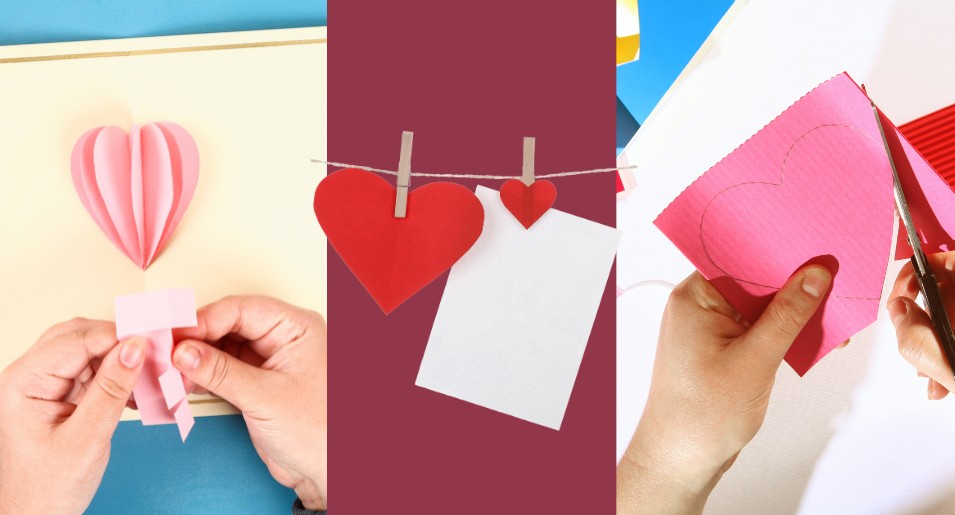
1. Ein Origami, um deine ganze Liebe zu zeigen
Benötigtes Material:
- Das Ausgangsmaterial: ein quadratisches Blatt Papier. Nimm im Idealfall Origamipapier in 15×15 cm oder schneide ein klassisches Blatt zu einem perfekten Quadrat zu.
- Die Werkzeuge: deine Hände reichen aus, aber für saubere und präzise Falten kannst du ein Lineal oder ein Falzbein verwenden (optional).
Ideen und Tipps
Wenn du Anfänger im Origami bist, fang mit einfachen Modellen an, etwa einem Herz in 3 Falten oder einem Origami-Umschlag, in den du eine liebe Nachricht stecken kannst.
Für einen Wow-Effekt wähle bedrucktes Papier mit romantischen Mustern oder verwende metallisiertes Papier für elegante Kreationen. 🌹
Verwandle deine Faltarbeiten in Dekorationen oder kleine Geschenke: häng sie an eine Schnur, um eine Girlande zu gestalten, leg sie in eine Valentinskarte oder benutze sie, um eine Geschenkbox zu verzieren. Wir L-I-E-B-E-N es!
2. Das ausgeschnittene Papier für ein bescheidenes DIY zum Valentinstag
Benötigtes Material
- Der Untergrund: Ein einfarbiges oder farbiges Blatt Papier. Tonkarton ist ideal für stabile Kreationen, aber du kannst auch recyceltes Papier oder Krepppapier für einen leichten Effekt verwenden.
- Ein Werkzeug zum Schneiden: eine Schere, ein Cutter oder eine Schneidemaschine,
- Ein Werkzeug zum Zusammenfügen: Kleber, Klebeband, ein Hefter …
- Ein Werkzeug zum Verzieren: Filzstifte, Glitzerstifte, Farbe …
Ideen und Tipps
Gestalte eine schöne Karte für ein super DIY zum Valentinstag, indem du Herzen in verschiedenen Größen ausschneidest und übereinanderlegst, für einen 3D-Effekt. Füge in der Mitte eine kleine liebe Nachricht hinzu, damit sie noch spezieller wird. Bastle eine romantische Girlande, indem du Formen (Herzen, Sterne, Blumen) ausschneidest und an einer Schnur oder einem Band befestigst. 💘
Für ein blitzschnelles DIY verwende Motivstanzer: damit kannst du schnell und einfach Muster erstellen, ganz ohne Mühe.
Recycling-Tipp: Verwandle deine alten Magazine oder Geschenkpapiere in Kunstwerke, schneide Bilder, Muster oder Farben aus, die dich inspirieren, um diesen Materialien ein neues Leben zu geben.
Wenn du Kinder bei dieser Aktivität einbeziehen möchtest, wähle eine Schere mit abgerundeter Spitze und lass sie ihre eigenen Dekorationen gestalten!
🔥DIE THERMOAKTIVE BEFLOCKUNG 🔥
Die Beflockung ist eine Technik zur Textilpersonalisierung, bei der ein thermoaktives Material (mit Wärme klebbar), etwa Flexfolie, mithilfe einer Heißpresse oder eines Bügeleisens auf ein Kleidungsstück oder einen Stoff aufgebracht wird. Mit dieser Methode erhältst du präzise und langlebige Motive, ob es sich um Logos, Texte oder komplexe Designs handelt. Sie ist einfach umzusetzen und perfekt für DIY- und professionelle Projekte. Die Flexfolie lässt sich mit einer Schere oder einer Schneidemaschine zuschneiden.
💡 Tipp:
Für ein makelloses Ergebnis stell sicher, dass deine Arbeitsfläche eben und sauber ist, und verwende eine Heißpresse oder ein Bügeleisen mit der richtigen Temperatur. Und für einen einzigartigen Effekt probier spezielle Flexfolien wie die glitzernde Flexfolie oder die holografische Flexfolie aus!
3. Ein beflocktes T-Shirt für deine bessere Hälfte.

Benötigtes Material:
- Der Untergrund: Ein schönes T-Shirt aus Baumwolle in der richtigen Größe,
- Das Ausgangsmaterial: die thermoaktive Flexfolie,
- Ein Werkzeug zum Schneiden: eine Schere, ein Cutter oder eine Schneidemaschine,
- Ein Werkzeug zum Heißpressen: ein Bügeleisen oder eine Heißpresse.
Ideen und Tipps
Hab keine Angst, dich an die Personalisierung von Textilien zu wagen, du hast sicher schon einen Großteil des Materials für dieses originelle DIY zu Hause. Wähle ein romantisches Design wie ineinander verschlungene Herzen, Amors Pfeile oder romantische Zitate, die perfekt für dieses DIY sind. Du kannst auch persönliche Elemente einbauen, etwa ein besonderes Datum oder einen liebevollen Kosenamen. 🩷
Für ein unglaubliches Ergebnis entscheide dich für die Samt-Flexfolie oder die glitzernde Flexfolie. Du kannst dein eigenes Design gestalten, für einen garantierten Wow-Effekt!
Tipp für Anfänger: Wenn du keine Schneidemaschine hast, lade dir online eine einfache Vorlage herunter, druck sie auf klassischem Papier aus und schneide sie aus, um eine Schablone zu erstellen.
Füge eine persönliche Note hinzu, indem du das T-Shirt mit einer schönen Geschenkbox oder einer personalisierten Karte zu einem kompletten Set kombinierst.
Ein beflocktes T-Shirt für deine bessere Hälfte zu gestalten, das ist die Garantie für ein einzigartiges Geschenk, mit Liebe gemacht, das die Zeit überdauert.👕
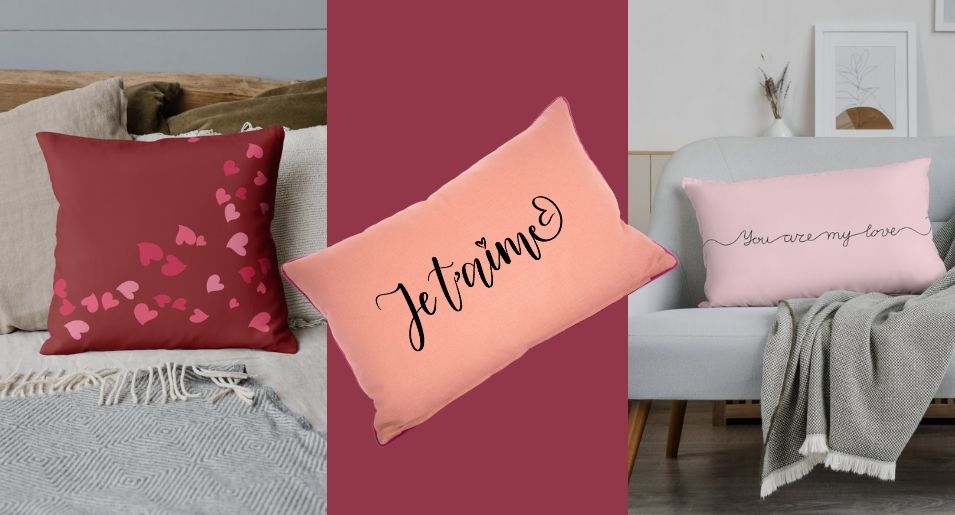
4. Ein Kissen für eine Deko "love to love".
Benötigtes Material
- Der Untergrund: Ein einfarbiger Kissenbezug aus Baumwolle oder Leinen, vorzugsweise in neutralen Tönen, damit die Beflockung zur Geltung kommt
- Das Ausgangsmaterial: die thermoaktive Flexfolie,
- Ein Werkzeug zum Schneiden: eine Schere, ein Cutter oder eine Schneidemaschine,
- Ein Werkzeug zum Heißpressen: ein Bügeleisen oder eine Heißpresse
Ideen und Tipps
Was gibt es Gemütlicheres als ein rund um die Liebe personalisiertes Zuhause? Gestalte ein zentrales Design, etwa ein großes Herz mit einer romantischen Botschaft im Inneren oder eine Kombination kleiner sich wiederholender Motive für einen schicken Effekt. Du kannst sogar einen alten Kissenbezug in gutem Zustand wiederverwenden, um ihm ein zweites Leben zu geben. 🛋️
Um noch weiter zu gehen, kannst du auch eine Decke, eine Kerze oder einen Teppich personalisieren, für eine echte Harmonie oder zur Abwechslung. Wenn deine bessere Hälfte gern Wert auf ihre Dekoration legt, kannst du dir sicher sein, dass dieses Geschenk den schönsten Effekt haben wird.
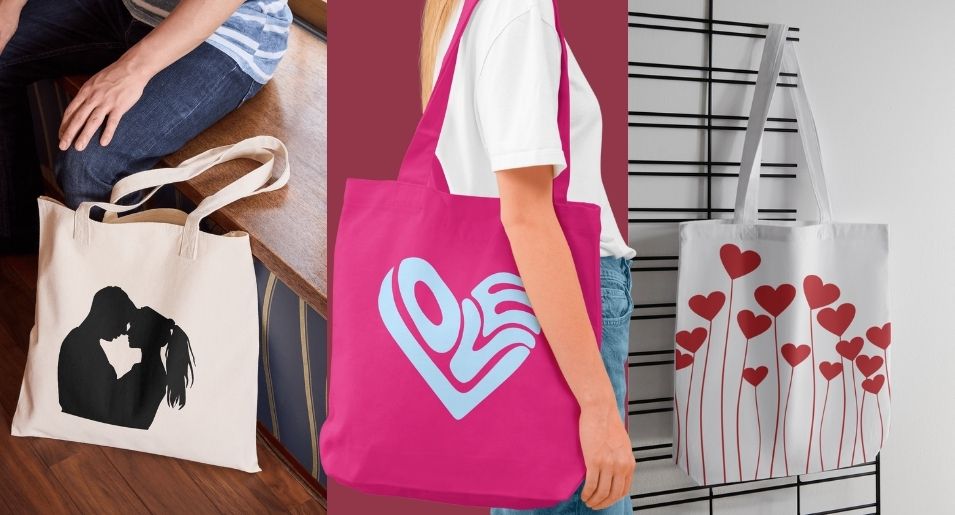
5. Ein origineller Tote Bag, um ihn überallhin mitzunehmen.
Benötigtes Material
- Der Untergrund: Ein Tote Bag aus einfarbiger Baumwolle, vorzugsweise weiß oder beige, damit die Beflockung zur Geltung kommt. Du kannst dich auch für ein farbiges Modell entscheiden, wenn du mit Kontrasten spielen möchtest.
- Das Ausgangsmaterial: die thermoaktive Flexfolie,
- Ein Werkzeug zum Schneiden: eine Schere, ein Cutter oder eine Schneidemaschine,
- Ein Werkzeug zum Heißpressen: ein Bügeleisen oder eine Heißpresse.
Ideen und Tipps
Du kannst eine Silhouette eures Paares finden oder sie selbst zeichnen, für eine tolle Erinnerung**.**
Wenn du ein Bügeleisen zum Beflocken verwendest, empfehlen wir dir, dir die Zeit zu nehmen, einen gleichmäßigen Druck auszuüben. Am besten entscheidest du dich für eine Presse mit einer gleichmäßigen Heizfläche ohne Löcher, für ein perfektes Ergebnis. 🌞
Der Tote Bag ist ein Must-have, er lässt sich zum Einkaufen, zum Transportieren von Sportsachen oder als Alltagstasche nutzen. Praktisch und stylish!
Einen Tote Bag zu beflocken, das ist das perfekte Geschenk: praktisch, personalisierbar und immer nützlich! 💕
🧵 DER FADEN 🧵
Der Faden, ob aus Baumwolle, Wolle, Jute oder Nylon, ist ein unverzichtbares Ausgangsmaterial in der Welt des DIY. Geschmeidig, widerstandsfähig und vielseitig, passt er sich vielen kreativen Projekten an: Nähen, Weben, Stricken, Sticken, Verpacken oder sogar künstlerischen Kreationen wie Wanddekorationen. Es ist ein ebenso technisches wie künstlerisches Werkzeug, das deine Ideen veredelt.
💡 Tipp:
Der Trick mit dem Faden ist, seine zahlreichen Texturen und Stärken zu erkunden. Verwende einen dünnen Faden für feine Projekte wie Stickereien oder dekorative Details, und greif zu einem dicken Faden für voluminöse Kreationen wie Hängedekorationen oder Traumfänger. Verschiedene Fadenarten in ein und demselben Projekt zu mischen, kann ebenfalls interessante visuelle und haptische Effekte erzeugen!
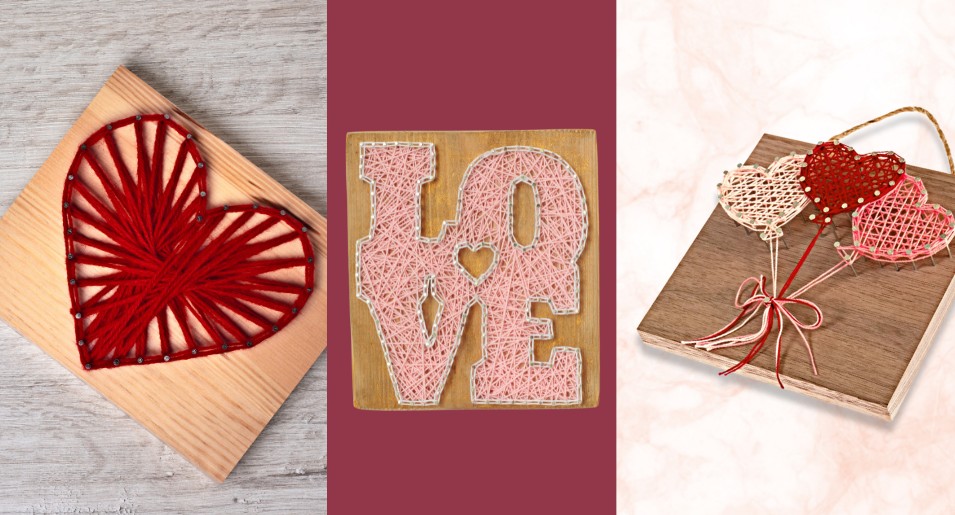
6. Ein String Art für einen garantierten Wow-Effekt
Benötigtes Material:
- Der Untergrund: Ein Holzbrett, ein Korkrahmen oder sogar dicker Karton. Stell sicher, dass er fest genug ist, um Nägel oder Reißzwecken einzuschlagen.
- Das Ausgangsmaterial: Farbiger Faden, etwa Baumwollfaden, Wolle oder feiner Metallfaden für einen glänzenden Effekt.
- Ein Werkzeug zum Befestigen: Kleine Nägel oder Reißzwecken. Reißzwecken sind perfekt für Anfänger, während Nägel ein professionelleres Ergebnis liefern. Und ein Hammer
- Eine Vorlage (optional): Ein Blatt mit dem Design, das du gestalten möchtest (Herz, das Wort „love", Pfeil usw.), um dir bei der Platzierung zu helfen
Ideen und Tipps
Fang einfach an: Für einen ersten Versuch gestalte ein Herz im String Art. Befestige deine Nägel oder Reißzwecken entlang der Umrisse einer Papierschablone und entferne das Papier dann, bevor du den Faden spannst. Verwende mehrere Fäden in verschiedenen Farbtönen für einen Verlaufs- oder Regenbogeneffekt 🌈. Das verleiht deinen Kreationen Tiefe und Glanz.
Schreib ein Wort wie „Amour" oder „Forever" in die Mitte deiner Kreation. Gestalte dafür Buchstaben im String Art oder füge sie mit Farbe hinzu. 🫶🏻
Tipp für Anfänger: Wenn du Schwierigkeiten hast, die Nägel oder Reißzwecken an Ort und Stelle zu halten, schlag sie zuerst leicht ein, justiere sie dann und befestige sie erst danach vollständig.
Für einen Wow-Effekt verwende goldenen oder silbernen Metallfaden, der das Licht reflektiert und deinen Kreationen ein schickes Aussehen verleiht, du findest ihn zum Beispiel bei l'atelier du fil.
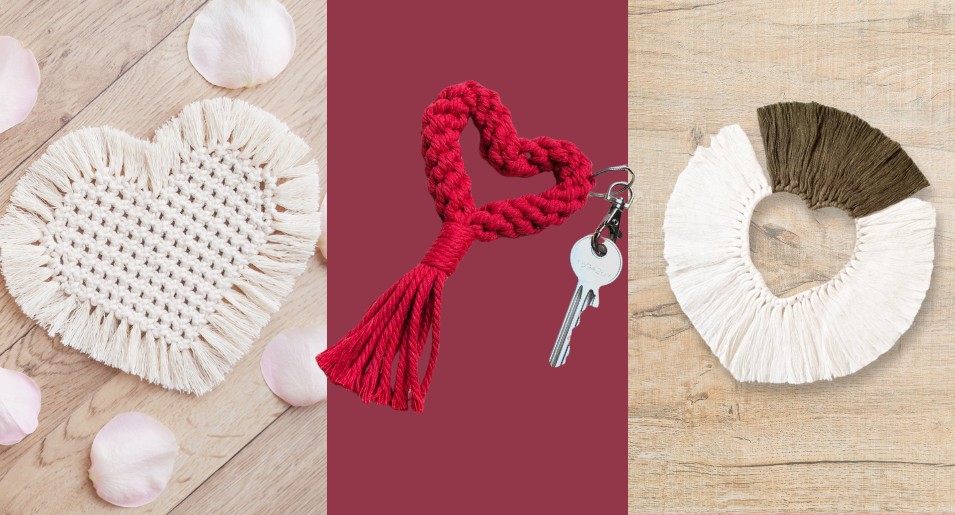
7. Ein Makramee für ein zartes DIY-Geschenk
Benötigtes Material
- Der Untergrund: Ein Holzast, ein Metallring oder ein Holzstab, um das Makramee aufzuhängen.
- Das Ausgangsmaterial: Baumwoll- oder Jutefaden. Bevorzuge eine Schnur mit einer Stärke von 3 bis 5 mm, für ein ästhetisches Ergebnis und gut definierte Knoten
- Ein Werkzeug zum Schneiden: Eine gut geschärfte Schere, um die Fäden auf die gewünschte Länge zu schneiden.
- Ein Werkzeug zum Messen: Ein Maßband oder ein Lineal, um deine Fäden auf die richtige Länge zuzuschneiden.
- Eine Vorlage oder Tutorials (optional): Lass dich von einfachen Modellen inspirieren, etwa einer kleinen Pflanzenaufhängung oder einem herzförmigen Motiv, für ein Valentinsgeschenk.
Ideen und Tipps
Wenn du Anfänger bist, lern zuerst einfache Knoten wie den flachen Knoten oder den gedrehten Knoten. Sie reichen aus, um wunderschöne Hängedekorationen zu gestalten. Füge Holzperlen, Muscheln oder Bänder für eine einzigartige Note hinzu, um deine Kreation zu personalisieren. Du kannst deine Fäden auch mit natürlichen Farbtönen färben, für einen Boho-Effekt.
Gestalte ein Makramee in Herzform oder bau dezente Motive mit Bezug zum Valentinstag ein. Eine Girlande aus kleinen Makramee-Herzen ist zum Beispiel perfekt für eine romantische Dekoration.
Geschenk-Tipp: Verwandle dein Makramee in einen Schlüsselanhänger 🔑 oder ein Lesezeichen 📖, für ein praktisches und personalisiertes Geschenk. Das ist eine ausgezeichnete Alternative für kleine Budgets.
✂️ DIE SELBSTKLEBENDE VINYLFOLIE ✂️
Die selbstklebende Vinylfolie ist ein vielseitiges Material, das dafür gemacht ist, auf glatten Oberflächen wie Glas, Plastik, Metall oder lackiertem Holz zu haften. Sie lässt sich leicht mit Maschinen wie dem Cricut oder dem Silhouette zuschneiden, kann aber für einfachere Kreationen auch mit einer Schere verwendet werden. Ideal für Sticker, Objektdekorationen oder Beschilderungen, ist die selbstklebende Vinylfolie eine schnelle und langlebige Lösung für deine DIY-Projekte.
💡 Tipp:
Für ein makelloses Ergebnis achte darauf, die Oberfläche vor dem Aufbringen der selbstklebenden Vinylfolie gut zu reinigen. Verwende einen Rakel, um Luftblasen zu beseitigen und ein glattes, professionelles Ergebnis zu erzielen. Denk auch an transparente selbstklebende Vinylfolie, um deine Kreationen zu schützen oder einen „Lack"-Effekt hinzuzufügen.
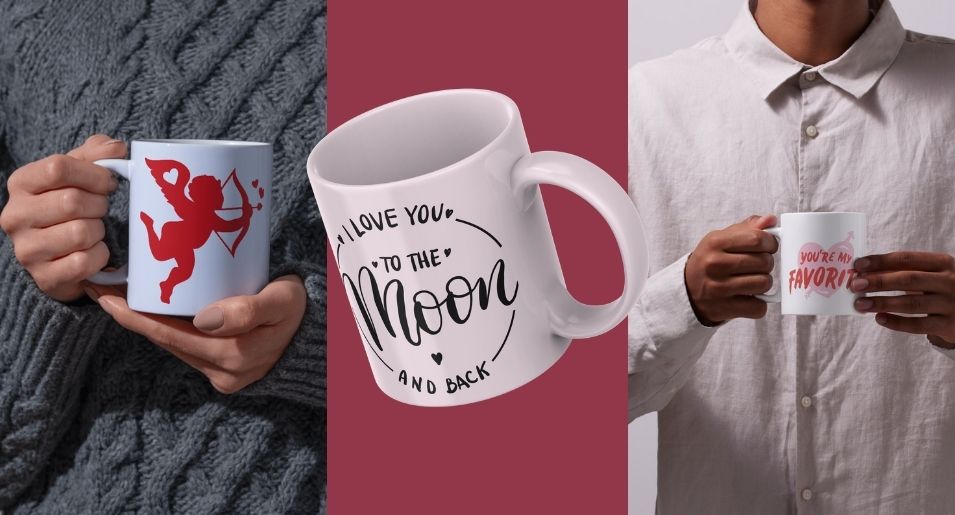
8. Ein einzigartiger Becher, damit er/sie jeden Tag an dich denkt.
Benötigtes Material
- Der Untergrund: Ein einfarbiger Becher aus Keramik (weiß, schwarz oder in einer Pastellfarbe), für eine gute Haftung der selbstklebenden Vinylfolie.
- Das Ausgangsmaterial: die selbstklebende Vinylfolie,
- Die Werkzeuge: eine Schere, ein Cutter oder eine Schneidemaschine.
- Die Folie zum Übertragen: Eine Transferfolie (auch Tape genannt), um dein Design einfach auf dem Becher zu positionieren.
Ideen und Tipps
Zögere nicht, deinem personalisierten Becher zum Thema Valentinstag eine Prise Humor zu verleihen, und entscheide dich für lustige oder verrückte Botschaften, wie „Fuel for Love" oder „Café d'amour en préparation." 🍵
Tipp für einen langlebigen Becher: Lass den Sticker nach dem Aufbringen 24 Stunden ruhen, für eine bessere Haftung, und stell sicher, dass du eine wasserfeste Vinylfolie gewählt hast, damit du ihn problemlos abwaschen kannst.
Die zugänglichste Technik ist, eine Vinylfolie auf den Becher zu kleben. Es ist auch möglich, eine Sublimation mit einer speziellen Tinte zu machen, die sich mit Wärme in der Tasse fixiert.
Um noch weiter zu gehen, fülle den Becher mit Bonbons, Teebeuteln oder kleinen aufgerollten Botschaften, für eine noch speziellere Überraschung.
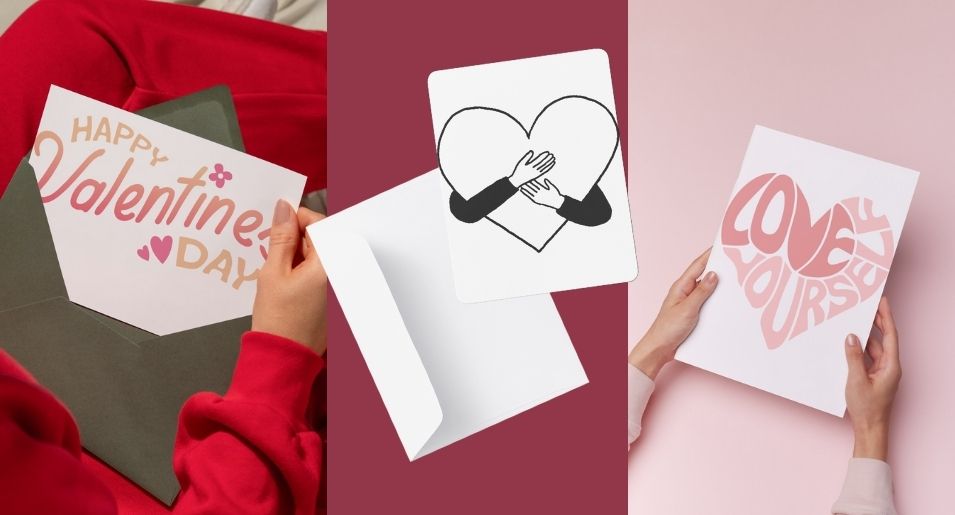
9. Eine personalisierte Karte, um deine Liebe niederzuschreiben.
Benötigtes Material
- Der Untergrund: eine leere Karte, ein Umschlag, ein A4-Blatt, aus dickem Papier (weiß, kraft oder farbig), für ein elegantes Ergebnis
- Das Ausgangsmaterial: die selbstklebende Vinylfolie,
- Die Werkzeuge: eine Schere, ein Cutter oder eine Schneidemaschine.
- Die Folie zum Übertragen: Eine Transferfolie (auch Tape genannt), um dein Design einfach zu positionieren.
Ideen und Tipps
Entscheide dich für einen Untergrund mit hohem Grammgewicht, für ein optimales Ergebnis. Denn je dicker es ist, desto hochwertiger wird deine Kreation. 💌
Du kannst eine einzigartige Vorderseite gestalten und auf der Rückseite der Karte deine Liebe gestehen. Ein kleiner Augenzwinkerer, der ihr/ihm warm ums Herz wird.
Und für ein noch unglaublicheres Ergebnis mische die Texturen, kombiniere die selbstklebende Vinylfolie mit anderen Materialien wie Bändern, Pailletten oder Stempelkissen.
Mit einer personalisierten Karte zum Valentinstag schenkst du weit mehr als nur ein paar Worte: du schenkst eine handgemachte Erinnerung, die das Herz deiner besseren Hälfte berühren wird. 💕

Ein handgemachtes Valentinsgeschenk verleiht ihr einen besonderen Reiz. Zusätzlich zum Stolz, es selbst gemacht zu haben, schenkst du der Person, die du liebst, eine exklusive Aufmerksamkeit und eine unvergessliche Erinnerung. Geschenke, die mit dem Herzen gemacht sind, sind jene, die man nie vergisst und die die Zeit überdauern. 💖
Unser bester Rat? Lass dich inspirieren, aber vor allem, mach dir diese Ideen zu eigen. Mach daraus Kreationen, die zu dir passen. Ob durch die Wahl der Materialien, der Motive, der Objekte oder durch die Art, wie du sie personalisierst, das Wichtigste ist, deine Kreativität sprechen zu lassen, um ein DIY-Geschenk zum Valentinstag zu verschenken, das eine echte Bedeutung hat.
Um deine Projekte zum Leben zu erwecken, denk an unsere thermoaktiven Flexfolien, um deine T-Shirts und Sweatshirts zu personalisieren, und an unsere selbstklebenden Vinylfolien, die perfekt sind, um Becher, Trinkflaschen und viele andere Objekte zu gestalten. Diese Materialien sind deine Verbündeten, um originelle und charmante Geschenke zu kreieren.
Entdecke unsere Auswahl an Beflockungs- und Sticker-Ideen für den Valentinstag auf unserer Pinterest-Pinnwand, die wir speziell für den Tag der Verliebten erstellt haben.
Markiere uns auf deinen tollen Kreationen auf unserem Instagram-Account, wir teilen sie gern erneut. Und wenn du Fragen hast, zögere nicht, uns einen Kommentar zu hinterlassen.